As I’ve had a bit of a hiatus in the workshop, these shoes have been over five months in the making. I drew the pattern on january 31:

When constructing the pattern, I found the basic pattern points (mainly the points commonly referred to as C, V, I, U and A) in three dimensions. Then I drew an adelaide pattern straight on the outside of the last.
I’ve imported some caiman hides with the appropriate CITES certificate, Appendix II. I made this shoe into an adelaide design for practical reasons, having the main part of the shoe made out of caiman leather.

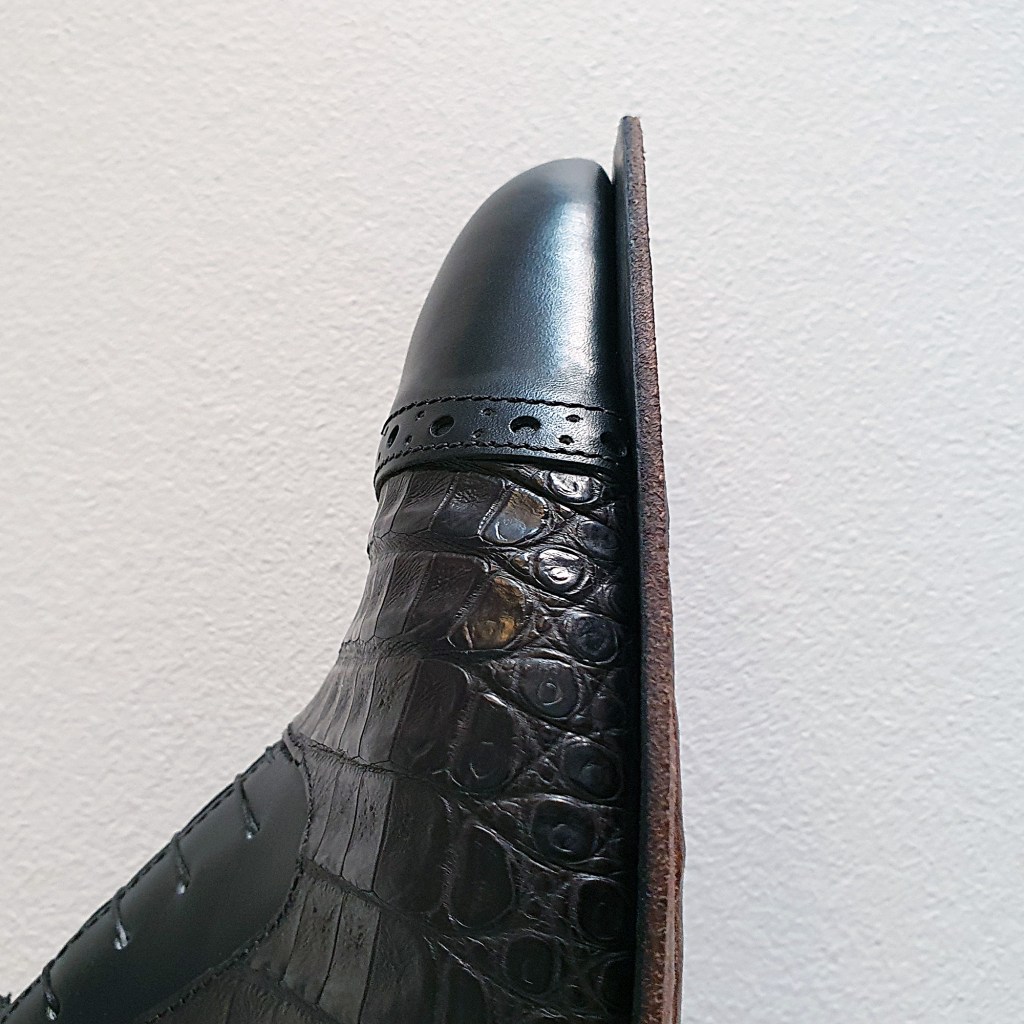
I aligned the pattern trying to center the piece as evenly as possible with the structure of the hide. I used the opening of the shoe and the center line of the pattern at the front to take aim. Since the shoes will have cap toes overlapping the front of the vamp, I opted to keep a full row of scales at the top of the vamp, towards the face. This row of scales will hence remain intact, whereas the scales at the front will be cut off by the toe cap anyway.
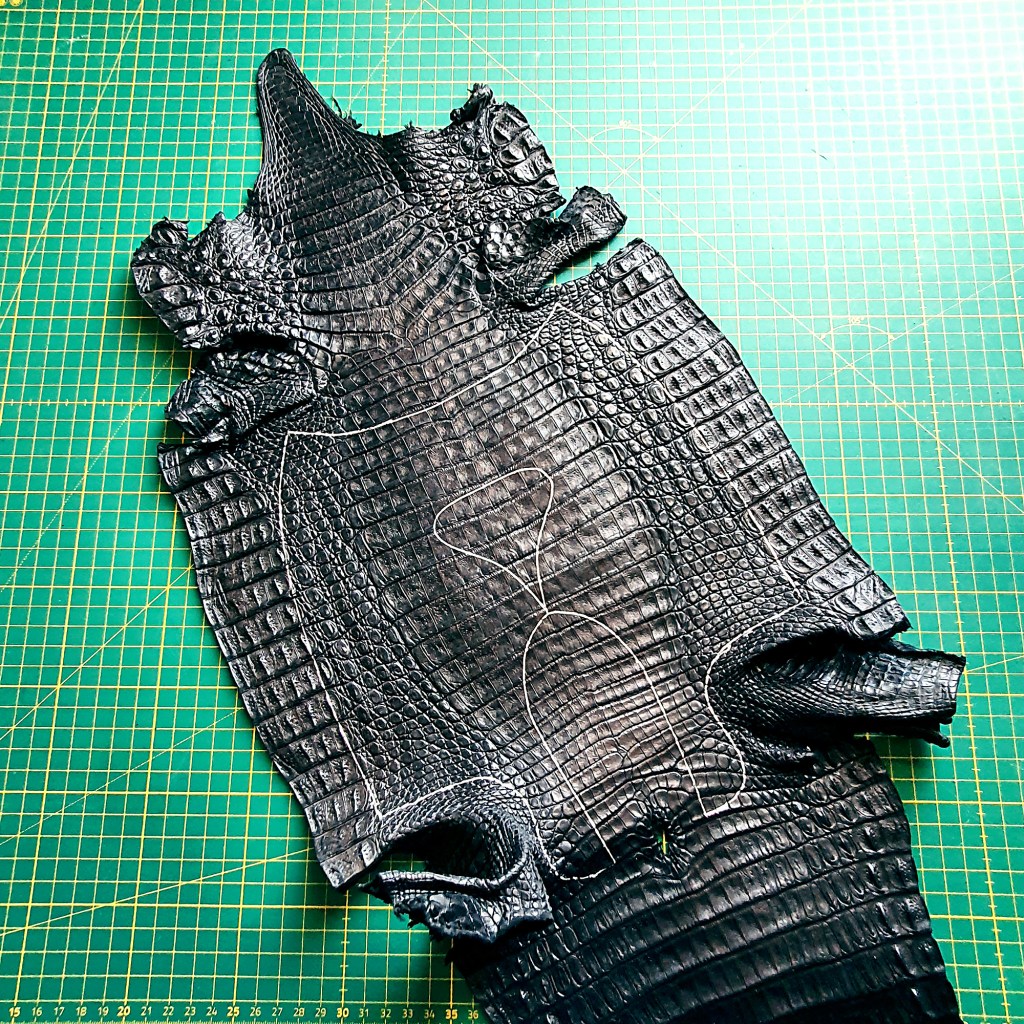
Caiman leather is partly very hard, through ossification in some parts of the hide. There are thin pieces of bone inside the larger scales, making them rigid. At the back part of the caiman (which is along the edges of the hide, since it was cut open at the back), the ossification has formed little horns of sorts. The smaller scales, between the horned back and the belly, and around the legs, have no ossification in them at all. These parts instead have a great deal of stretch – far more so than box calf.
The ossification makes the hide very difficult to cut. Just one run with the knife doesn’t do the job, and one must be very careful to get the aim and force just right. I had feared this for some time, but remembered some sage advice I once got from a distinguished shoemaker: Do not fear your materials. Just take a deep breath, focus, and do it. Thankfully, this approach did the trick very well.
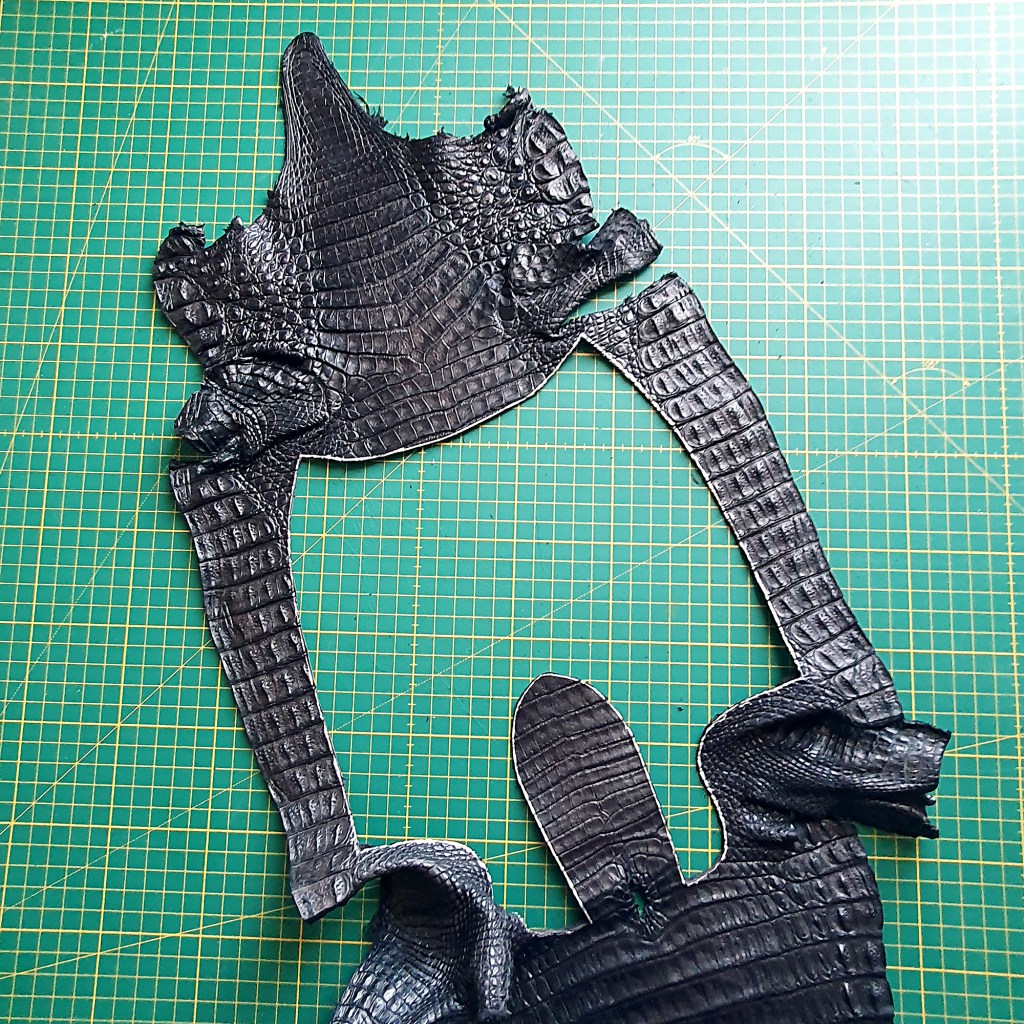
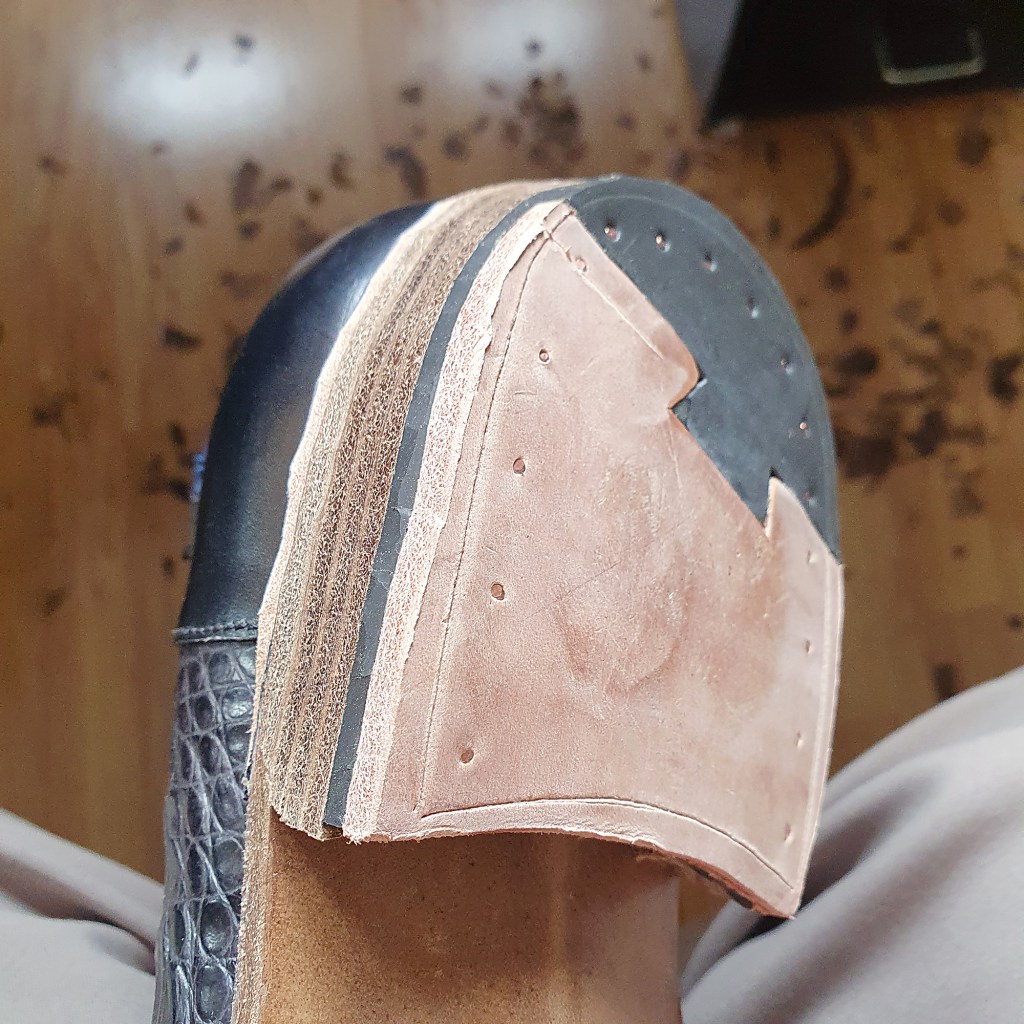
I figured that the ossification would make it impossible to last toes and heels nicely, hence the design with contrasting box calf leather for these parts. In the future, I look forward to work with crocodile and/or alligator, which I understand are free from this ossification problem.
Below is an inside look of the caiman piece, and the toe and heel pieces in black boxcalf from Ilcea. This is a very affordable box calf option, sturdy and nice to work with. I’ve drawn silver lines on the inside of the pieces, making them very easy to align with the correct overlap. For this pair, I used 7 mm overlap where there will be no broguing, and 12 mm at the brogued toe cap.

I reinforced the face (also made in boxcalf) with a reinforcement fabric usually used for handbags and the like. I forget exactly which one (since I have several options), but I think this is 0,5 mm Vlieseline.

When inserting it with contact cement, I bend it slightly as to promote a shape curving nicely around the cone of the last.

Once in place, before sewing, the face looked like so:

I wanted just a tiny splash of color on these shoes, so I put in a piece of blue reverse calf suede at the heel part of the lining. The rest of the lining is 2 oz (ca 0,8 mm) vegetable tanned calf.

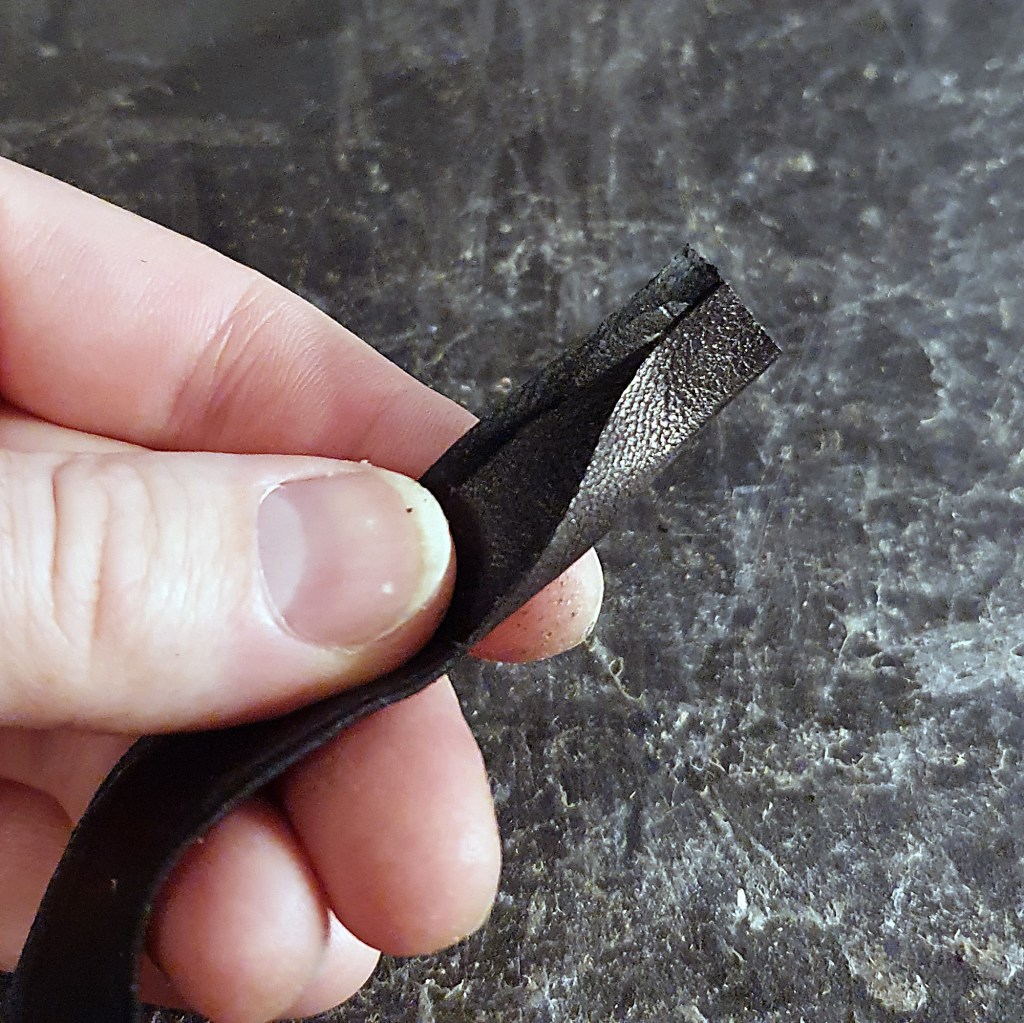
I made beading to decorate the opening of the shoe, by cutting out a strip of thin leather and cementing it shut like shown below. Once completely folded, I hammer it to get a nice and even surface, cut up slits all around it so that it will bend naturally around the opening, and insert it inside the uppers.
Here the lining is prelasted, before getting attached to the rest of the uppers. I placed the seams so that they won’t get cut off when I later trim off excess lining after lasting. The insoles were made with 7-9 iron buffed insole shoulder by J&FJ Baker.

I made a very thin strap of black leather and put behind the broguing of the toe caps, so that the inside of the brogue holes wouldn’t be disturbed by the uneven texture of the caiman.
Sewing through the caiman leather was easier than I had ancipated, what with the ossification. It was nothing my good ol’ Pfaff 593 (heavy duty post bed) couldn’t handle – it cut through the caiman like butter, bones and all.

With the lining in place (but before being sewn in), I did a very gentle prelasting. It’s satisfying to see the shoes start to take shape.

While sewing the lining, I put an extra row of stitching at the top of the heel for extra durability.
As I’ve described before, I made pre-shaped heel stiffeners using this method. I made sure to burnish the edges around the feather as to promote a sharp edge.

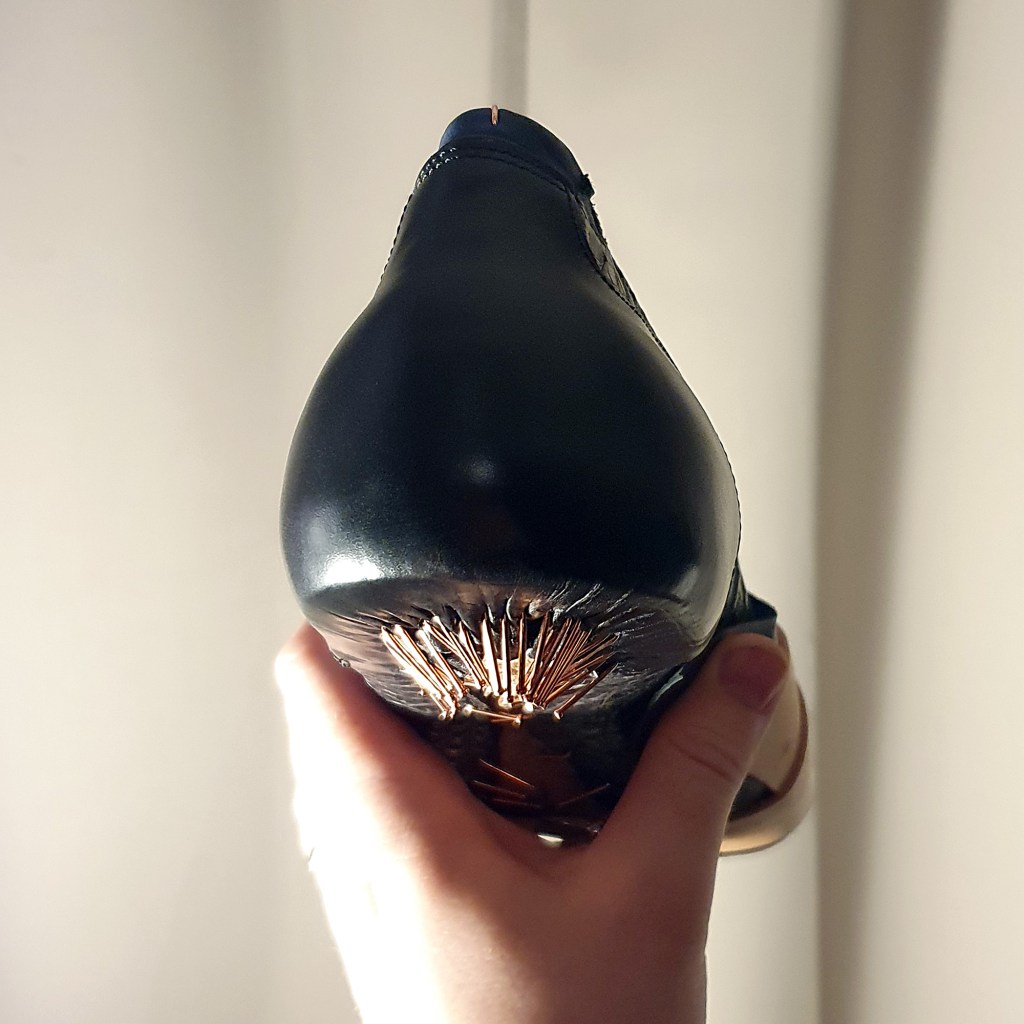
I lasted the lining separately, with just a small amount of Hirshkleber under the feather at the heel. Always, always using copper plated Blackbird lasting nails in 1.1 mm by Kos Tacks.

I made side-stiffeners in the same boxcalf as used for the uppers, and shaped them around the last while slightly moist, using a heated heel iron.

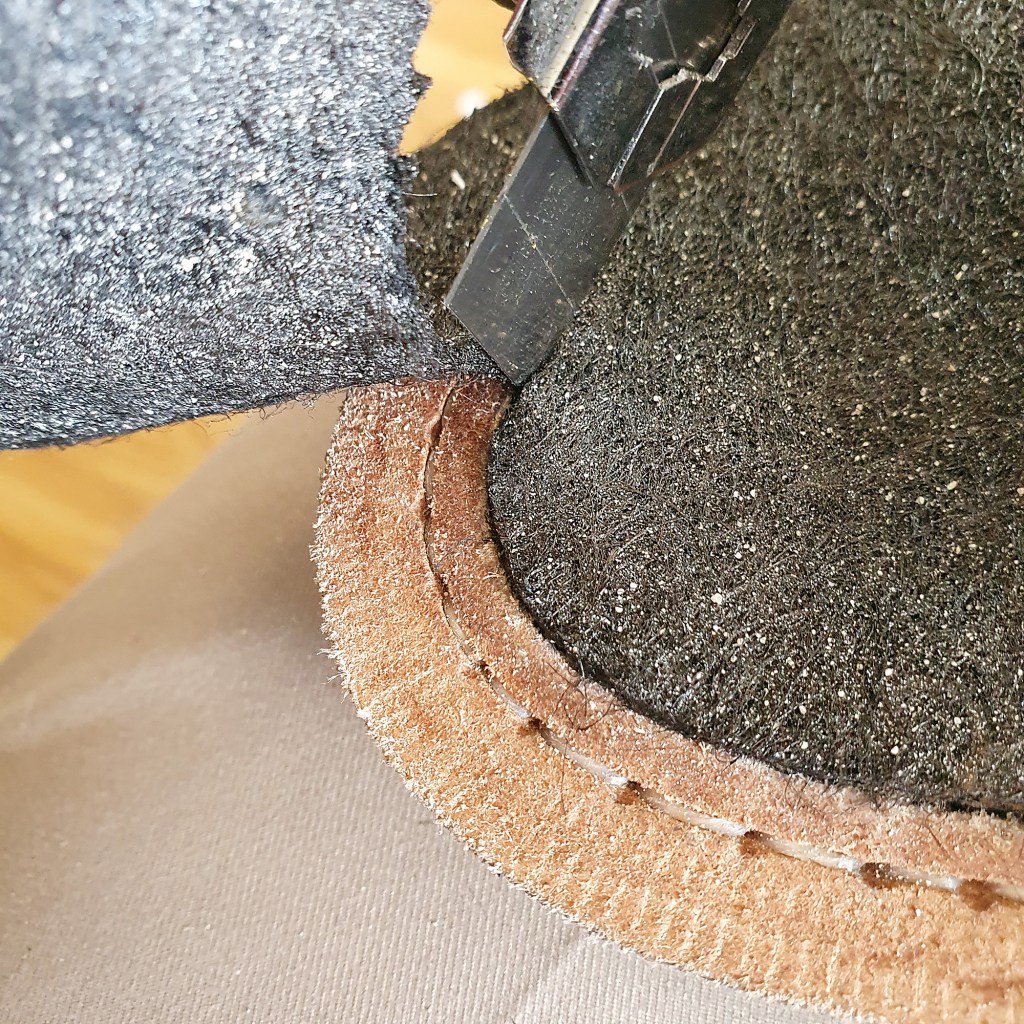
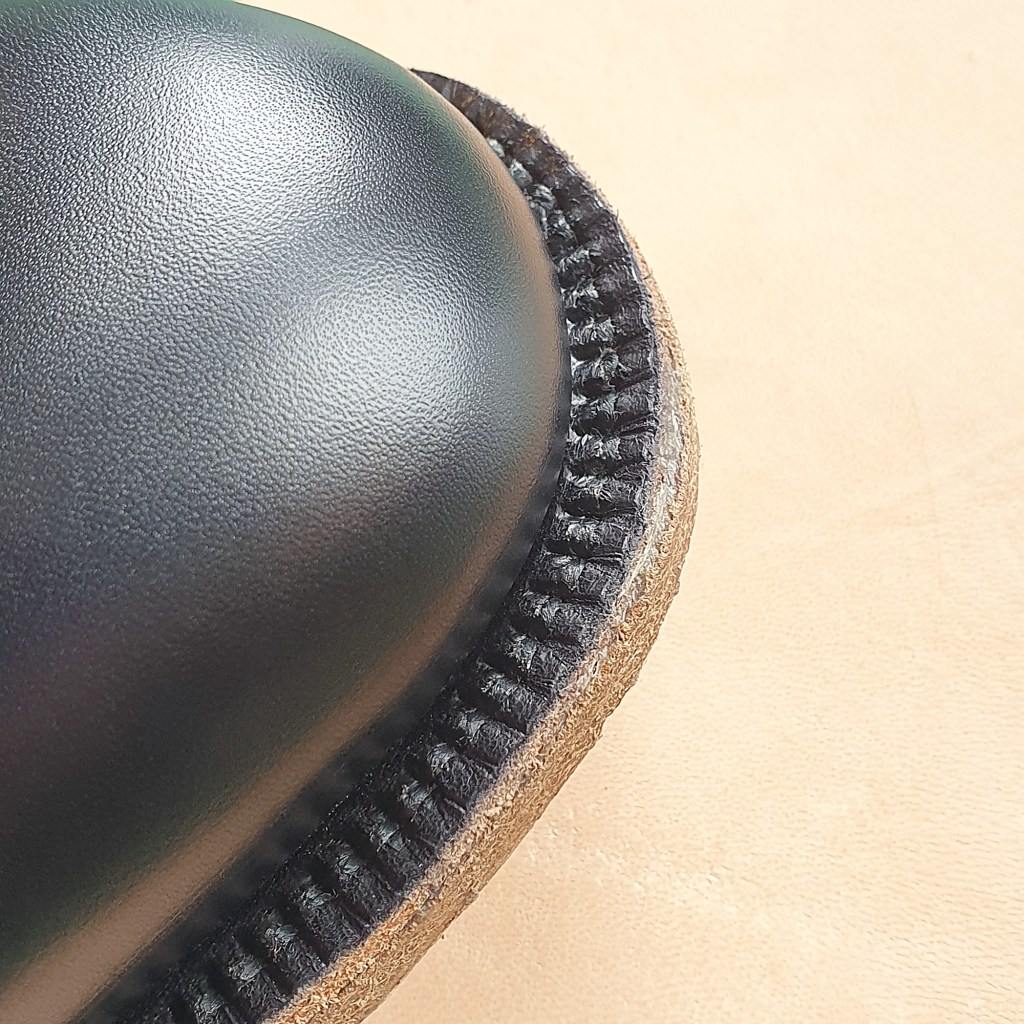
The toe puffs were made with 5-6 oz (ca 2,2 mm) veg tan from Swedish Tärnsjö. I make sure to trim them into a sharp edge.

Then I used small amounts of contact cement to attach the side stiffeners to the toe stiffener, and to the part of the lining that will underlap the heel stiffener. I also secure them under the feather in the same manner, and use a heated heel iron to make them sharp.
I keep forgetting to do this, but will in the future be interested in putting the side stiffeners in before the toe puff. The theory is that it would be easier to trim the toe puff into a smooth transition if it were on top of the side stiffener, thus avoiding any visible overlap after lasting. Next time, I hope to remember this.

I just love the look of a lasted seamless heel. The feather of the boxcalf is also worked on with a heated heel iron after lasting with Hirschkleber.
As barely visible below, at the front of the shoe, I’ve tightened some “third party” leather across the vamp. This is to help push the vamp tightly onto the last.
The toes were treated like the heels, to get a nice feather.

After sewing the welt:
I use tar felt to fill the footbed. With the proper groundwork, only one layer of tar felt is enough to fill up the gap between the insole and the welt. I put it on there and use a cheap snap-off knife to trim it just inside the edge of the welt, making for a perfect fit. (The tar felt is sticky and destroys the knife used to cut it, hence the blade option.)
Here the tar felt is in place, on top of the veg tanned shank cover that was made with the same leather as the insoles. I was a bit sloppy when trimming the shank cover, which resulted some crevaces between the shank cover and welt/rand. I used a tiny amount of cork filler to cover up these small crevaces, and will try to be more precise next time.

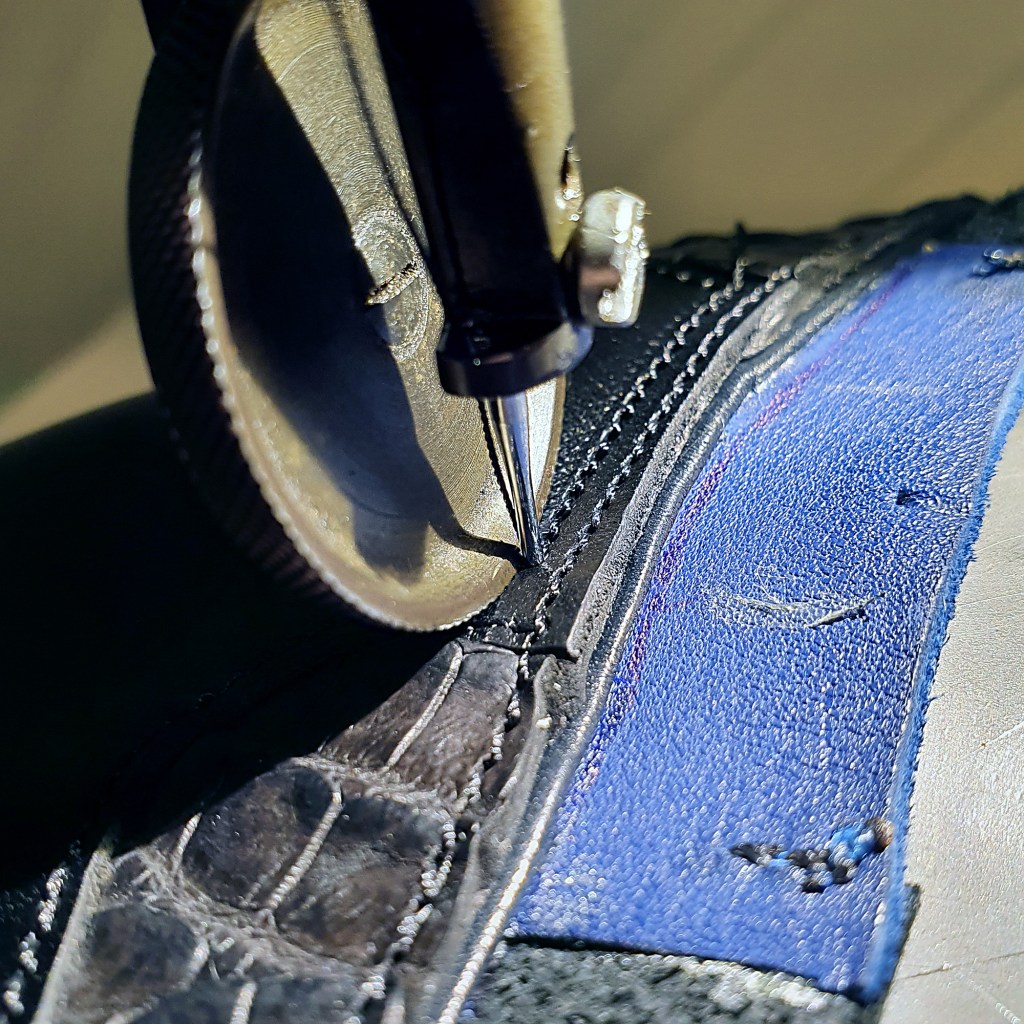
I put on some oak bark tanned outsoles by Tannerie Garat, which was a real pleasure to work with. The thread used is 0.035″ waxed polycord in black, by the Maine Thread Co.

After sewing, I ran the fudge wheel over the stitches as preparation for the later finishing process. It will look much sharper later on, but is already starting to take form.
Since it was a while ago I did this, in order to cut myself some slack, I opted for 8 stitches per inch.
This was the first time I used any of my new tools from Starko Tools. I got this custom set of finishing tools, with the luxury detail of walnut handles. I look forward to try them out for real in the finishing process.

Putting a second rand on top of the outsoles, I had first skived it and then trimmed it even more once in place. This is starting to create an even surface for the heel building. The leather used for second rand and heel lifts is a special bend for heel making. Like the outsoles, it was sourced from Tannerie Garat, and was lovely to work with.

Using a heel pattern, I aligned it and marked where I want the heel to go using a scratch awl. I did this on each layer of lifts. The heel lifts were slightly moist, but still dry enough on the outsides to bond easily with contact cement.
I did skimp a bit on the top lifts, using a cheaper option from Leather & Grindery. While they are made with veg tanned leather, it’s not oak bark tanned. In the future, I will try to remember not to skimp, but these too will do the job.
EDIT: this was done incorrectly – see the edit at the bottom of the post!
I shaped the heels like so, leaving some margin all around while letting them dry. I hammered the heels hard all around using the back of my shoemaking hammer, and then with the front hammer head. This compresses and hardens the leather, making it easier to get a nice finish on the heels later on. I still left margin all around the heels, as the leather tends to shrink a little bit while drying completely. Once the leather is dry, I will return to re-moisten them only slightly, and trim them as much as possible with a knife, before proceeding with the finishing process.

The construction of the shoes is now complete, and “all that remains” is the thorough finishing process. Stay tuned for the final result!
EDIT:
I actually made a big blunder when putting on the top lifts, as shown above. Simply put, I mixed up the right and left top lifts, putting them both on the wrong shoe. Continue reading how I fixed it here.
