I’m very happy to be back in the workshop, making some shoes again. This pair has been on my bench sine june of 2021, when I made the initial design and pattern. Now finally, almost 8 months later, it is ready to walk the earth.
In golf, the meaning of the term “tiger line” is disputed and has several potential meanings. My understanding is the following. Firstly, the “tiger line” is the most effective theoretical way (given human limitations) to advance the golf ball a long way towards the hole – be it on a drive from the tee or a long approach shot towards the green. It is generally performed with a light draw, i.e. having the ball curve right to left (for the right handed golfer). Furthermore, apart from being the most effective, the “tiger line” overcomes one or more perilous obstacles, thus being a dangerous route. It is hence considered a creative play, despite its obvious theoretical effectiveness. Not entirely unlike surprisingly sacrificing your queen in a chess game, only to perform a check mate a couple of moves later. Although there are different origin stories out there, this is generally attributed to the legendary golfer Tiger Woods, who would often find the “tiger line” in the highest level of competitive play.
Anyway, I digress. This post is a summary of the finished shoes – in the construction post I describe how the shoes were made.
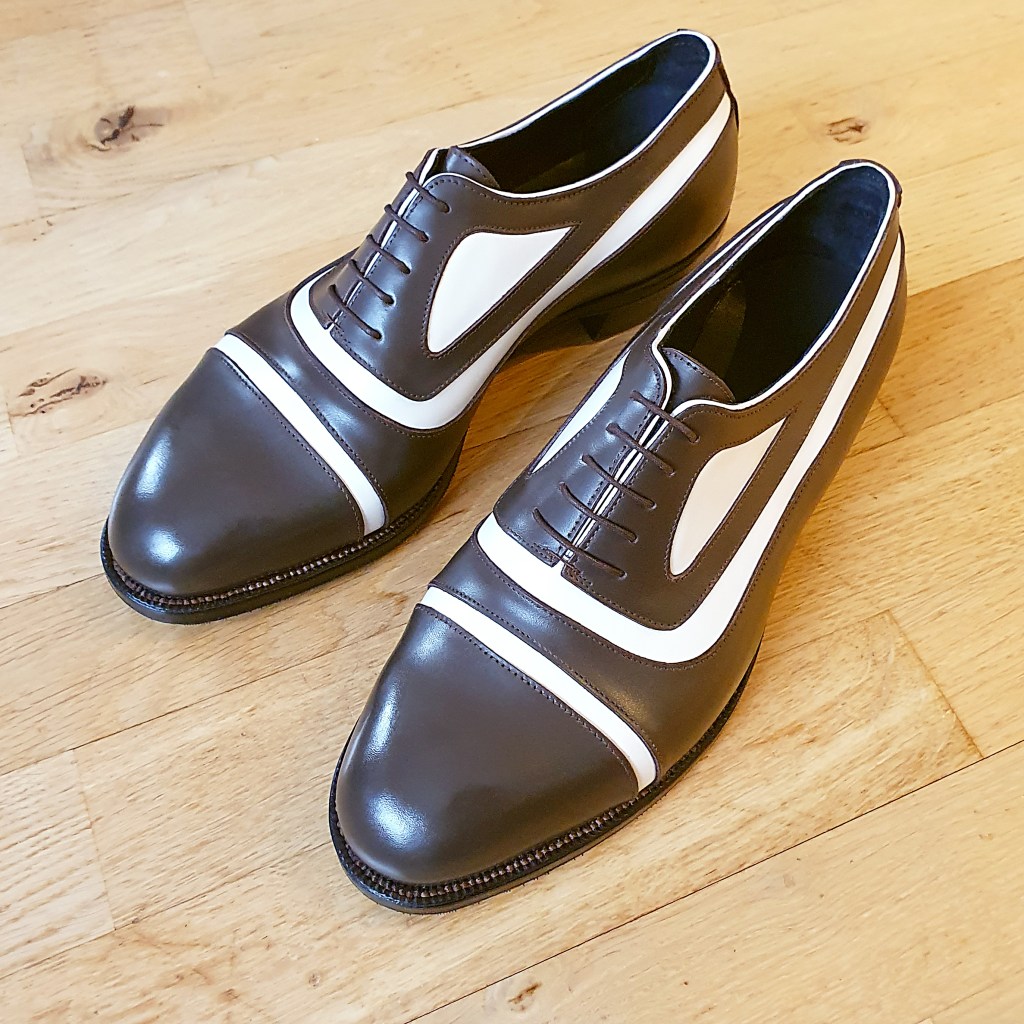
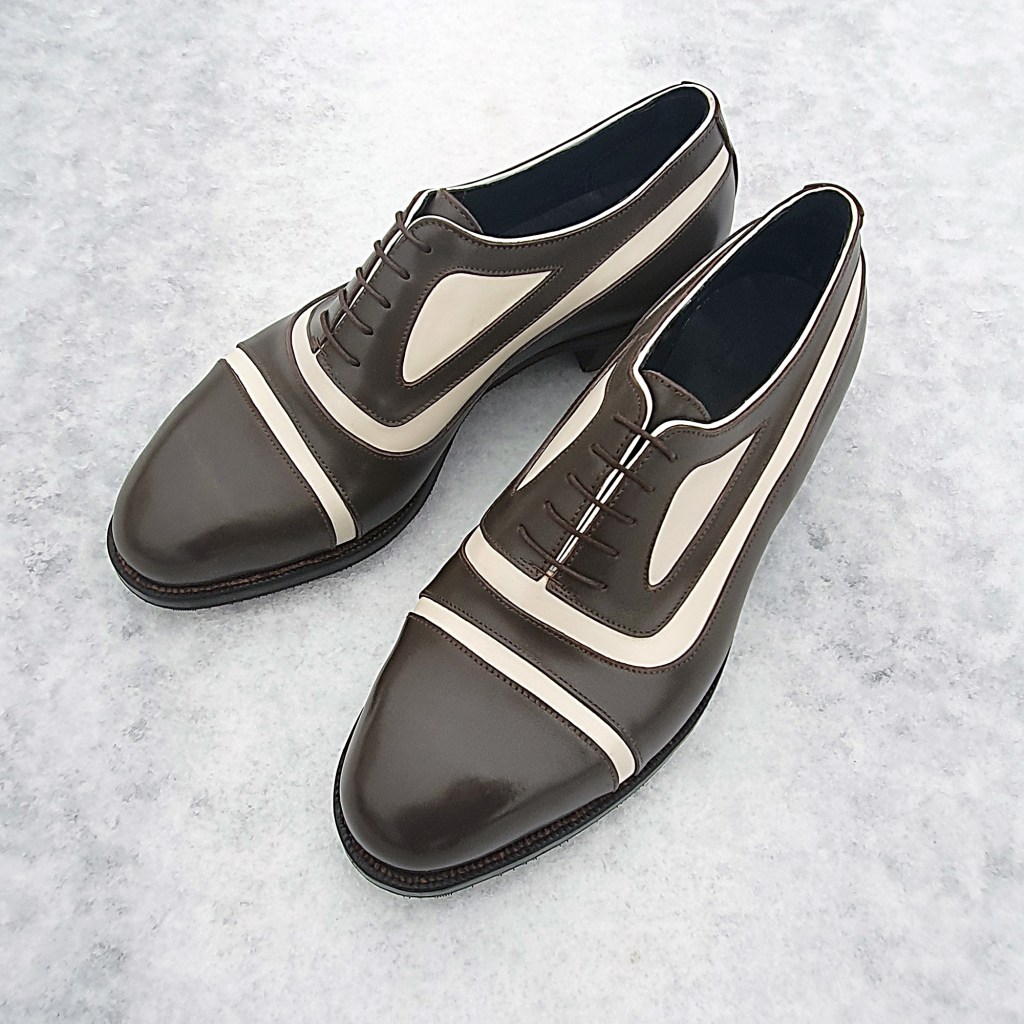
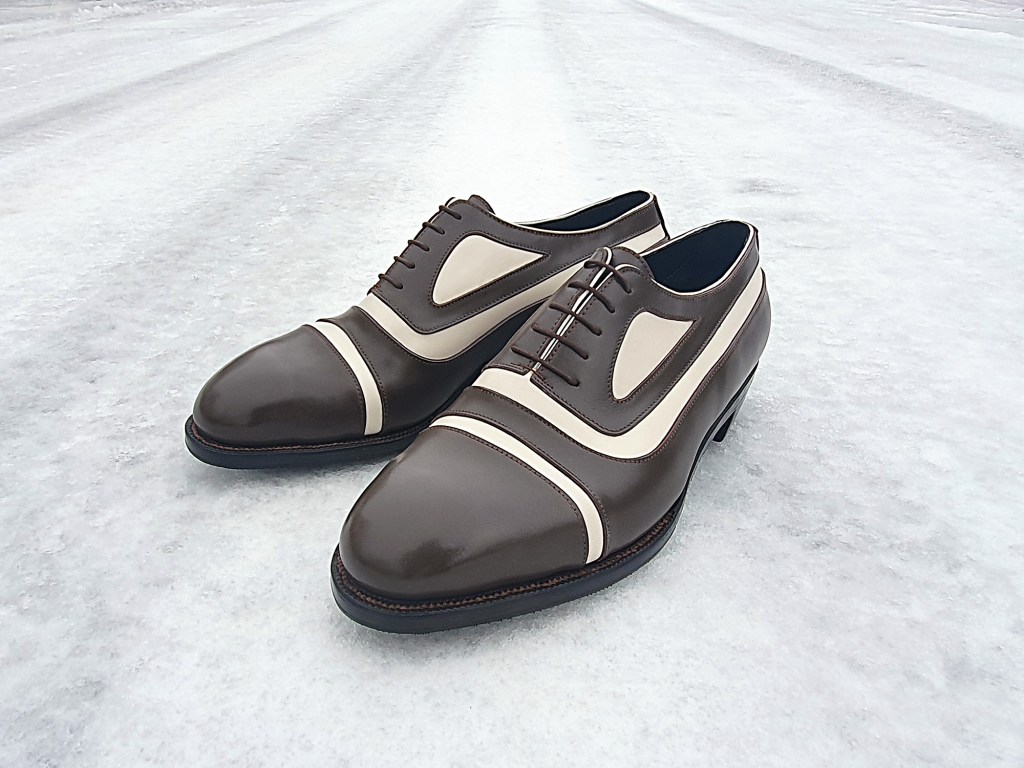
As I hope you will agree, this design has a very ‘golfy’ appearance overall. The mixture of dark brown and white leather certainly helps to achieve this.
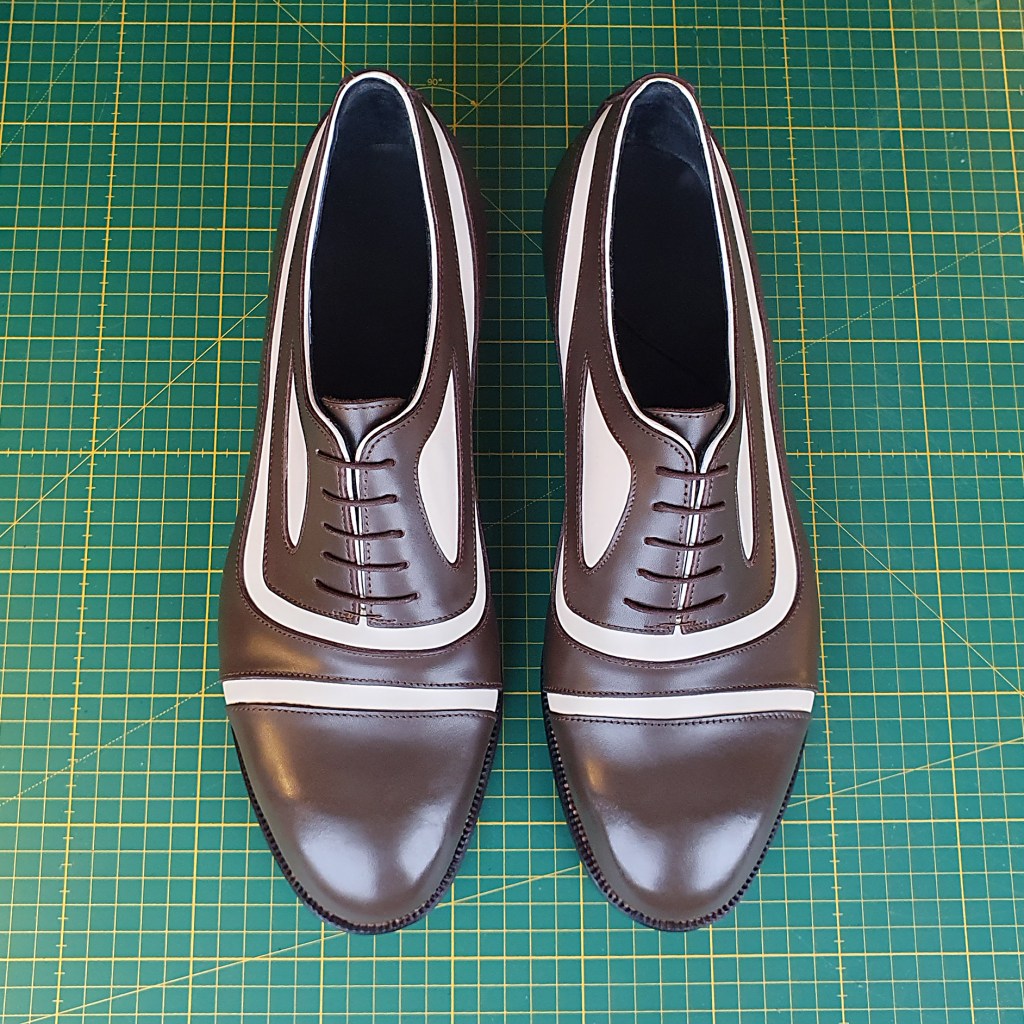
If you look at the lining of the heel inside the shoes, you can see I have inverted the leather there as to expose a portion of the suede side. This is to add some extra grip at the heel. As a bonus, it makes something interesting happen in the interior design. (This is the most visible on the shoe to the right in the image below).
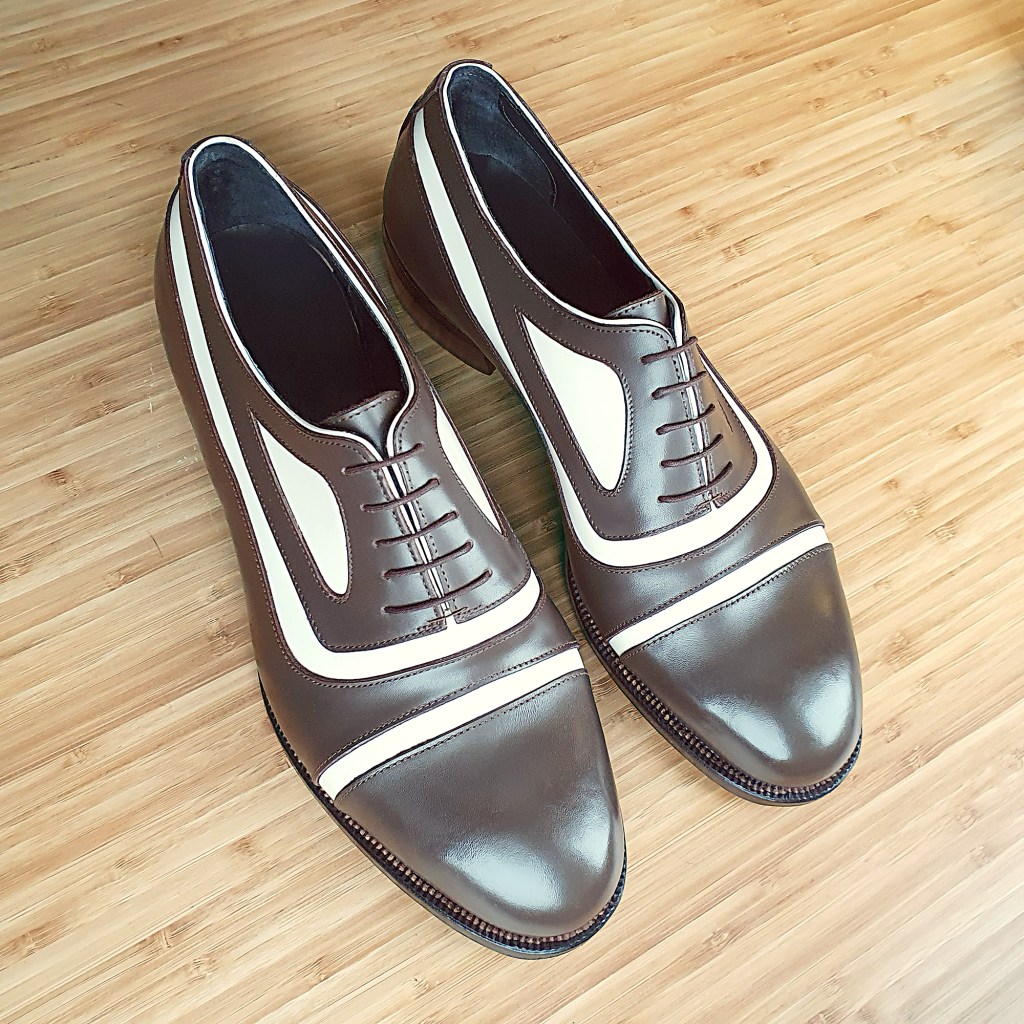
I would also describe the overall design lines as ‘effective’. This I base on how the base design follows the basic rules of patternmaking, pertaining to the counterpoint, vamp point, instep, etc. I’ve also taken careful note to produce a straight balmoral line, going from the end of the face and towards the rear. I’ve also taken care to maintain proportions on the “gladiator” line (the brown part between the face and the toe cap). The same thing goes for the white inlays on the quarters, framing the face – keeping balance between the face, top line and balmoral line, maintaining order in the galaxy.
Tigerline is as such your regular, every day ‘gladiator balmoral spectator austerity brogue oxford’.
I call it gladiator because of the brown leather strip between the cap toe and facing; balmoral due to the line parallel to the ground across the quarters (although here presented in a slight angle); spectator due to the two contrasting leather tones and golfy look; austerity brogue due to the lack of broguing on a shoe that would otherwise invite broguing (albeit this is not a wingtip design, which an austerity brogue normally is), and finally oxford due to the closed lacing. I’m sure it could also be entitled something else, due to some other detail.
In order to pull the design off, I opted for a “faux open lacing”, having the face ‘hover’ over the white leather of the vamp. This choice was made since I wanted all the white and brown leather areas to be on the same ‘level’ respectively: brown always on top and white always on the level beneath (including the white beading leather around the opening).
The leather outsoles were stitched at 9 stitches per inch with .035″ waxed polycord from the Maine Thread Company.

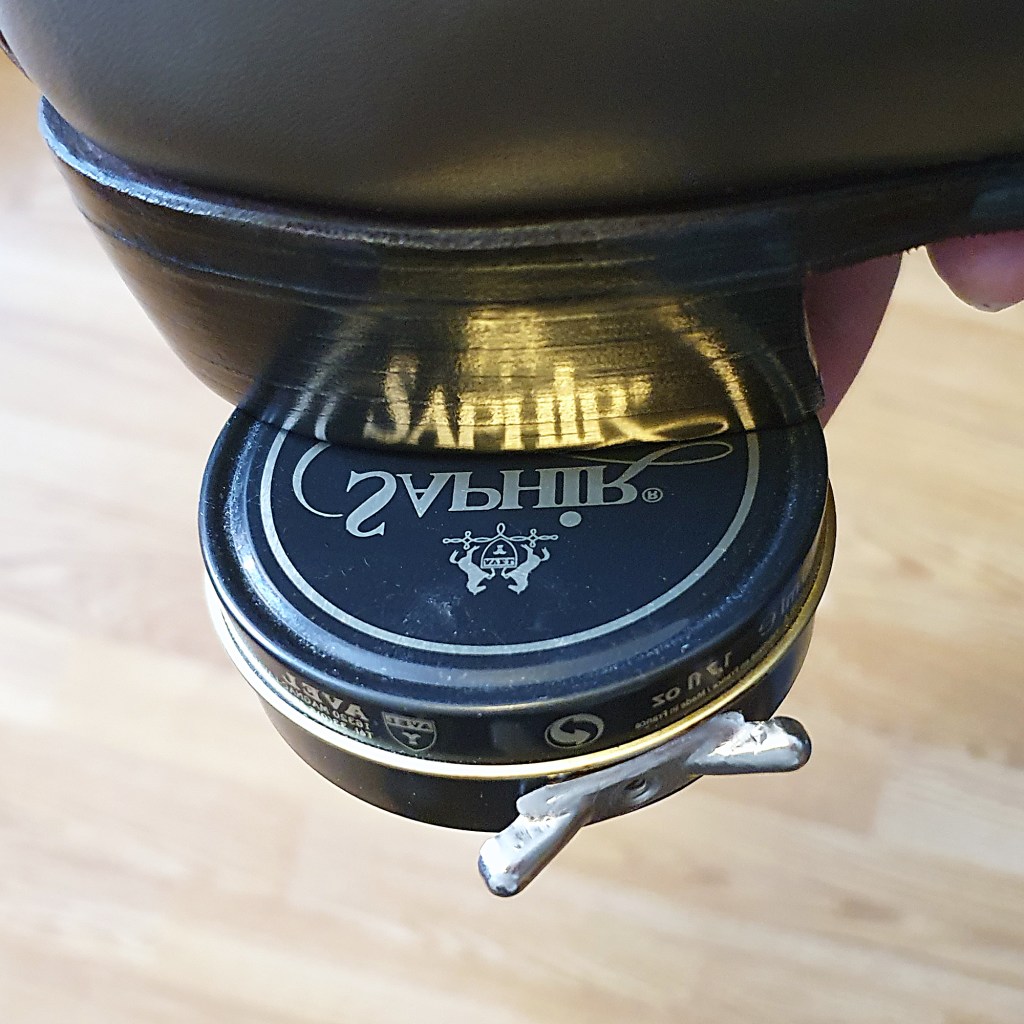
I polished the heels up to a nice shine, as displayed with this tin of medaille d’Or pate de luxe shoe polish.
The outsole is covered in a full layer of 1.8 rubber sheeting, giving added protection from the elements. I forgot which brand it is, since it’s unmarked, but it’s either Vibram or Topy.
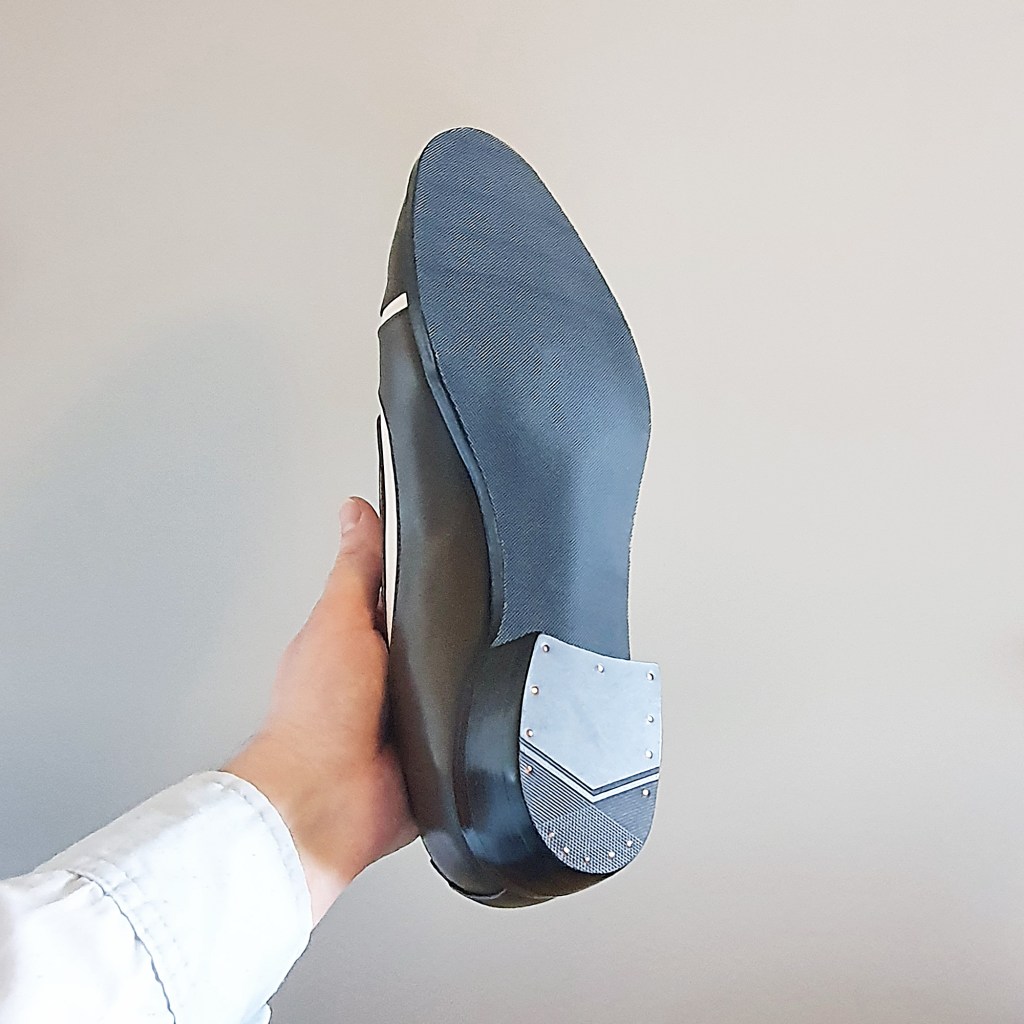
Thanks to the rubber sheeting (and rubber top lifts on the heels), I felt comfortable putting these shoes on the packed ice of my driveway.
Not entirely unlike watching paint dry, I’m now waiting for the Nordic ice to melt… I want to go rock these shoes in the wild on clear ground – and I really want to get started with the golf season…
Thanks for reading!
Specs:
Uppers: 3-4 oz dark brown and white Italian boxcalf
Lining: 2 oz veg tanned baby calf in black
Insoles: J&FJ Baker buffed insole shoulder, 7-9 iron
Outsoles: 9-10 oz veg tanned outsole butt + 1.8 mm rubber sheeting on top
Top lifts: Cross striped rubber
Toe/heel stiffeners: 5 oz from Tärnsjö Garveri
Welt: natural welting leather from Leather & Grindery
Shank: Plastic

Absolutely fine shoes. I really like the color, the way they are all their own and they look like they know it. I know I keep saying it but the craftsmanship is really starting to show through with every pair you make. If you are an avid fisherman, I am a rod builder and I’d love to make a deal one day!
LikeLike
“There’s a fine line between fishing and just standing on the shore like an idiot.” – Steven Wright
Thank you very much for the kind words, Curt – I really do appreciate it! While I do enjoy sportfishing in theory, I almost never get around to it, simply due to other priorities and too little time. I’m glad for the opening on a trade deal, but for the time being, I have too many projects I want to realize and not enough time to do so. Feel free to send me a query if you wonder anything about getting started making your own shoes! 🙂
LikeLike
Beautiful work, your heel finishing is getting better and better.
LikeLike
I’m glad to hear it – thank you Andrew! Heel finishing has always been a bit of a “white whale” for me, always chasing it but never quite getting all the way there… I’m happy to be making some progress in the area.
LikeLike