I’ve had a long hiatus from the blog, and from shoemaking itself. Intermissions have happened before, but this one was record-setting. However, I have now broken the curse, and hope to slowly start picking up the pace again.
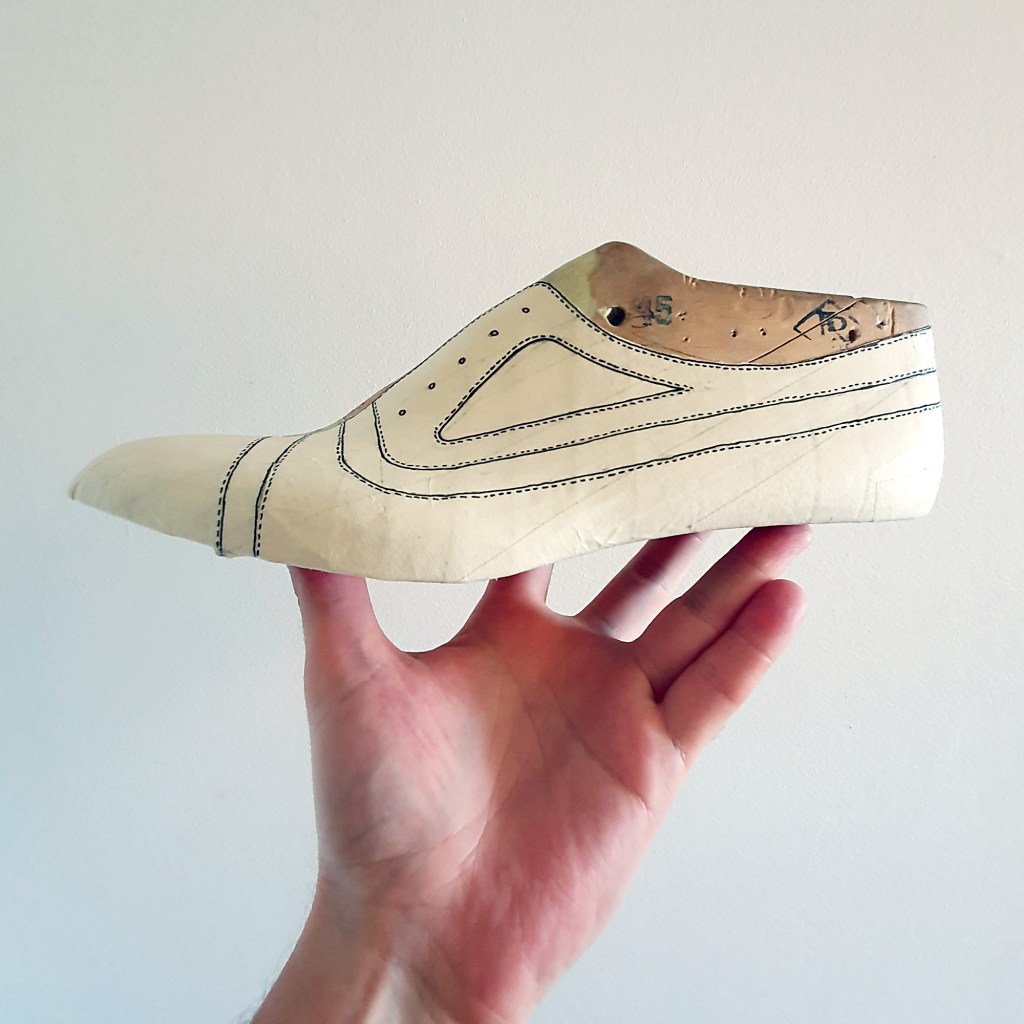
I made the design to this pair of shoes in june of 2021. It’s probably the most intricate, and certainly the most original design that I’ve made to date.
I’m not entirely sure how the design could be labelled, but I’m thinking it can be called a ‘gladiator spectator austerity brogue oxford’?
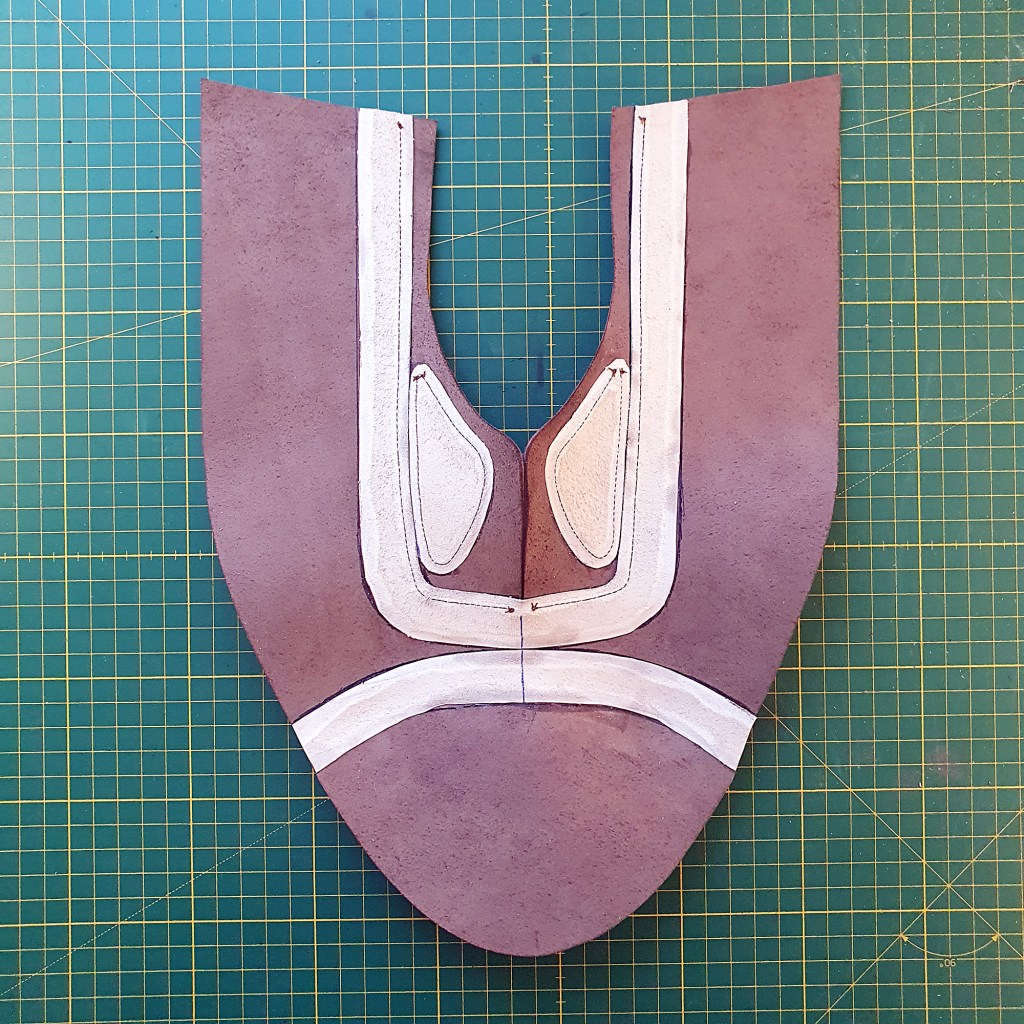
With the pattern converted to leather, this shows the basic jist of it. Rather ‘golfy’, and with some creative yet effective lines. Hence the name: Tigerline.

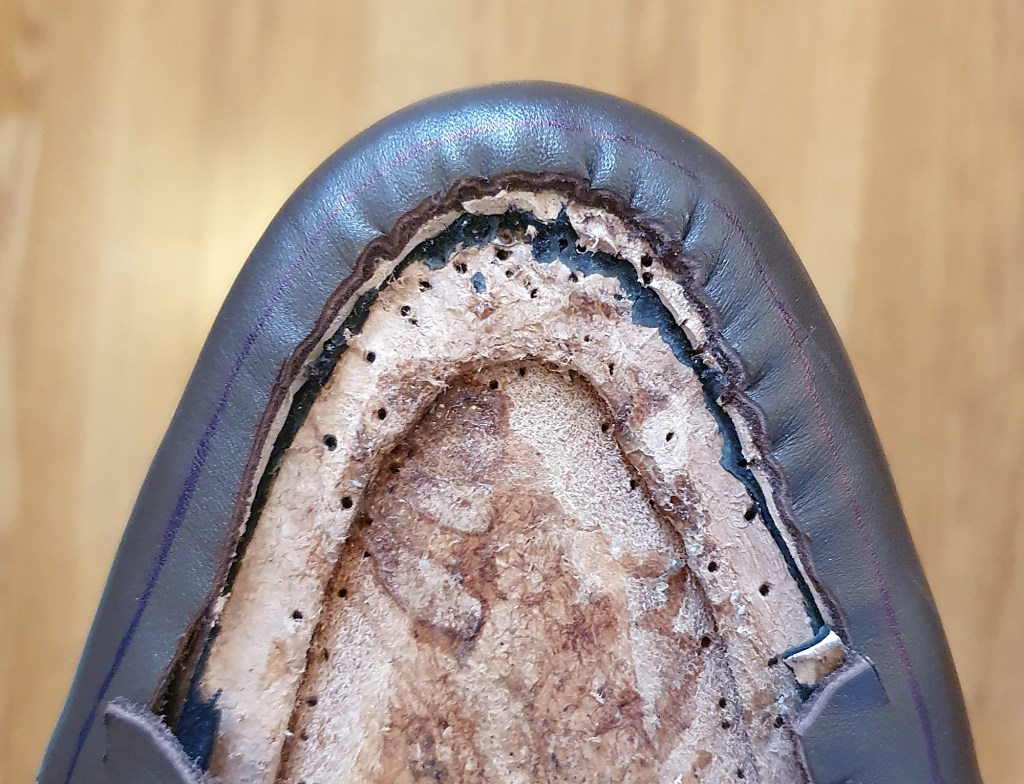
An inside look reveals how it was put together regarding the white areas. (After this image was taken, I would reinforce the facings with a rather heavy, vlieseline-style reinforcement fabric.)
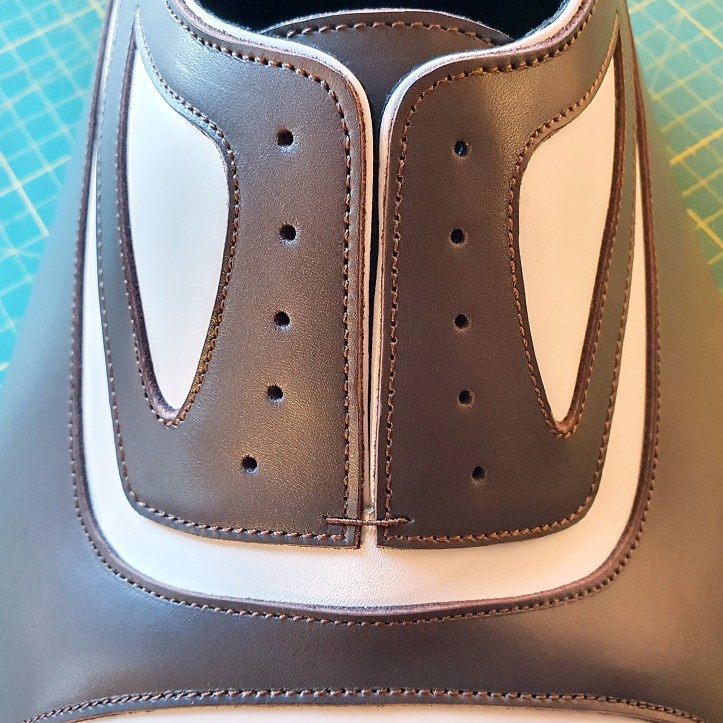
Here’s a look at the completed uppers, right before lacing them up and starting the lasting process. I used white leather for beading, completing the design. I’m rather content with how the seams turned out.
I like to last in a couple of steps, making the whole endeavour less daunting. Here the lining has been lasted completely, and the uppers have been prelasted.

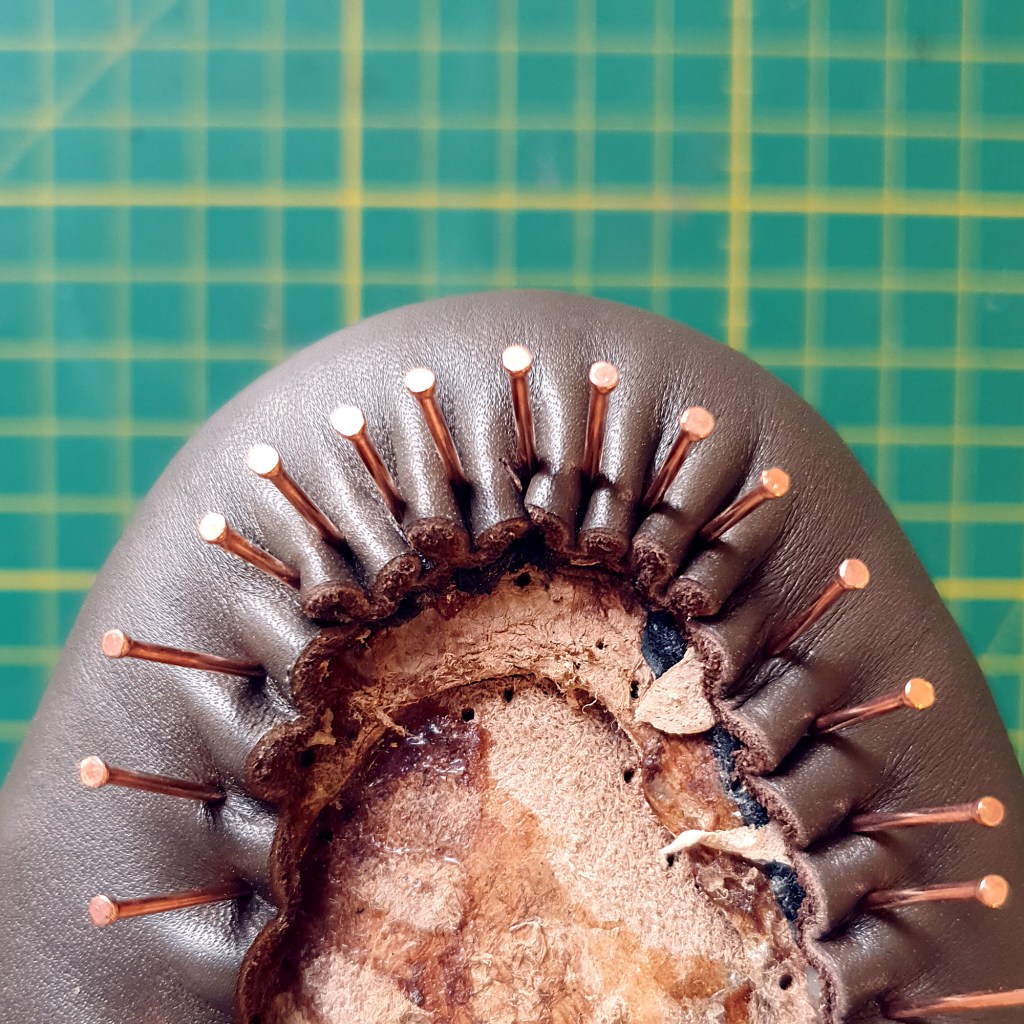
And here’s after the final lasting of the shoe:

I used Blackbird lasting nails as always, in the 1.1 mm thickness option. Gotto love those nails.
When the Hirschkleber was dry, I removed the nails and trimmed off excess leather. Then I used a regular bic pen to trace where I wanted the welt seam to penetrate the uppers.
Welting complete:

I put on the leather outsole as usual: keeping it moist and flexible in the middle, but dry enough on the surface to bond with contact cement. (Too moist leather will not bond with contact cement.) Since I will later put rubber sheeting on top, I settled for using Italian brandless outsole leather.

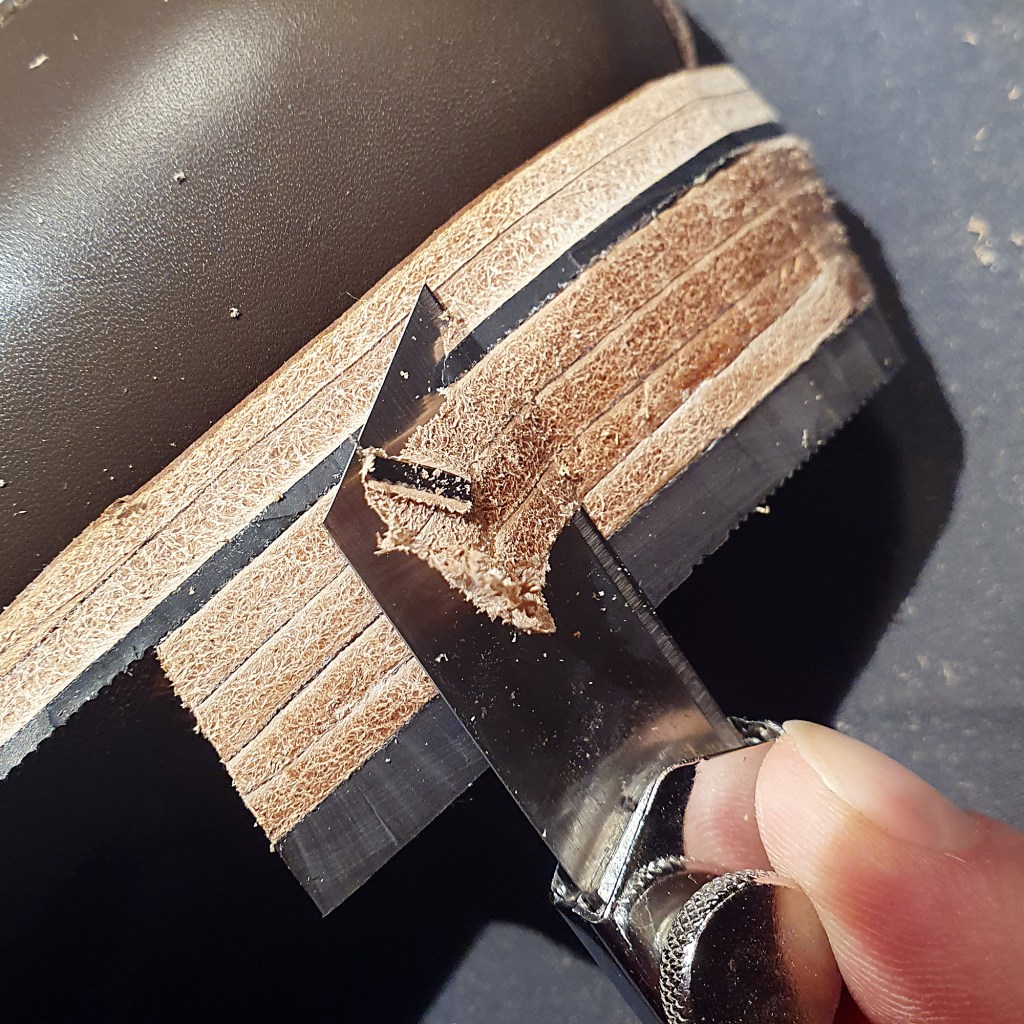
After rough trimming the outsole edges, I used a simple tool to trace out where i wanted the outsole seam to go. Since the outsoles would be covered with rubber sheeting, there’s no point in doing a hidden outsole stitch. (Doing a hidden seam before putting rubber sheeting on top would not only be unnecessary – it would compromise the construction.)

With the guideline from above in place, I use another simple tool to create a groove for the seam. This is a very satisfying minigame that’s almost impossible to fail at, and it makes necessary room for the outsole thread.

I used my preferred thread for the outsole seam: Maine Thread Company waxed polycord in .035″ (3 ply).

With the rubber sheeting in place on top of the outsole and the heels stacked, I trimmed the heels into shape with a knife. I always keep in mind that the heels are indeed shaped solely with the knife. After the knife-work, they are only finished and “touched up”, but no longer actually shaped.
Trying not to blunder as I cut off excess from the sole edges. (I did fine.)

After rough-shaping the heels and sole edges with a blade, I proceed to use a shoemakers rasp.

I’ve written before in detail about how I finish a pair of handmade shoes, and I haven’t really altered much in my finishing process since then. So, I did that, and the shoes were done.

Thank you for posting. Very happy to see you’re at it again. Beautiful
LikeLike
Nice to hear – thank you very much! 🙂
LikeLike
Ace work. Did you glue or sew the welt on?
LikeLike
Thank you kindly! The welt is welted, so sewed on, going through a carved out holdfast in the leather insoles. I used .045″ waxed polycord from Maine Thread Company for welting.
LikeLike
So good to see you back at it, I am currently making my first test shoe like you did but I am really struggling with the lining, is there any of your blogs with a detailed description of how you make and fit your linings please?
LikeLike
Thanks Andrew, I’m glad to hear it! But hmm, now that you mention it, I don’t think there is such a post. I think I had one at some point, but thought it was too bad so I removed it. For better or worse (ie, worse), I do oxford lining a little ‘special’ way. It’s a bit tricky, but works for me for the time being. I’ll keep that in mind for a future post – although it may take a while to get up, since I already have stuff past that point cooking on the bench. 🙂
LikeLike