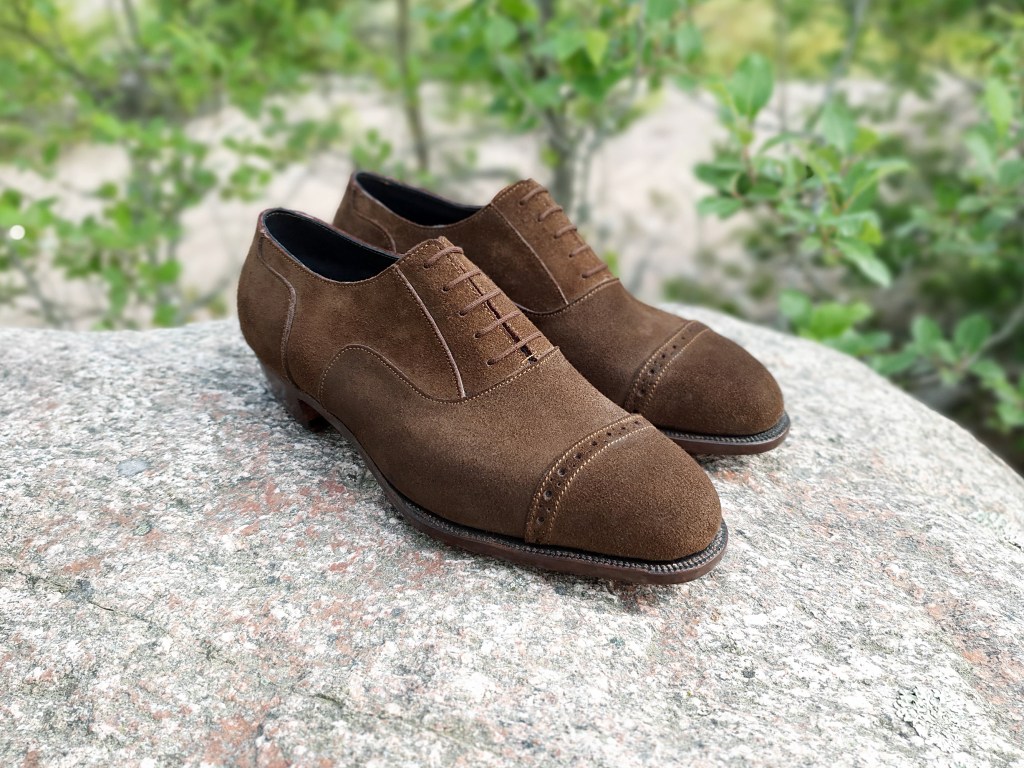
After a few months on the bench, my first pair of suede shoes is completed. Since I’ve never owned any pair of suede shoes before, I’ve made these for myself. (It seems I just couldn’t be swayed before…)
This is a summary of the finished shoes – in the construction post I describe in detail how the shoes were made.
The upper leather is a sturdy full grain reverse bull suede, in a rather pleasant dark brown color.
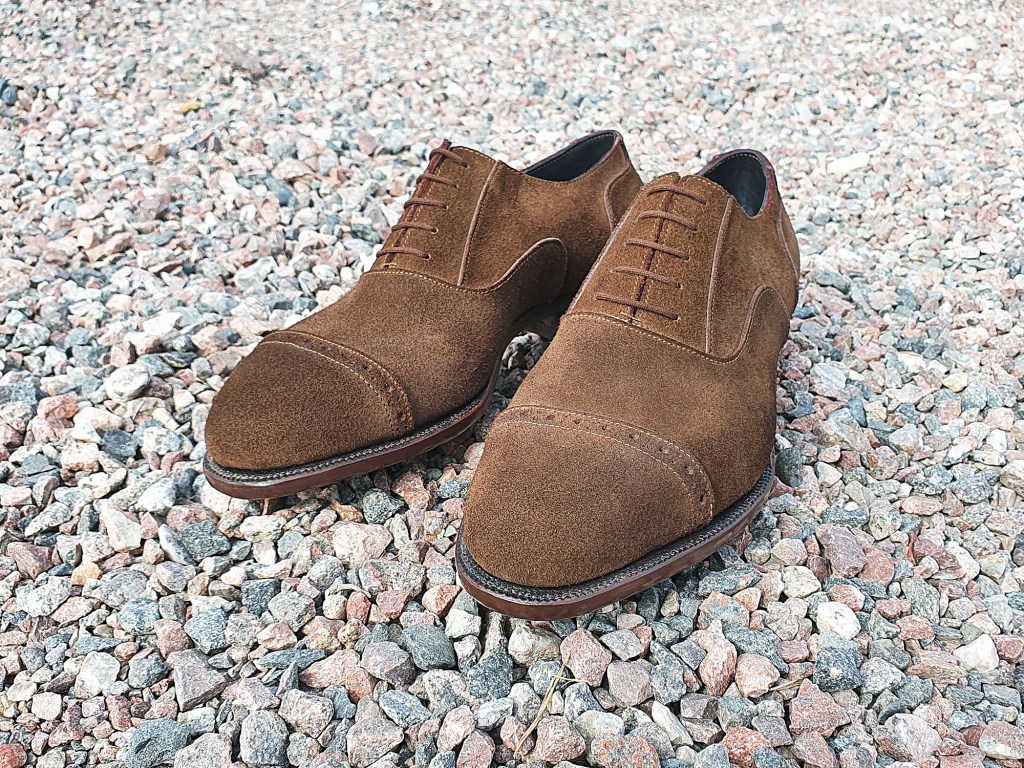
Protected with Saphir Medaille d’Or Super Invulner, these shoes are ready for monsoon rainfall.

Don’t mind me, I’m just standing in the middle of a gravel pit taking photos of some shoes.
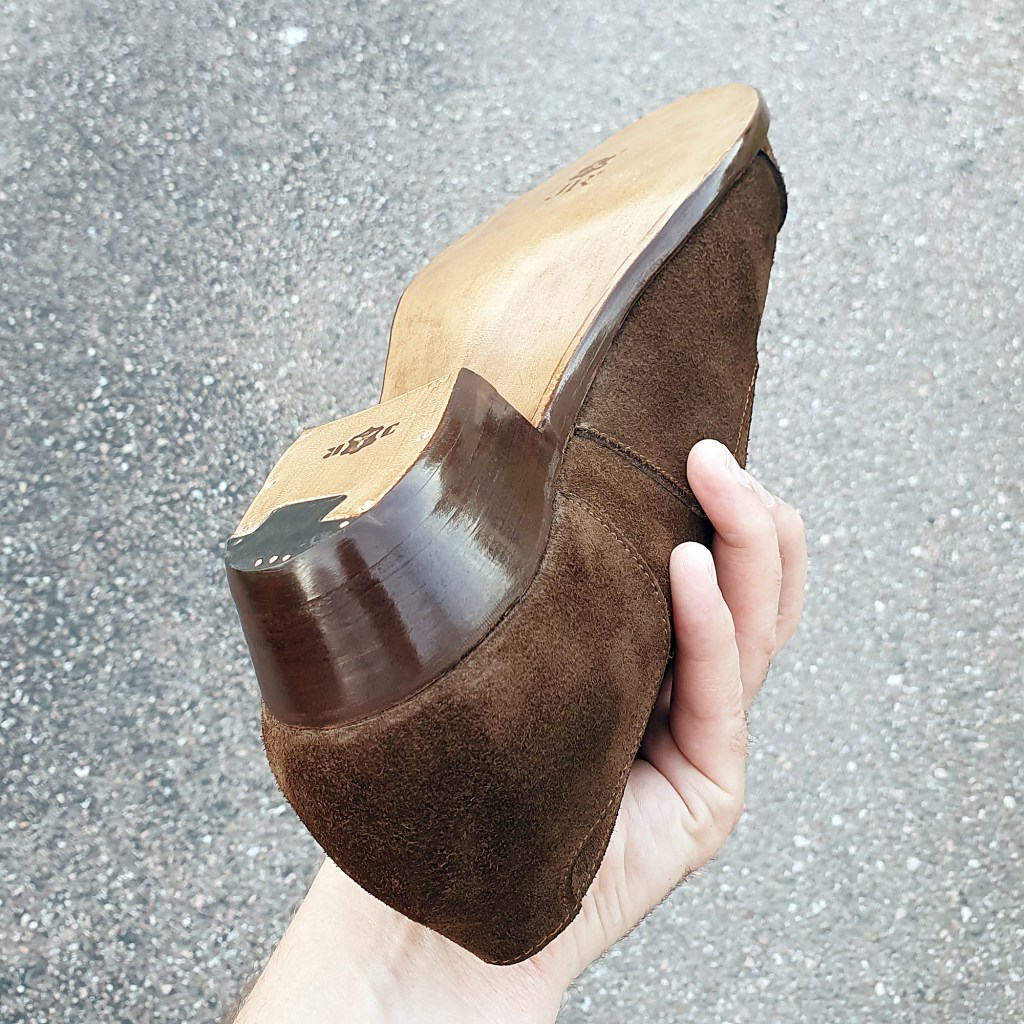
Sole edge.

This is another heel which I’ve tucked tight in under the seat, and allowed the angles of the heel to sort of follow the shape of the heel. A matter of taste, surely, but I think it’s nice.
In dramatic lighting!

Ready to get some mileage down.

Specs:
Uppers: 5 oz reverse bull suede
Lining: 2 oz veg tanned baby calf
Insoles: J&FJ Baker buffed insole shoulder, 7-9 iron
Outsoles: J. Rendenbach
Toe/heel stiffeners: 5 oz from Tärnsjö Garveri
Welt: natural welting leather from Leather & Grindery
Shank: Plastic

These look stunning! What last are they on? Another standard Springline last? This is the shape I want to get out of my first pair of shoes I will be making in the coming months. The hardest part so far has been deciding on and getting a last. I have begun buying tools and have just been stuck on the last due to there not being as many options.
LikeLike
I’m glad to hear it – thank you very much! These shoes were made on a heavily modified bespoke last that I’ve modified for my feet. I used an old vintage last pair for the base, ground down the arches to remove volume there, added a lot of volume to the instep, and added volume to the sides. For adding volume, I’ve mainly used veg tanned leather and milliput – a two-component clay that’s easy to work with (preferrably with a little bit of water), and excellent for such tasks.
For a first pair, I would recommend getting a pretty standard Springline last – probably this one: https://springline.net/collections/student-lasts/products/mens-fashion-formal-almond-toe.
Best of luck getting started!
LikeLike
Very cool! That last you linked is actually the exact one I was thinking of starting with. Then doing as you did and modify it for my fit after my first pair. Thanks so much for the info on that.
On another note, do you have a resource for the side stiffeners? It is the last element I am having issues finding information on. What kind of leather to use? Any “rules” for dimensions and shape? It’s been an elusive section.
Again thanks so much for getting back to me!
Cheers
LikeLike
Cool! I think it’s a great choice of last. 🙂
I’ve actually seen little info on side stiffeners myself – I’ll think about in a future post. I did write a bit about it in my latest construction post: https://secretcobbler.com/2022/07/08/caiman-construction/.
People usually take whatever leather is used for the uppers for side stiffeners, so long as it’s not textured or exotic. I’d recommend regular chrome tanned boxcalf in ca 1 – 1,2 mm. It needs to underlap (or overlap) the toe puff and the heel stiffener. to get a nice smooth transition – maybe something like 15 mm or so. You can measure on your last how long it needs to be, and make test patterns until you get it like you want it. The side stiffeners need to go under the feather – I put them in overlapping the insole up to the holdfast, so that I sew the side stiffener in while welting (but don’t need to trim off any excess side stiffener when welting is done). I skive the side stiffeners on all sides before inserting with a little bit of contact cement – using cement only where they overlap the toe or heel stiffeners, and under the feather. (No cement on the sides).
Good luck!
LikeLike