At last (“open with a joke”, they said), here’s another attempt at a hand welted ladies shoe.
To get started, I took a very narrow last with a round toe, and modified it quite a bit to (hopefully) suit the recipient. Here’s the original last shape: (In a EU size up from the one used, but otherwise the same model – since I forgot to photograph the actual pair before starting to modify them.):
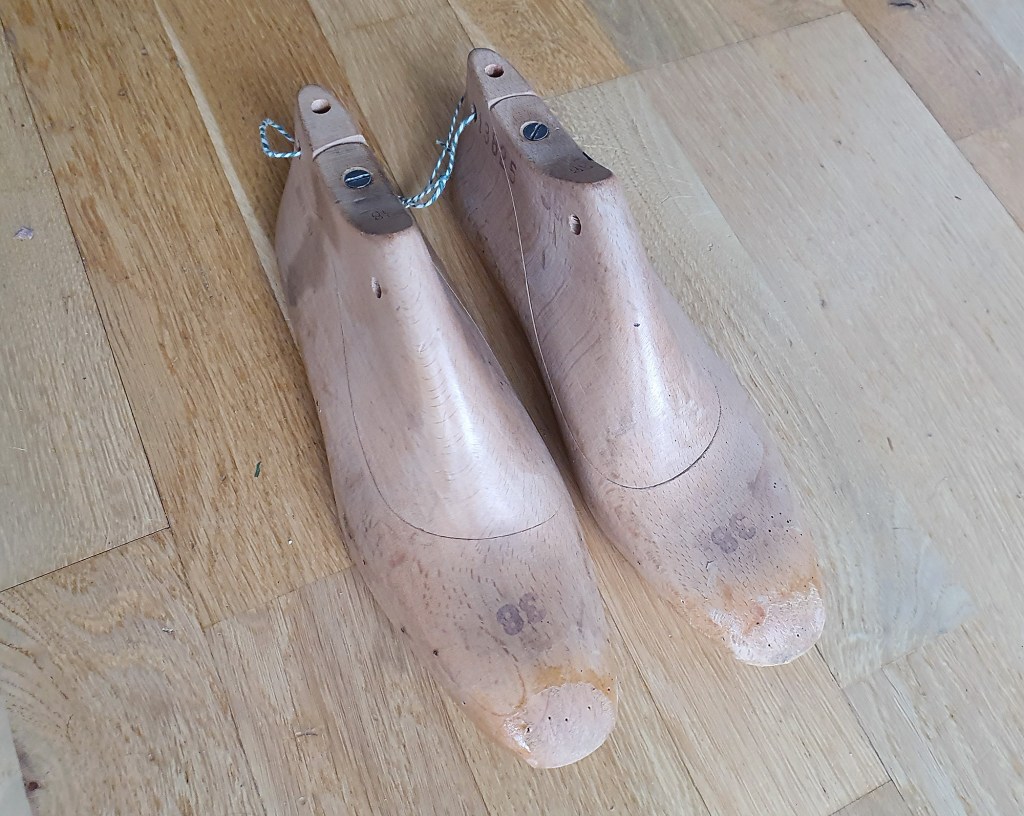
I added veg tanned leather to create some more room along the sides, at the ball and for the toes, and made a chisel toe shape. I also ground up the arch to make it slightly higher and more supportive. Here’s my modified version of the lasts (in base size EU 37):

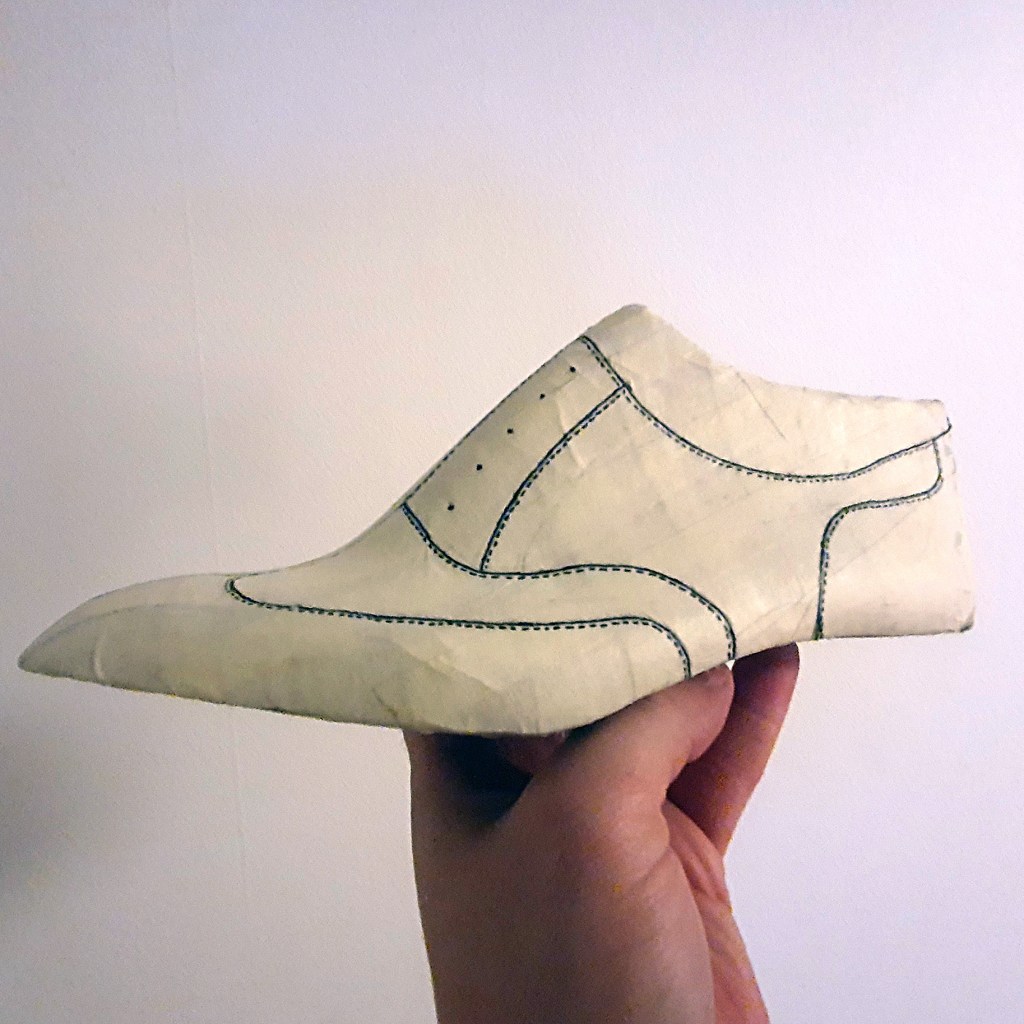
With the lasts modified, I designed the pattern for an austerity brogue wingtip oxford:
A detail shot of the stitching from the uppermaking. I used Serafil 40s thread to sew boxcalf from Tanneries du Puy, bought via Kolde leder.

As always when it comes to good leather, it’s intriguing to observe the great color variation and how it can play in different lighting. Here’s an upper in the making, just before attaching the lining:
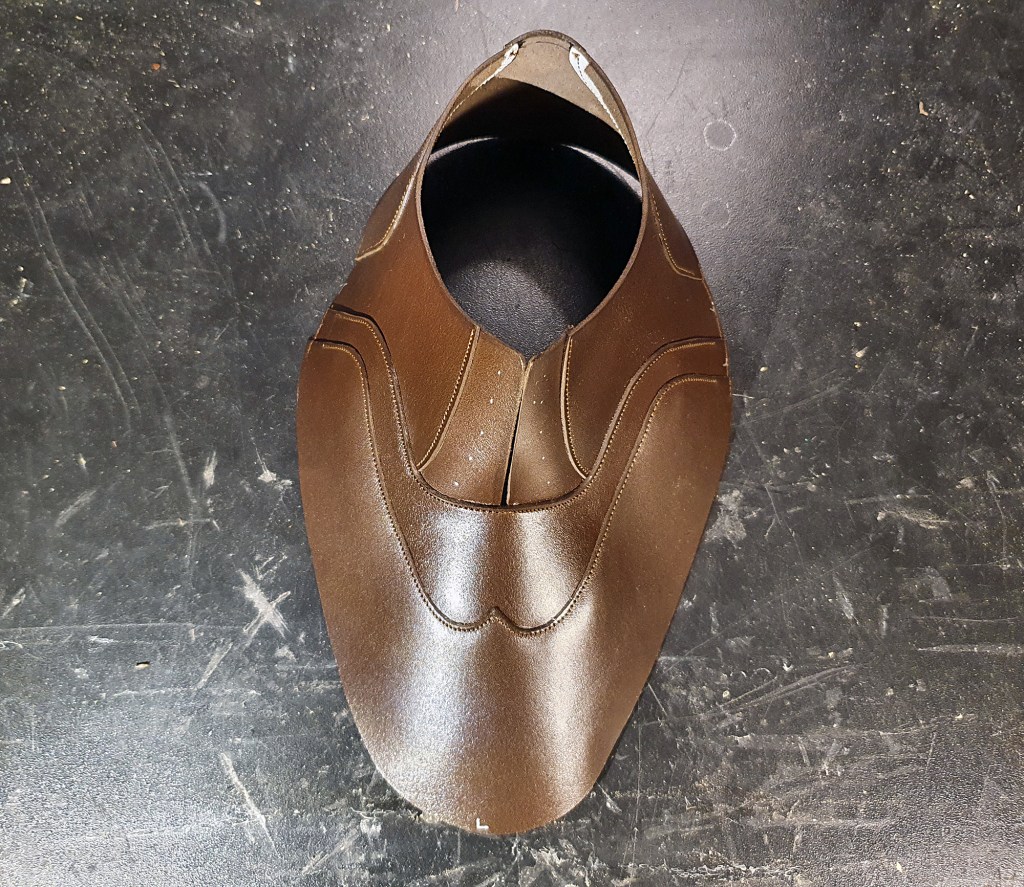
I reinforced the facing with 0.5 mm Freudenberg Vildona interlining.
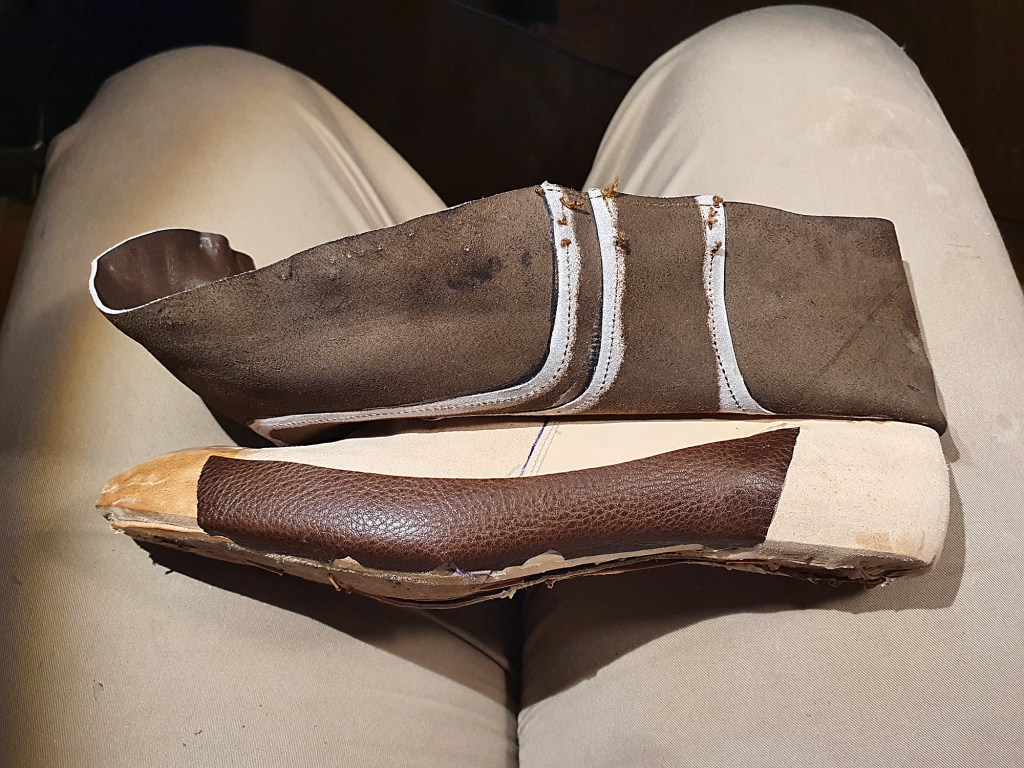
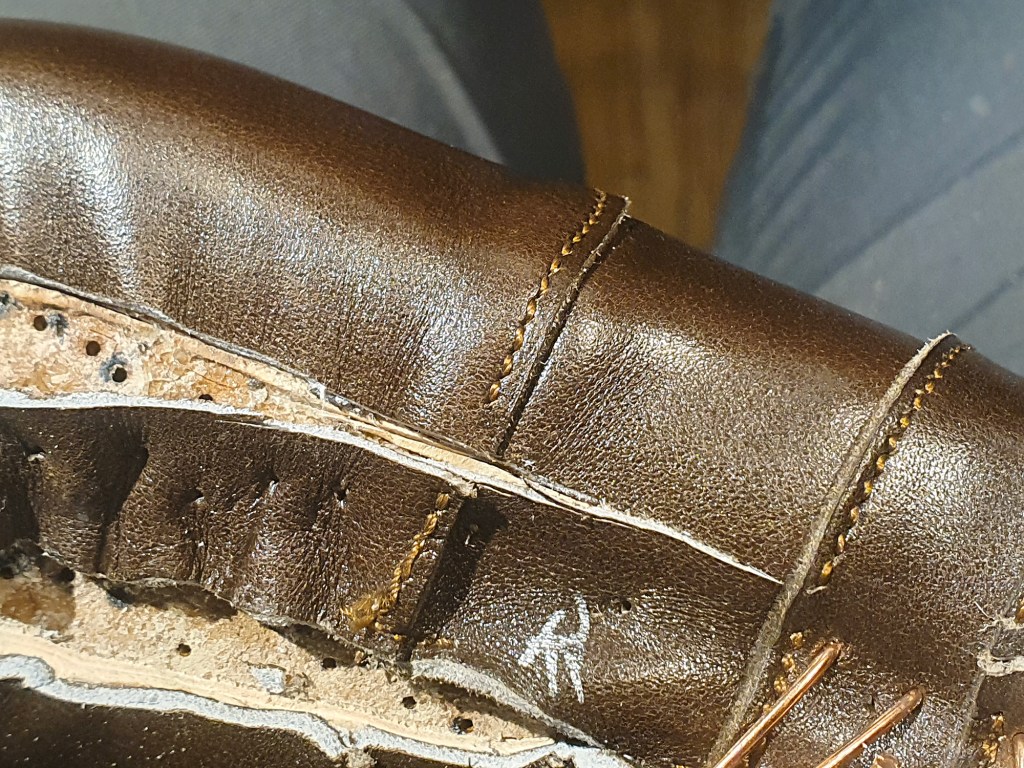
As can be seen at the edges that go in under the last, I have left each seam short from the edge. This creates a gap where there’s no thread, and I’ve then put in some extra stitching at the bottom. In so doing, I can last the uppers like usual without having the seams break, but don’t have to cut off any thread when trimming excess after lasting.

Fast forward a bit in the lasting process, I lasted ca 6 oz veg tanned stiffeners from Tärnsjö on top of the veg tanned lining. The stiffener lasted very moist with Hirschkleber underneath, I used an edge iron around the edge to compress the malleable stiffener around the holdfast. Hence, I can later trim away all the pleating easily once dry.

I carved the stiffener to follow the shape of the last.

The image below sums up how I currently do lasting. First, I last the lining separately. When I do, I’ve applied a little bit of Hirschkleber to the insole just around the toe and seat – but not at the sides. (I also do a crude pre-lasting of the upper at this stage with something like 3-7 nails, to help the upper start taking shape.) When the lining has set and the paste is dry enough, I last the toe puff moist with Hirschkleber, let it dry a day or two, and then trim it into shape.
When it’s time for the final lasting, I insert my dry, pre-made heel stiffeners at the back with Hirschkleber underneath. Following instantaneously, I glue in the prepared side stiffeners (skived on all sides). I only use glue at the heel, toe, and under the feather – nothing along the length of the side of the last.
Directly following the insertion of the side stiffeners on both sides of the shoe, I last the heels with more Hirschkleber on top of the pre-shaped stiffeners.
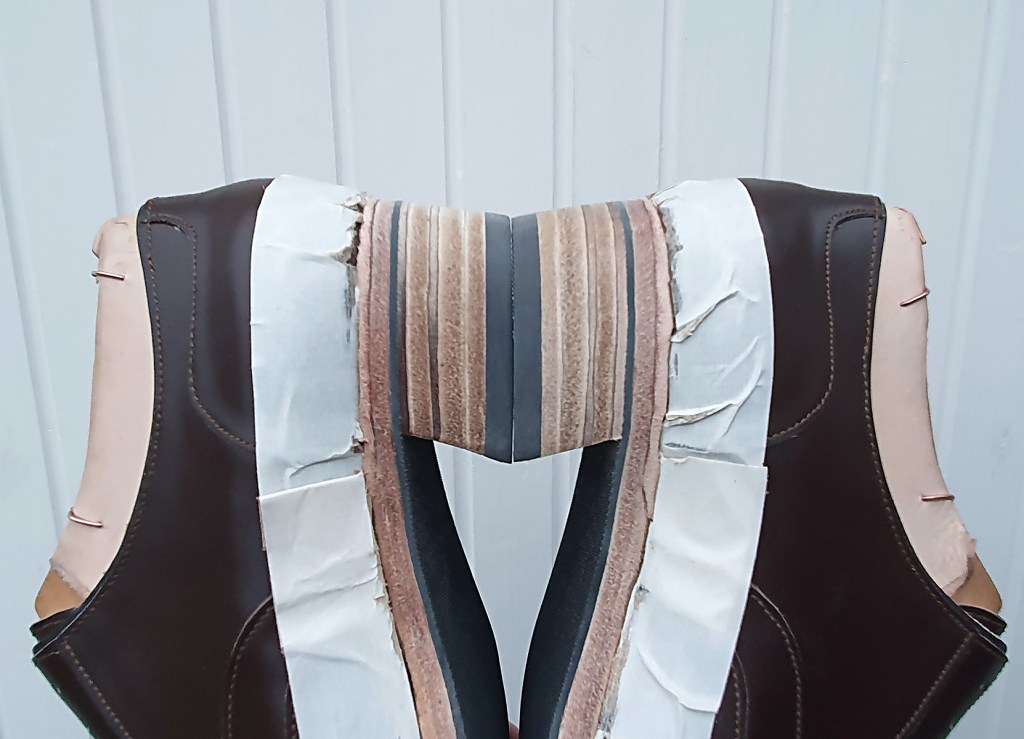
In this case particular case, the shoes were made with a seamless design at the back, which I quite enjoy.

As shown earlier on an upper, I took the time to make a little extra seam at the bottom of each line of sewing, creating a little gap in between where there’s no thread. This allows me to cut off the excess leather without harming the thread.
I pegged the seats and hand stitched the welt, using my usual welting leather. I work the welt into a flat shape while moist, so it ends up in a 90 degree angle from the feather.

At the bottoms, I put in some shanks and covered them with a thick veg tanned leather. I carved the shank cover to create a pointy ridge as shown below. With this kind of help from underneath (and certainly not much more, lest it would become bulky), I could proceed to create a razor sharp fiddleback waist, or just settle for a bevelled waist.
In this case, I settle for a bevelled waist, seeing as how I will slab some rubber sheeting on top of the leather outsole. Then I filled the footbeds, in this case with cork filler, because I was feeling lazy at the time.

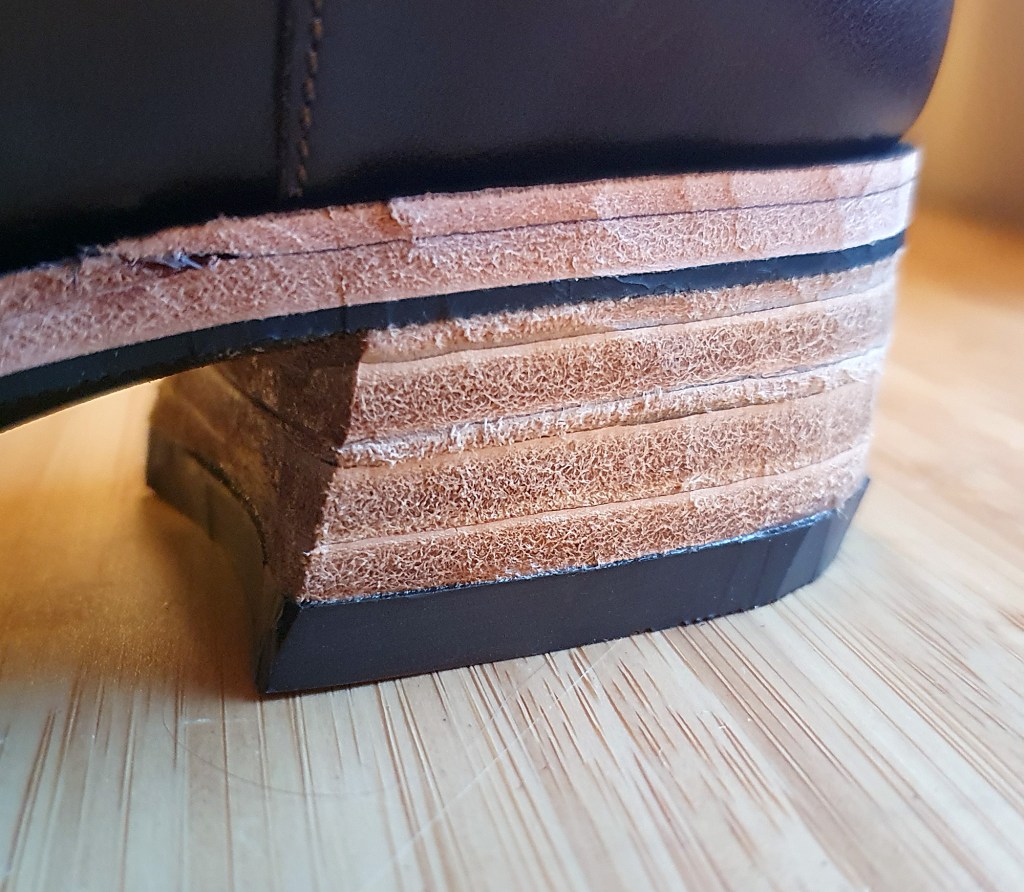
With the leather outsole in place, I hand stitched the soles with waxed polycord from Maine thread. I cemented on a 1.8 mm rubber sheeting, and decided to go for a somewhat aggressive heel shape. Here’s a heel once rough trimmed with a blade:
For finishing, I protected the upper with Tesa flooring tape. I find that this protects the leather from surface scratches, leaves no glue residue once removed, and takes no leather grain with it when removed.
Here’s the same heel a bit into the finishing, while sanding. After rasping the edges with a shoemaking rasp, I use super sharp shards of broken glass to scrape off the traces left by the rasp. With the heel edges slightly moist, I used sand paper from 220 grit, 280, 320 and then finally 400, always going in only one direction. Still experimenting a lot with my finshing process, not quite settled for one particular way to do it yet.

Making one heel is easy – trying to get a pair of heels to remotely resemble one another is a different challenge altogether.
And there we are, closing in on the finish line.
