Disclaimer: This post contains an old attempt at shoemaking, during the beginning of my journey. I really didn’t know what I was doing at this time, and the post is left online for archive purposes only. Please do not “learn” anything from it, as the post is certainly riddled with mistakes. It’s just a documentation on some of my thoughts as a beginner in this venture. For a more updated view of my shoemaking, please see my latest posts instead.
I’ve made a wholecut once before – Stockholm – about a year and a half ago. I felt it was time to give it another go this winter. This time, I’m opting for a dark brown textured leather of the same type as Stockholm. “Björn” is Swedish for “bear” (as well as a common male name), which I found suitable.
Since I used the same last as Stockholm (my good old Springline, ref. 977), I also used the same pattern. Here’s an image from the archives of the taped up last, in the summer of 2018 when the pattern was made.

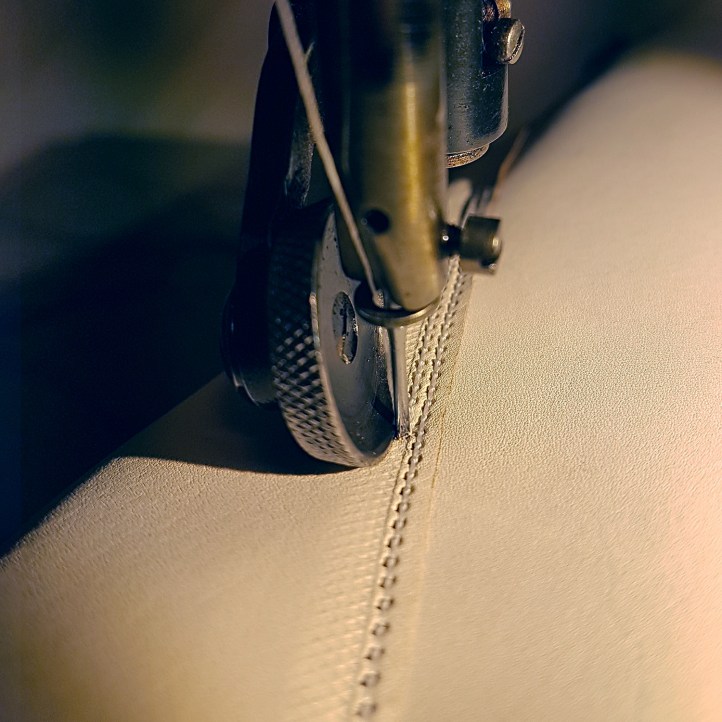
I recently got a new sewing machine – a Pfaff 193 of undetermined age. It has a wheel feed, which is a major improvement coming from my Singer 29 k.
I made linings with my trusted option of 2 oz veg tanned baby calf, and used Serafil 40’s thread to close them. (I have been advised that the thread tension was off in the image below, which I have since adjusted.)
Just like on my previous two pairs (Ambassador and London), I used ye olde German method for making heel stiffeners, with some slight adjustments. I really like this method, as it’s very easy and produces a great result at the same time. The leather used for heel stiffeners was 8 oz Tärnsjö leather, skived and molded like below.

The upper leather is as said textured, 4 oz “dollar” printed calf. It’s quite stretchy and easy to work with. Here’s a lasted toe:

As usual, I let some lining leather stick up while I last the shoes and nail that lining to the lasts, so I can really trust the alignment when I’m lasting them. I also use thick leather strips as face protectors, to avoid creasing the leather with the lacing.
Here’s Björn lasted for the final time, with all the stiffeners in place. I used 8 oz Tärnsjö leather for heel and toe stiffeners, and 4 oz italian calf side for side-stiffeners, connecting the heel and toe stiffeners.

Below is shown how I welt these days. Prior to the step below, I last the lining slightly moist, so that it retains its shape. I do not glue the lining to the insole at any point. Skipping ahead a bit, when I last the upper leather for the final time (stiffeners in place and all), I do glue the upper leather to the lining using Hirschkleber, administered only below the feather. That makes uppers and lining bonded together.
I then trim the upper and lining to extend just over the holdfast of the insole, like shown below. Then I welt, and first after I am done welting do I trim the rest of the upper and lining leather.

So, it looks like this when I am done welting and have trimmed off the excess – first then the actual holdfast appears again.
Below, the cut away leather strips of the holdfast channels have been put back into place, as to level out the surface and avoid unwanted space. (The Tärnsjö leather rands were pegged in two rows prior to welting.)
This is a terrible photo quality, but I taped up a plastic shank and surrounded it with cork before doing the bottom filling.

The shank was then covered with hard outsole veg tanned butt, which was pinned while moist and then carved into shape while dry a day or two later. Then I filled the footbed with tar felt.

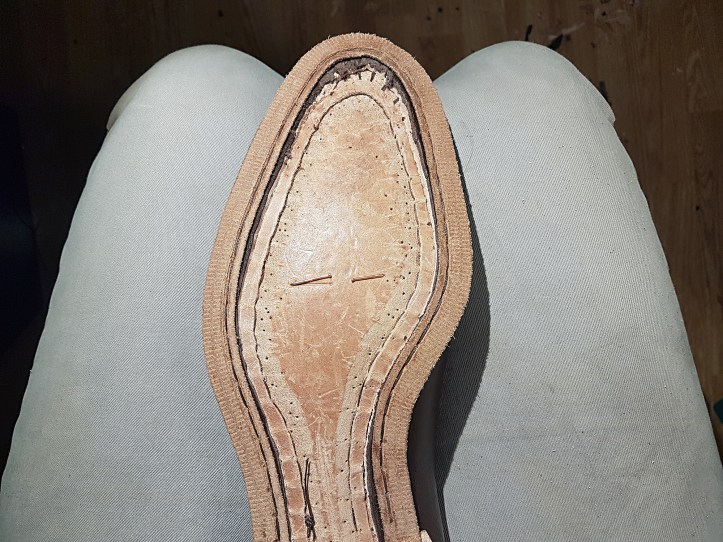
I cemented on some J. Rendenbach outsoles and did my usual job with the outsole seam. This was my best attempt thus far, producing a result as shown below (before trimming the edges).

The image below shows the fiddleback waist decoration after the outsole seam had been made and the flap closed. I of course made the general shape of the fiddleback just after cementing the outsoles on (before starting to sew), but I do like to go back after closing the flap to make sure the fiddle looks sharp.

“So anyway, I built som heels and finished the shoes.”
Finishing is indeed a rigorous practice – perhaps the most meticulous in the whole shoemaking process. At some point in the future, I will write in more detail about my finishing process.

