Disclaimer: This post contains a very old attempt at shoemaking, during the very beginning of my journey. I really didn’t know what I was doing at this time, and the post is left online for archive purposes only. Please do not “learn” anything from it, as the post is certainly riddled with mistakes. It’s just a documentation on some of my thoughts as a beginner in this venture. For a more updated view of my shoemaking, please see my latest posts instead.
At last, Ericsberg is born into the world.
This page is a summary of the finished shoes – in Part 1 and Part 2, I display in detail how they were made. Furthermore, it may be read here how the solid lasts were destroyed in order to free the shoes…

Construction: handmade with hand-held tools
Last: Springline 977, size UK 10F
Uppers: 4 oz vegetable tanned calf side, hand painted
Lining: 2 oz vegetable tanned baby calf, crust
Top beads: 1 oz chrome tanned baby calf, black
Insoles: 12-13 oz vegetable tanned calf butt
Insoles (sock liner): 2 oz vegetable tanned baby calf
Outsoles: 10 Iron vegetable tanned J. Rendenbach
Toe/heel stiffeners: 5 oz vegetable tanned calf shoulder
Rand and welt combo piece: 5 oz vegetable tanned calf shoulder
Shank: Plastic
Heel lifts: 12-13 oz vegetable tanned calf butt
Top lifts: vegetable tanned (1/4 rubber) J. Rendenbach

These thick heel lifts made from outsole calf butt were much easier to burnish nicely. There are many improvements to be made, and for future heels I will use a finer grain sandpaper before burnishing.

The curvature of the closed channel outsole:
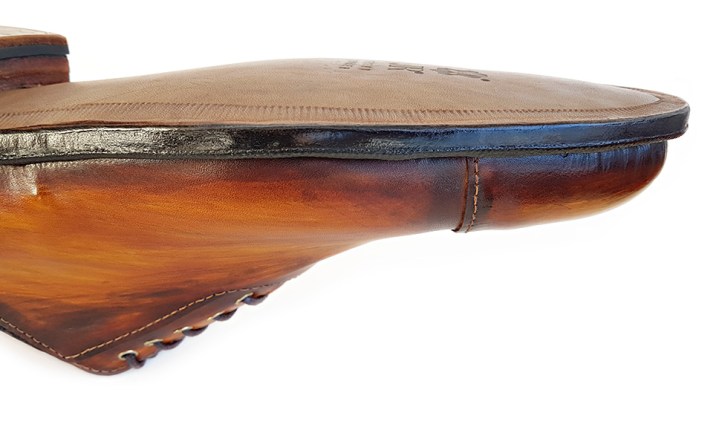
I wasn’t careful enough with the water while opening and closing the outsole channels, which can be seen in the end results. This is yet another feature to perfect for future shoes, although it only matters before the shoes have been walked in…

The vibrant coloring against the grayish wood reminds me that it’s time to re-oil the porch…

The shoes fit, and I took Ericsberg for a quick stroll in the evening sun.


Snygga!!!
LikeLike
Tackar!
LikeLike