Disclaimer: This post contains a very old attempt at shoemaking, during the very beginning of my journey. I really didn’t know what I was doing at this time, and the post is left online for archive purposes only. Please do not “learn” anything from it, as the post is certainly riddled with mistakes. It’s just a documentation on some of my thoughts as a beginner in this venture. For a more updated view of my shoemaking, please see my latest posts instead.
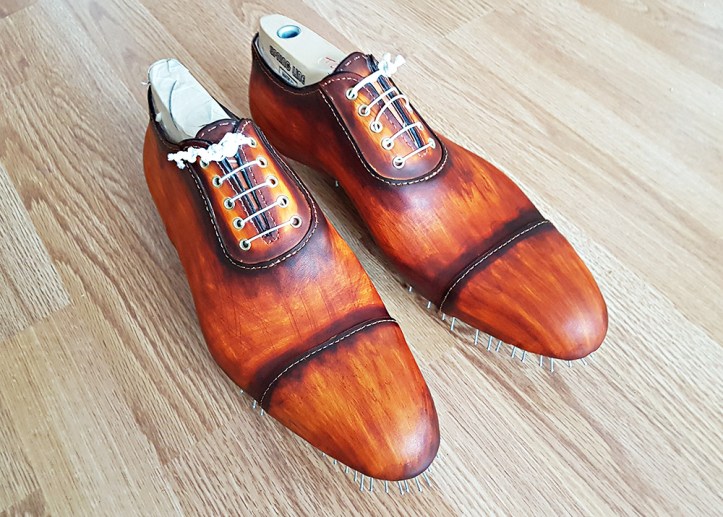
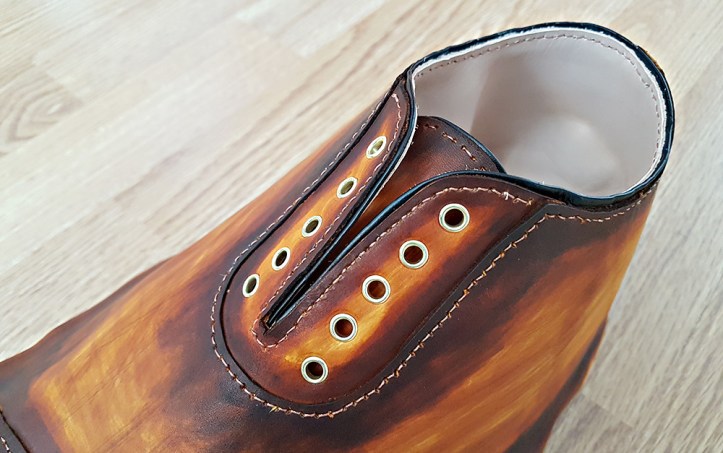
This is Ericsberg, named after the 17th century castle outside Katrineholm. It’s a vibrant yet classy cap toe adelaide with a ‘whole cut feeling’, made with hand painted vegetable tanned uppers and lined with veg tanned baby calf.
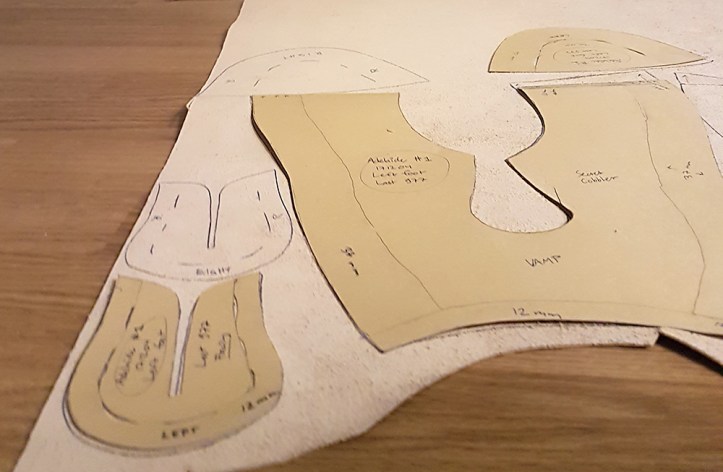
This pair has been in the making for some time now. The patterns were made three months ago, on december 4th 2017. After clicking in early december, I put the pair aside for various reasons to instead work on Gripsholm.
I made the initial design with brouging in mind, but reconsidered during clicking. I simply figured that skipping the brouging altogether would give the shoes a little more class, which I desired to balance the zesty coloring to come.
The leather used for the uppers is 4 oz (1,6 mm) vegetable tanned calf.
The reason why I let this pair rest for a couple of months was that I couldn’t quite figure out how to put the pieces together nicely at the heel. Eventually I stopped overthinking it and just had a go at it.
As for coloring, I cemented the uppers together and painted them before stitching. I first coated the entire shoes with Fiebing’s leather dye in the color tan, using a regular Fiebing’s dauber. Even though the initial coat covered all of the leather, I made sure to keep the coat very thin on the areas I wanted brighter, and went for a progressively richer amount of dye on the areas I wanted darker. I didn’t use any particular technique, but rather winged it as I went along, using no color mixing and no instrument save for the dauber. To complete the desired effect, I used Fiebing’s leather dye in medium brown, but only on the darker areas, applying a thicker coat where I wanted the darkest result. The result turned out pretty cool:
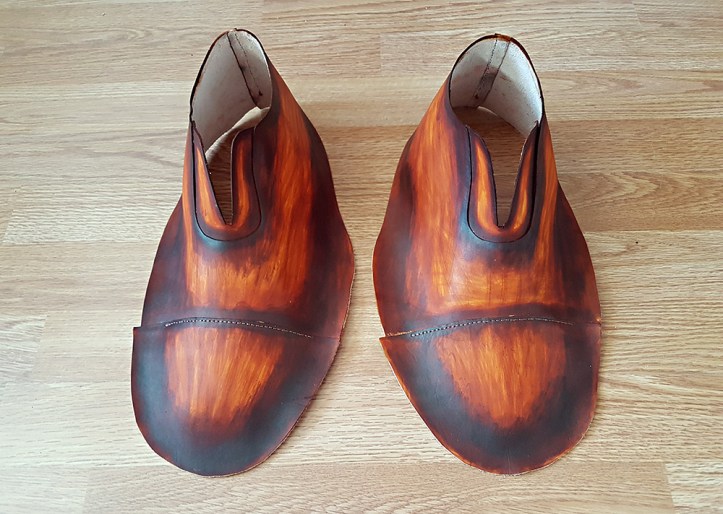
The color transitions could certainly be made far smoother using fancy techniques, air brushing, or mixing dyes in various shades of brown before applying in several thin layers. I wanted the result to be a bit blunt, and really look hand painted. When these shoes are polished with Saphir products after finishing, I look forward to an irregular and lively color depth.
The uppers were closed using bonded nylon thread in a suitable shade. I lined the pair with 2 oz vegetable tanned baby calf crust leather, made tongues out of the same leather as uppers and lining, and used 1 oz black baby calf to make top beads. (The top beading is the only element of Ericsberg that is made with chrome tanned leather, for the simple reason that I didn’t have enough vegetable tanned lining leather in stock at the time to make veg tanned top beads. The 4 oz calf used for the uppers would be too thick for my taste to make top beads with.)
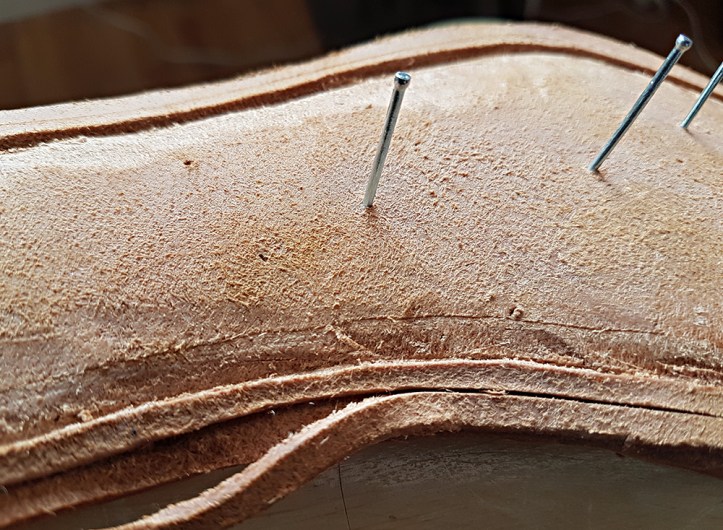
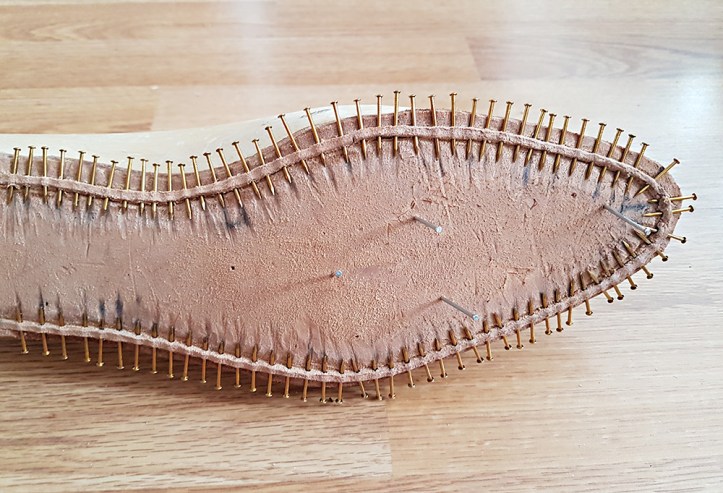
Then it was time to make insoles. I traced around the last bottom patterns on a veg tanned 12 oz calf butt, and trimmed the insoles tightly before nailing them onto the lasts. I hope it won’t affect durability, but one of the insoles were cut out from the piece of butt where the calf was branded. It won’t be visible of course, but to me, the mere knowledge of it being there gives Ericsberg an added aura of authenticity.

As faithful reader Antoine of Paris has pointed out, I thus far haven’t made any holdfasts on my insoles. Inspired by our interaction, I decided to give this a go. Keeping the insoles moist, right after nailing them to the lasts, I cut out an elevated channel around the insole. I started with cutting the innermost line of the holdfast straight down into the leather. Then, holding the knife at an angle, I cut around the inner perimeter to create an elevation of ca 2 mm on the inside. When that was done, I cut the outer perimeter of the holdfast straight down into the leather, making the holdfast ca 2-3 mm in width. Then, working from the outer edge of the insole, I completed the holdfast by cutting off ca 2 mm of leather around the outer perimeter. Here’s a picture from the last step of the process:
I ran a screwdriver along the sides of the holdfast for good measure, and brushed off excess leather. This produced the following effect:
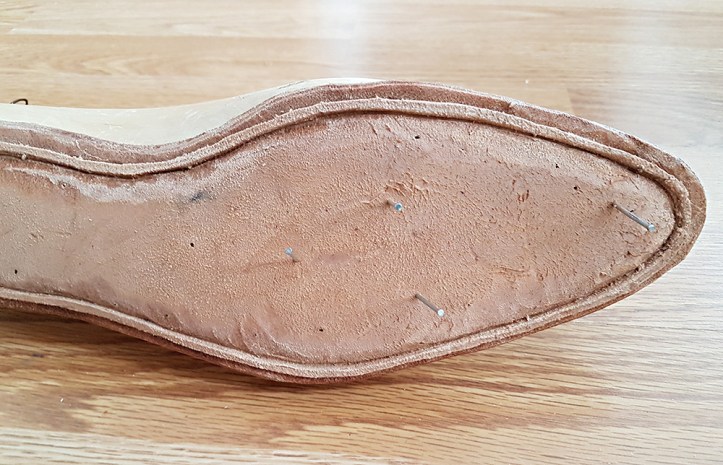
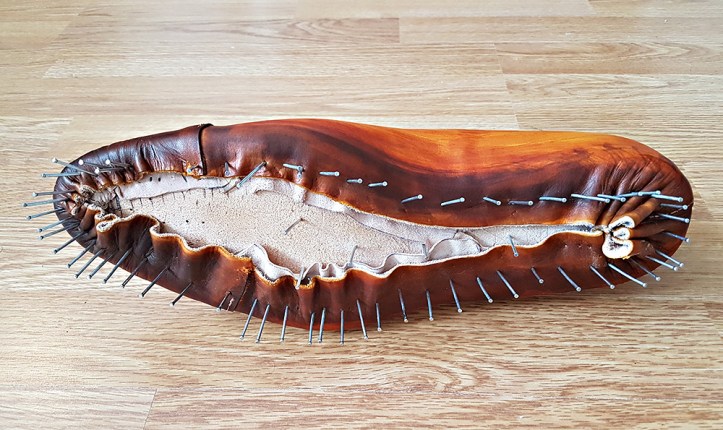
Using a curved awl, keeping the leather moist with water, i started making holes in the holdfast from the inside and out. Once a hole was made, I popped a small nail in there, to force the leather to dry around the hole and not sink back down on itself.
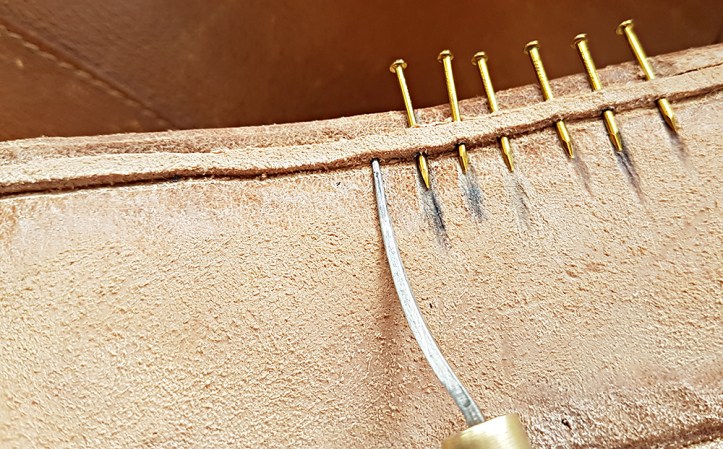
I’m not entirely certain whether it’s crucial to stick nails in like this, but I do think it helps. At any rate, it sure looks cool.
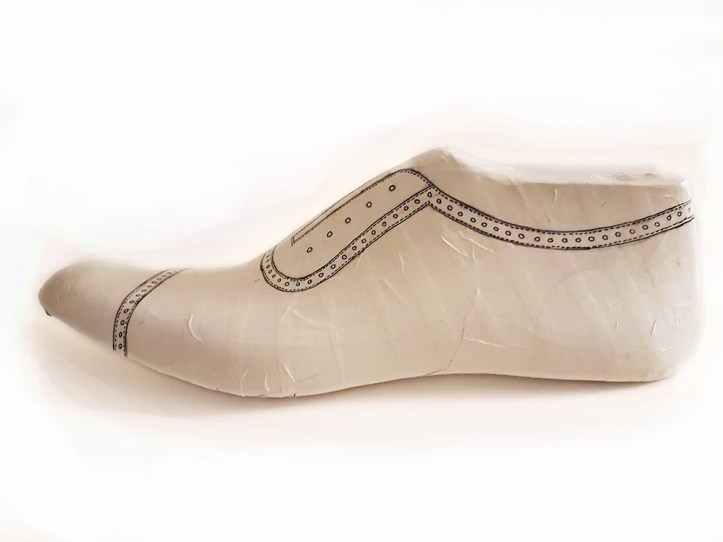
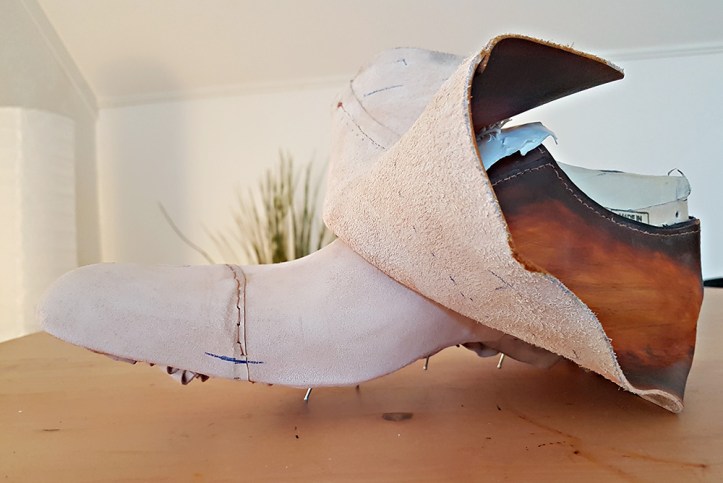
Once the insoles had dried completely, I removed the temporary nails and lasted the lining only. Here’s an image of the lasted baby calf lining, with the uppers flipped up. At this stage, the shoe resembles an alien spacecraft ready to take off.
As usual, I used 5 oz veg tanned shoulder leather for toe puff and heel counter. I took this opportunity to try making an elongated heel counter, in comparison to the heel stiffeners I’ve done in the past. I made these heel counters ca 4 cm longer than I’ve done before (ie, about 2 cm longer on each side), and have a good feeling about it. The shoulder leather was soaked in lukewarm water for about 15 minutes before lasted with Hirschkleber underneath.

I let the toe and heel stiffeners dry thoroughly before proceeding with the final lasting. I cut off excess from the dried up stiffeners, leaving ca 15 mm excess around the heel and almost no excess around the toe. While the shoulder leather was still dry, I carved it up with a knife as if I was carving wood, to create a smooth shape for the uppers to follow. Then I moistened the stiffeners, hammered them gently, and painted them with a good amount of Hirschkleber before lasting the shoes for the final time. Note to self: don’t attempt to paste the toe and heel counter at the same time before lasting, as the paste starts to dry quickly and I’m just not that fast. Paste and last the toe completely first, then paste and last the heel and rest of the shoe.
I also moistened the vegetable tanned uppers prior to lasting with lukewarm water, and re-moistened them with hot water once lasting was done. The lukewarm as well as hot water makes the leather shrink around the last, creating a tightly lasted shape.
And so it was that Ericsberg is taking shape: