
In reality, there are hundreds of little steps required in making a pair of handmade shoes. In order to not have to take and comment hundreds of images, I’ve concentrated on the main steps in the images below. The shoes are not quite done at the time of writing, but they’re not far from it.
Improvements/Experiments – Part 2:
In addition to the improvements/experiments listed in Part 1, I also did the following differently from the practice pair:
- Dying the rand and welt before attaching.
- Using full length pegs while pegging, and cutting off the protruding piece of peg once hammered down.
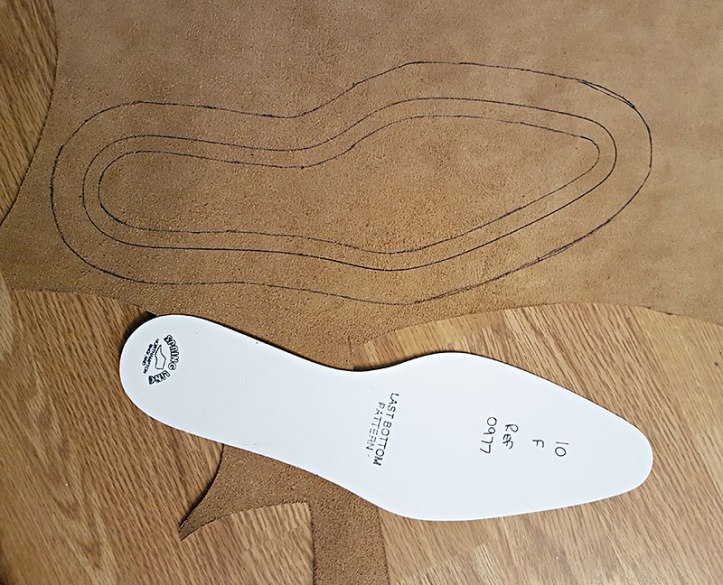
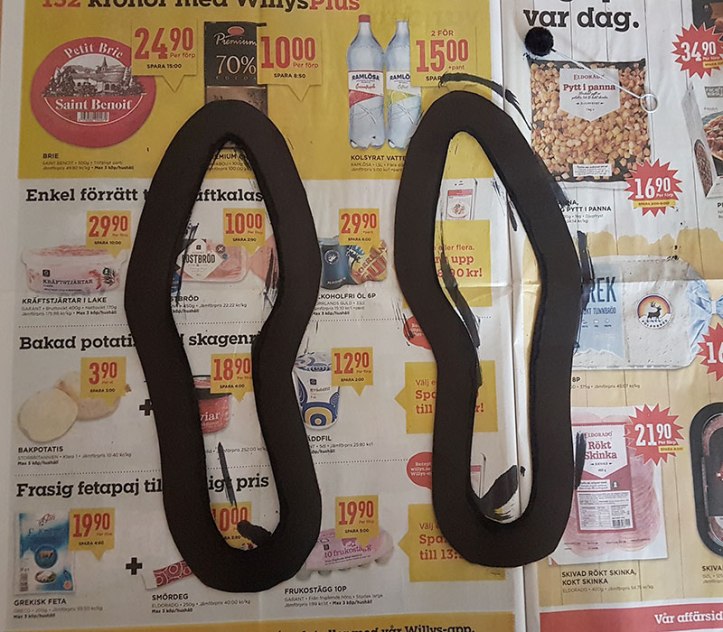
- Making a curved welt that follows the shape of the last bottom pattern, and attaching it grain side facing up.
- Making a bevelled waist. Almost fiddleback, and a great learning experience.
- Hiding the outsole stitches by cutting a flap from the outside an in, instead of opening a channel in the middle of the outsole. This was much harder, but has the potential to look much nicer.
- Horse-shoe shaped second and third rands, to even out the heel.
Without further ado, here is the current progress.
Nails removed from the heel and excess leather cut off:

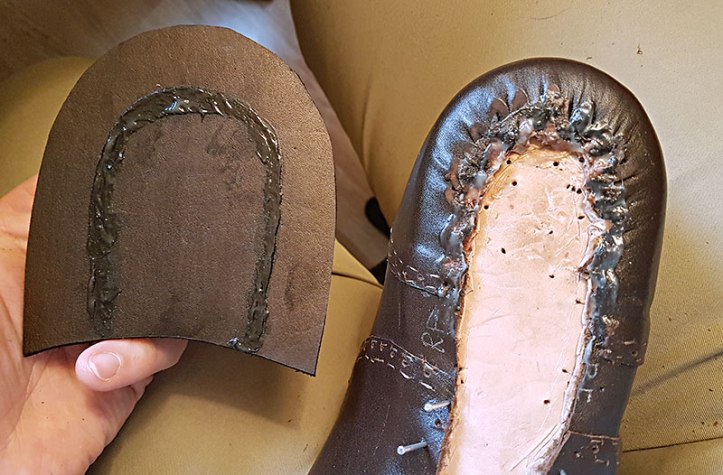
Cementing the first rand, grain side up:
Peg hole awled, wood glue applied, first peg gently put in place:
Peg hammered in next to a full length peg:

- The protruding part was cut off and hammered down.
Fully pegged rand:

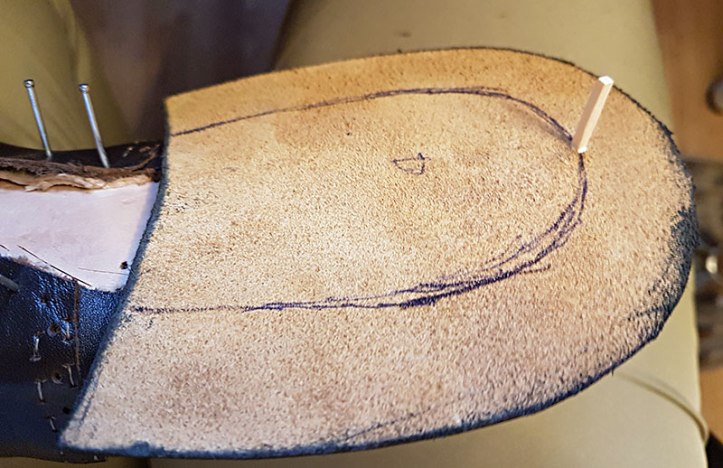
Preparing the curved welt:
Welts dyed black, grain side up:
Welting the uppers and lining:
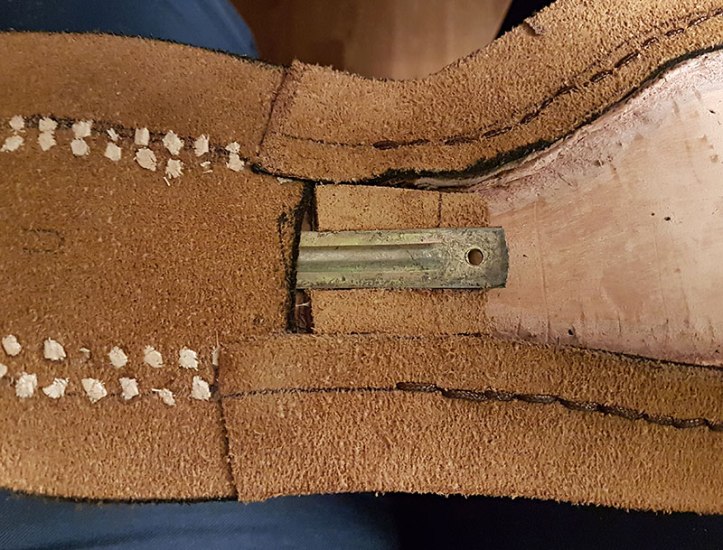
Welting the uppers completed, shank put in place:

Shank built in with two layers of shoulder leather on each side:
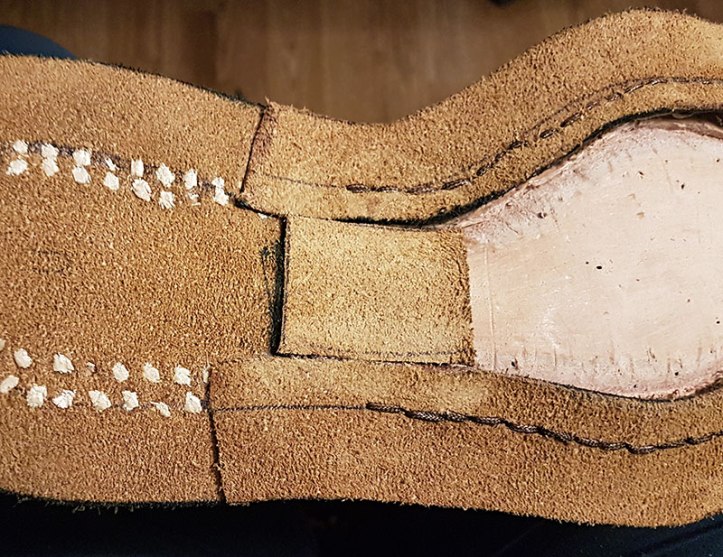
Shank covered with shoulder leather:
Footbed filled with three layers of 2 mm sheet cork, cemented between each layer:

Three skived layers of shoulder cemented to the waist:

Outsoles carved and sanded around the waist, nap side:

Cementing the shoe and outsole:

Outsole cemented and hammered into shape:
Excess outsole carved off:

Starting to slice up the outsole:

Slowly building a flap from the outside and in:

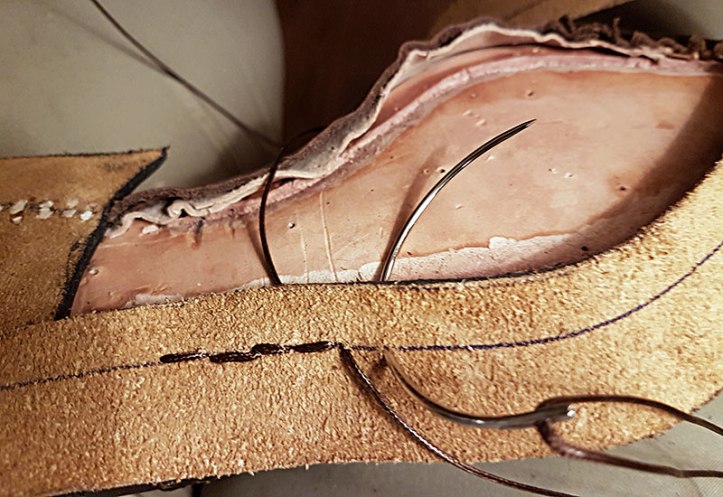
Welting the outsole:
Channel closed, second and third rand added and skived:

- Making the flap was hard – I couldn’t do it entirely without mistakes in this first attempt. The darkened area that emphasizes the waist is darkened entirely by hammer, ie no dyes.
Preparing heel lifts and extra rands:

Putting the heel lifts together with Hirschkleber, pressed between heel blocks:

How this all turns out will be shown in the summary.
