Long have I wanted to make and have this shoe, and now the time has finally come. This will be a cap toe oxford with lots of broguing, made in scotch grain calf from Tannerie d’Annonay. It’s dubbed after Sherlock Holmes, simply because it feels like the type of shoe he’d wear.
The shoes will be built on a new pair of lasts, adjusted for my feet with a higher arch. I made the pattern design on september 4th:

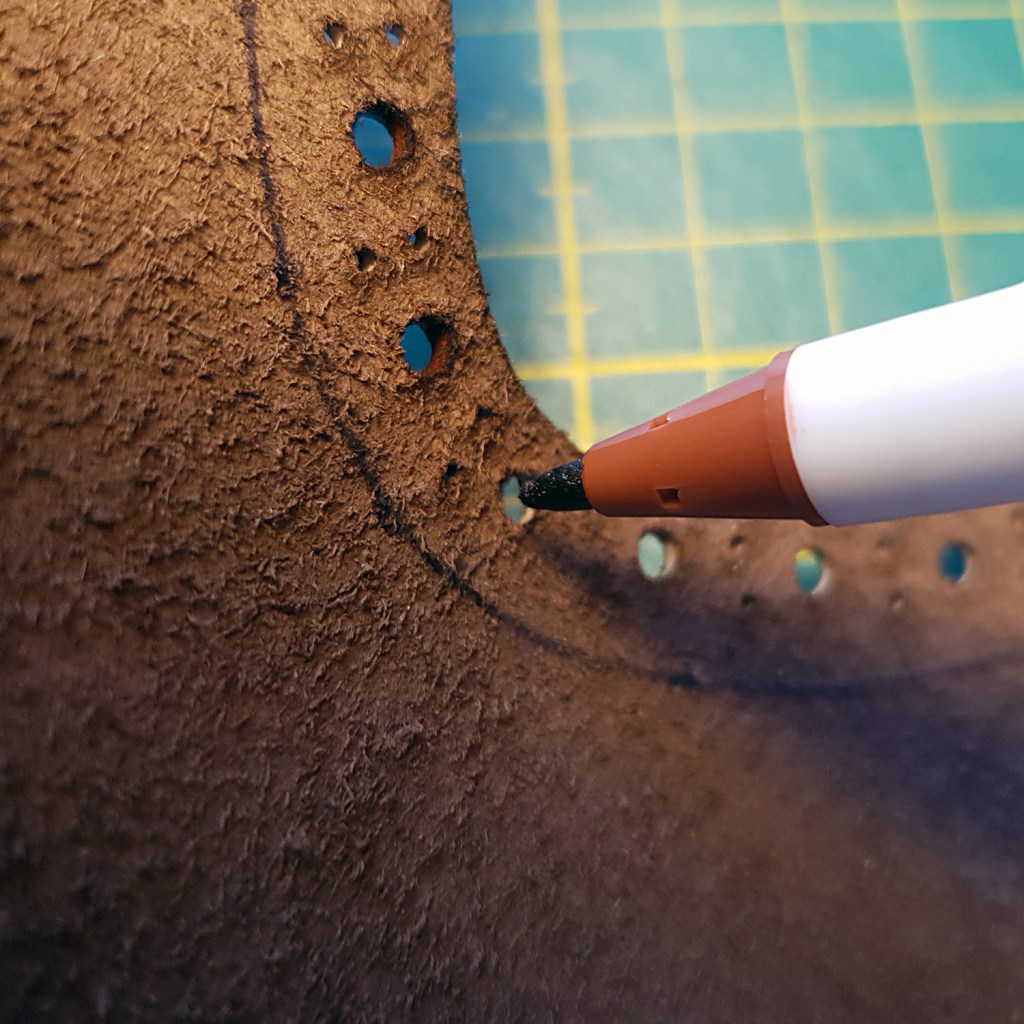
I was advised to use a sharpie to fill in the brogue holes from the inside of the shoes. This worked rather well. (I only did this with the large brogue holes.)
I draw a line on the inside of relevant parts, corresponding to the exact amount of overlap I added in the patternmaking. This helps me to align the pieces perfectly when gluing them together.
(The leather part depicted below is of lesser quality as it’s from a non-premium part of the skin. On the premium areas, the flesh side of the leather has a super nice finish.)
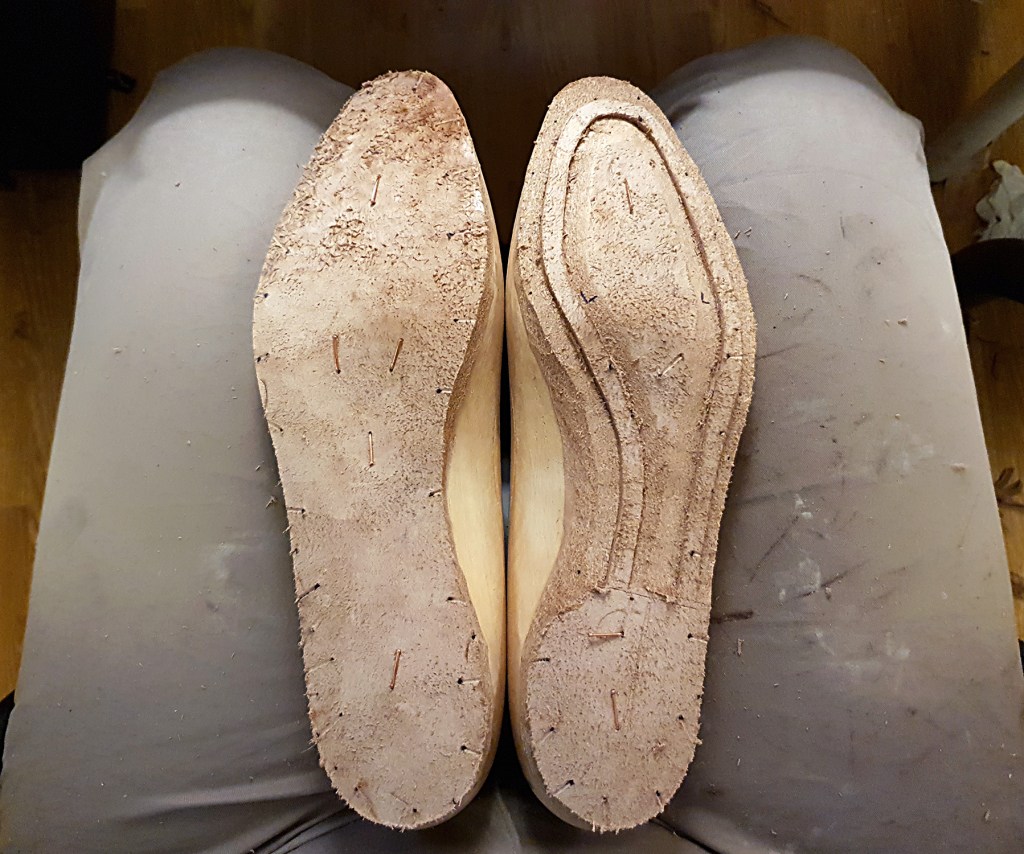
I carved the insoles with my favorite insole leather from JFJ Baker. As usual, I don’t use any special plough to carve them, but prefer a straight blade. I just feel like a straight blade offers more control than a plough, although it’s also riskier. I cut the inside perimiter of the holdfast in one go so I can save and re-insert the cut out leather strip at a later stage.
It is probably due to the risk of cutting through the insoles that I really like this 7-9 iron insole leather: it’s super thick, which aside from durability also offers confidence when working with it. I also find that the thickness makes it important to let the insoles dry completely before carving them. Leather expands while moist, so if trimmed while still moist they risk shrinking in under the feather. Since this leather is extra thick, it can take extra much water, which makes it swell extra much – which makes it shrink extra much. Thus I let it dry for two days before making the insoles, whereas one day has always been enough with more slender insole leather.
Closing the uppers, I always make little test pieces from scraps with the exact materials used, before I start sewing. Since I always make the test pieces new together with the uppers, they enable me to check that the glue is completely dry, and of course to adjust the thread tension. (Trying to sew before the glue is completely dry is asking for all kinds of trouble.)
Depicted below is a test piece for the opening of the shoe, where I’ve inserted beading/piping between the upper and lining. I usually do this instead of adding a fold-over margin to the opening of the upper pattern.
I make the beading by cutting out a ca 20 mm wide strip of a thin leather (preferrably 0,5 – 0,6 mm in thickness), skiving it along both sides, and gluing it shut. When folding the beading, I let one side stick out a 3-4 mm, as to utilize the skiving on both sides. This prevents any edge from showing through the upper leather. (And as you can see, the thread tension was off during this test – which makes me happy it was a test and not an actual shoe.)

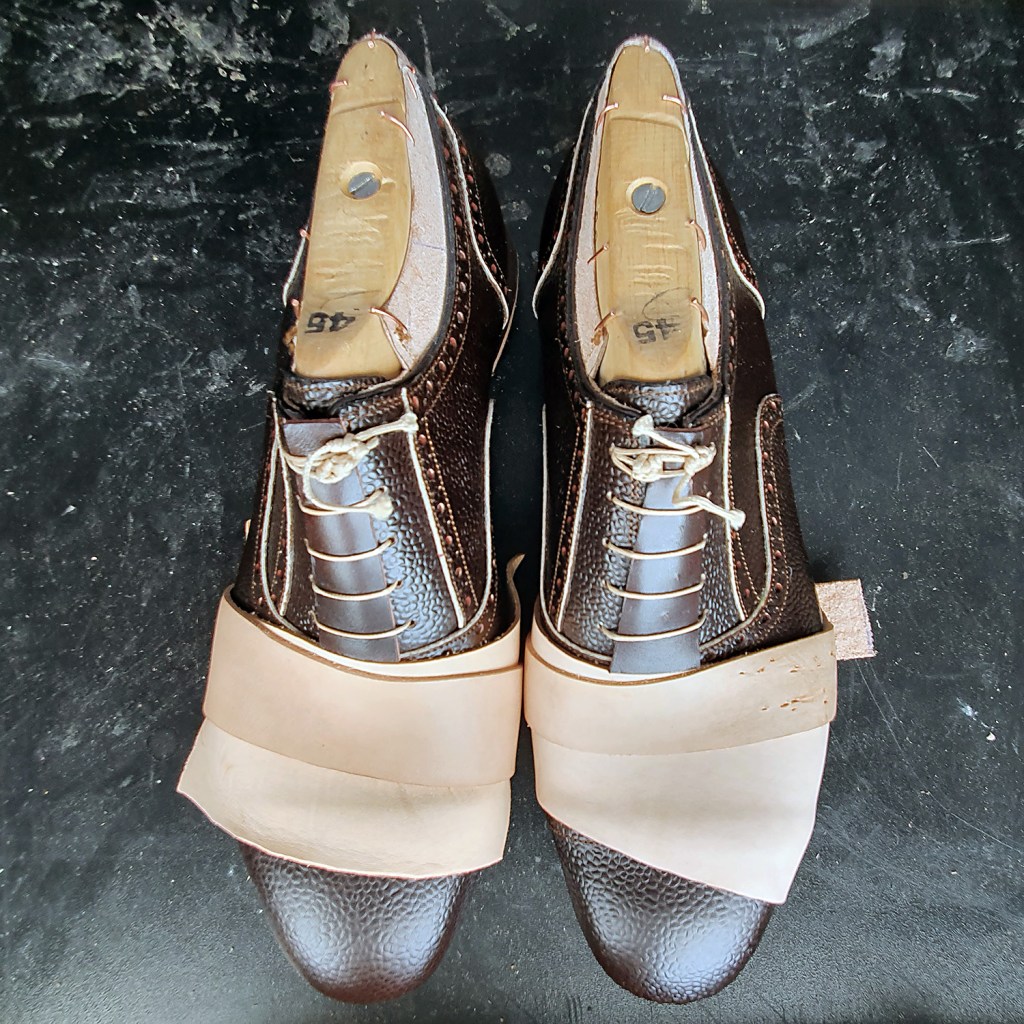
And here we are: a pair of uppers completed. The beautiful upper leather is sourced from Kolde leder.
For lining, I’m using my usual veg tanned baby calf, but this time I have tried dying it with Fiebing’s pro dye. This really is an experiment, and I have no idea how it will fare with light colored socks. In a test environment, I can soak the dyed leather wet and then rub it with a white cotton cloth without catching any of the dye onto the cloth. What happens during actual use, time will tell.

When lasting the shoes, I always last some additional leather on top as to really help the shoes to hug the last. Here they’re lasted for a final time, with veg tanned stiffeners glued in with Hirschkleber at the toe and heel.
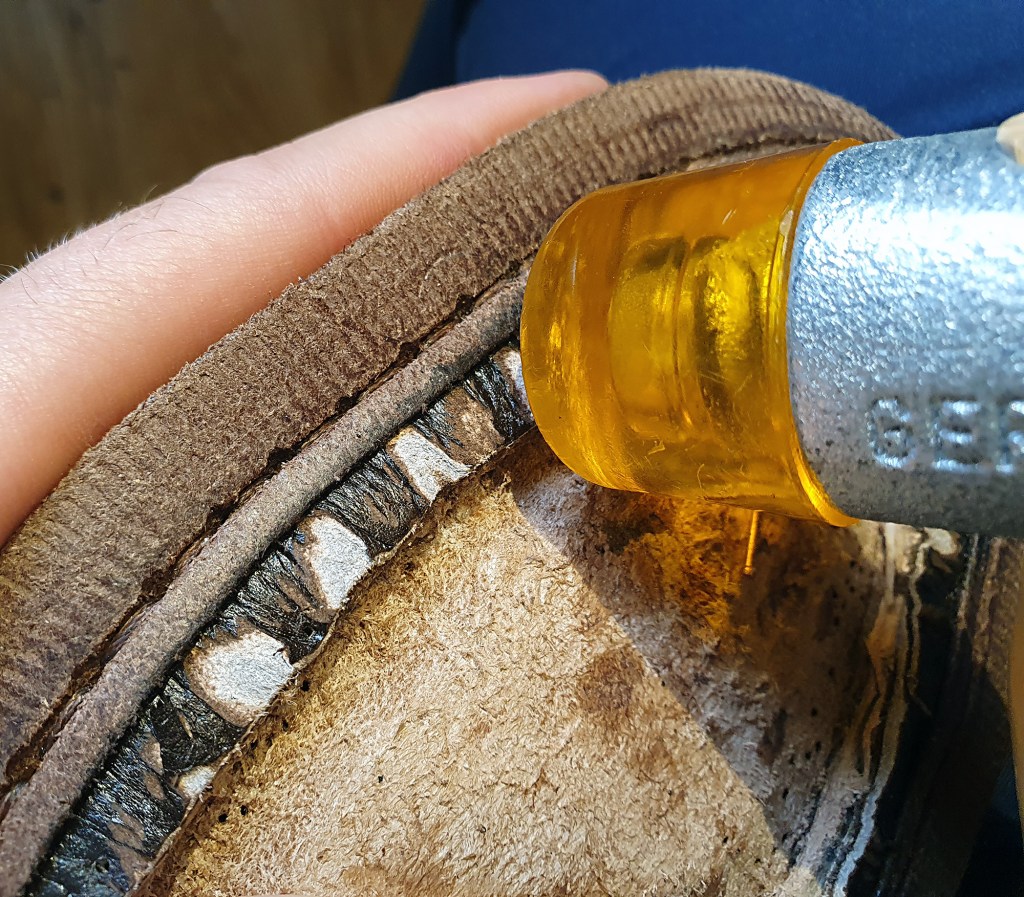
I use welting leather from Leather & Grindery, which I dye to my desired color before welting with Fiebing’s pro dye. After the dye has dried completely, I soak the welt in water for at least 10 minutes before getting to work. Just before I get to the toe, I often re-wet it a bit as to really keep it moist and workable. Once welting is completed, I hammer around the welt with a rubber hammer, supporting the welt with my finger like below (in lack of a welt beater tool).
Then I trim the upper and lining away, separately as to keep control and not cut through the thread or insole. I do an aggressive trim, and this is a delicate step – screwing up here could be fatal for the shoe. Once this step is done I hammer the welt again to really flatten it.

Here’s a view from the side of the welt – it’s quite satisfying to get it so flat.

I re-insert the cut away strip of insole, which gives me a flat surface to work with. This is especially nice as I like to fill the footbed with tar felt.

I pop in a shank, pin some moist insole leather on top of it, and trim it once dry. (The shank cover also needs to be partly trimmed while inserting, so that it will fit at all.) If I’m sloppy while trimming and take away too much leather, I squeeze some cork filler into the created cavity once everything is dry. (Seen below at the heel).

I slabbed on some 3,8 mm outsole leather to stitch to the welt. This would be a fine outsole on its own (albeit a bit slender for this shoe size), but I will later cement Dainite outsoles on top of it, giving this pair very sturdy soles in all. (Hand stitching through the rubber outsole is just not done.)
I stitched it at 9 stitches per inch, with 3-ply waxed polycord from Maine Thread & Co. This is easily my favorite thread for the task.

Since I will cement rubber outsoles onto these leather ones, I’m using an open channel instead of a closed channel stitch. I roughed up the leather before stitching, so it will take the contact cement better. Here’s a view from below:

After completing the stitch, I ran a fudge wheel on the thread to give it a preliminary shape.

Then came the rubber outsoles, heels and finishing. This is of course a rigorous process, but this is the last image shot during construction, using a shoemaker’s rasp to rough trim the edges:


This blog is s simply fantastic! Incredible to see your journey, and I must say, your last several shoes are simply breathtaking pieces of art! The time and effort has truly paid off! Can I ask where this final rounder last is from? It is just a gorgeous shape and this blog has given me the impetus to try my hand at the process! Bravo once again sir!
LikeLike
Thank you kindly – that’s very nice to hear! It has indeed been a rewarding learning experience, with developments between each and every pair – and still so much more to explore and learn. This particular last (which I also made the shoes “Dragonwing” and “Java” on), is a heavily modified old vintage last, that I bought second hand and modified myself for my feet. The modifications are mainly made with leather and milliput – an excellent two-component modelling clay that I just love to work with for some such operations. So alas, I can’t direct you to where to score something similar – but I can recommend Springline Lasts in the UK. They have some very nice options and offer student/amateur discounts even on single pairs.
I wish you the best of luck getting started!
LikeLike