Disclaimer: This post contains a very old attempt at shoemaking, during the very beginning of my journey. I really didn’t know what I was doing at this time, and the post is left online for archive purposes only. Please do not “learn” anything from it, as the post is certainly riddled with mistakes. It’s just a documentation on some of my thoughts as a beginner in this venture. For a more updated view of my shoemaking, please see my latest posts instead.
After having made two oxfords shoes (Wenngarn and Waxholm), I figured it was time to try my hand at making a derby. This shoe is named after the 16th century castle in Mariefred, Sweden.
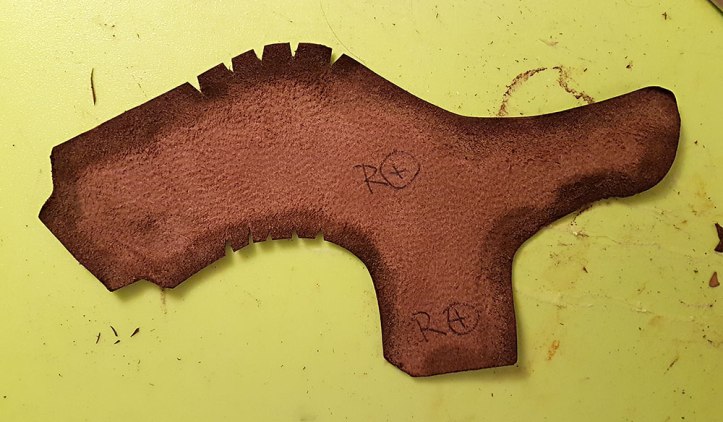
I forgot to take a picture with the tape pattern still on the lasts, so here is an image of the cardboard patterns in construction.

A derby requires a slightly different construction method than an oxford. Because the face of a derby shoe is disconnected from the vamp, the uppers need to be closed a slightly different way, and the shoe cannot be lined like an oxford.
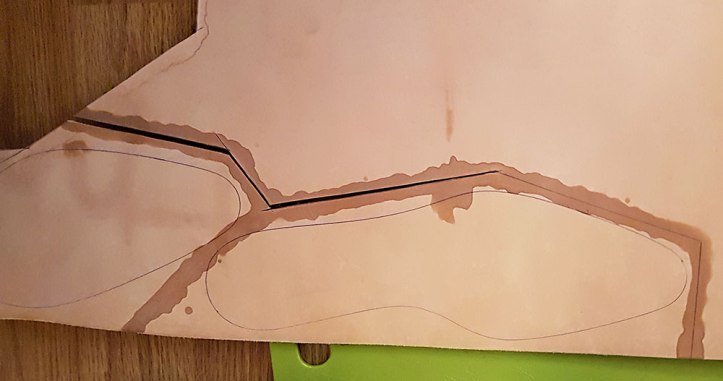
As can be seen in the cardboard patterns above, I allowed some extra margin for the quarter/face-pieces, to fold the leather over instead of making separate top beads. While trying this out in practice, I learned that I needed a bit more than a 5 mm margin for this leather, and cut out new pieces with slightly more margin. As displayed below, I cut them up along the sides like I was making top beads. (After the image below was taken, I cut them up even more as they were quite tough to fold.)
Since I made the design of the facings rather slim, I realized at this point that my original idea of brouging around the face would become very tight. As a result, I simply skipped the brouging everywhere save for on the cap toe. The pieces were lined with vegetable tanned baby calf.

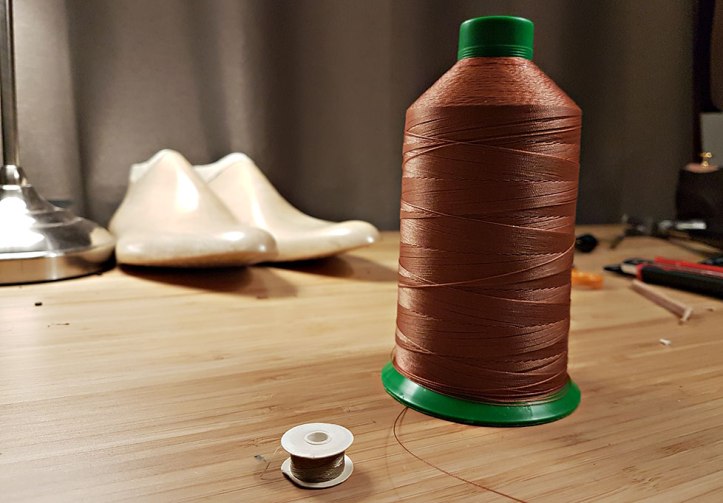
For sewing the uppers, I used my new bonded nylon thread, which came on a slightly larger spool than the unbonded nylon thread I had previously used…
The tongue of a derby needs to be cut out together with the vamp. As I went for such a slick facing, this left me with very little space to make an intact tongue. Hence, I only left a V-shape on the vamp to build the tongue on, and sewed on a separate piece below. The tongue now slightly overlaps the sides of the shoe, which will be solved while lasting. Not only was this a practical solution to a problem – it looks like a conscious design feature.
When the vamp and toe were sewn together, I also glued on a single piece of veg baby calf lining that was shaped like the vamp and toe pieces together. (It was clued only along the edges of the vamp that will meet the face pieces.)

Here the faces have been glued into place, and holes have been prepared to sew them.

Uppers closed:

To make the insoles, I drew around the last bottom pattern on some 12 oz vegetable tanned calf butt. As can be seen below, I cut the pieces out with some excess in as straight lines as possible, and moistened a path for the knife to make it easier.
I then trimmed the pieces down further – not to their finished shape, but still leaving some excess.

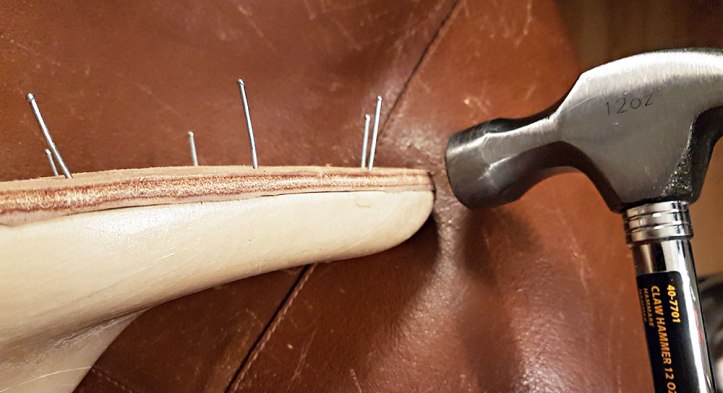
The insole pieces were bathed in lukewarm water for a good 20 minutes before being nailed to the lasts. Just leaving a little excess (instead of putting too big chunks on the lasts), made it much easier to fine-tune the edges on the lasts with a blade.
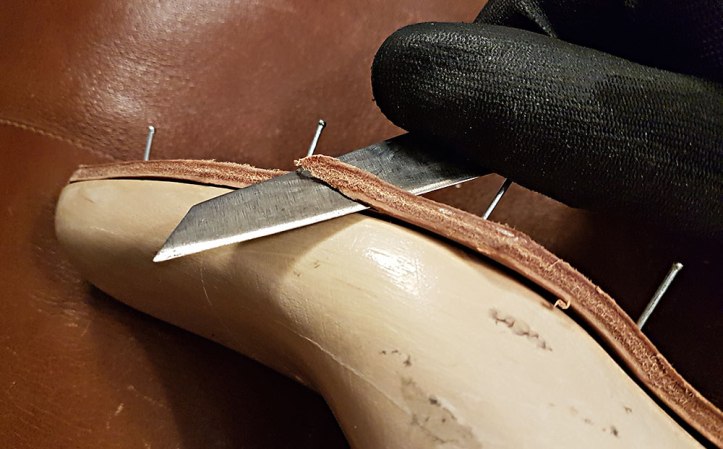
Hammering the edges closes the leather up, and provides a crisp feather edge. (Before lasting the uppers, the outsoles were also left to dry and then removed from the lasts, fine trimmed while dry, and put back on.)
Again, since this is a derby and can not be lined like an oxford, the heel stiffeners cannot be made the same way as the toes. To make the heels nice and firm, I cut out pieces of 5 oz shoulder leather, skived and burned around the nap edges. They were cut into a shape as to not go in under the lasts at all, but rather meet the edge of the shoe. Before lasting, I would put Hirschkleber on both sides of the shoulder leather with a little bit of water. (Note: it’s easier to do this if you mix the Hirschkleber with a little bit of water in a bowl on the side. Also, do not try to put the Hirschkleber on before you stick the stiffener in there – I found that it needs to sit in place before you paste it up.)

After first lasting the entire shoe (including the pasted up heel stiffeners), I unlasted the front half of the shoe (vamp and toe) and lasted just the lining with some water.

When making toe puffs, I have found it unnecessary to mix the Hirschkleber with water in a bowl on the side. I just slab it on there with a brush straight from the jar, and use a cup of pure water on the side to water the paste down slightly right on the toe. This is faster, and prevents wasting Hirschkleber if you mix too much. (The reason why I recommend mixing it up separately for making derby heel counters, is because you can’t reach into a derby heel in the same way you can reach a toe.)

Lasting thick, vegetable tanned leather is tough – physically. I let it soak for a while before lasting, to keep it moist and workable. It still curves up in thick segments, making for vigorous pulls.

For this pair, I went back to my original choice of lasting the toe puff with the grain side outwards. This makes it easier to carve away the excess nicely once it’s dried. It also makes it easier to lightly hammer the newly lasted, still moist toe puff all around, to really settle the shape. A newly lasted toe puff is a beautiful sight:
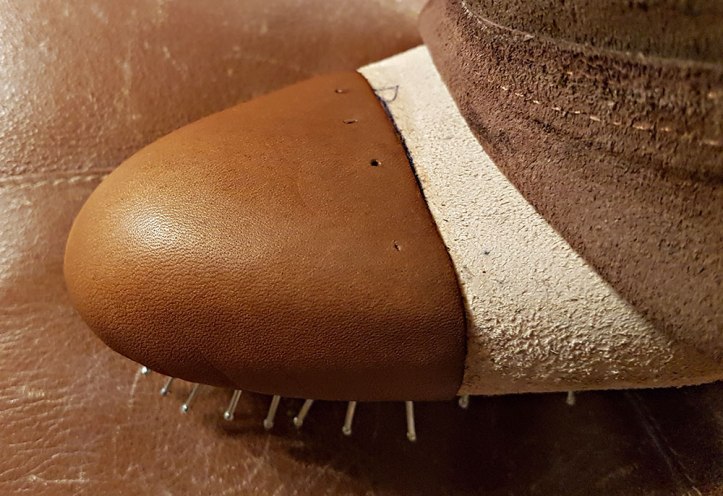
Here it is all dried up:
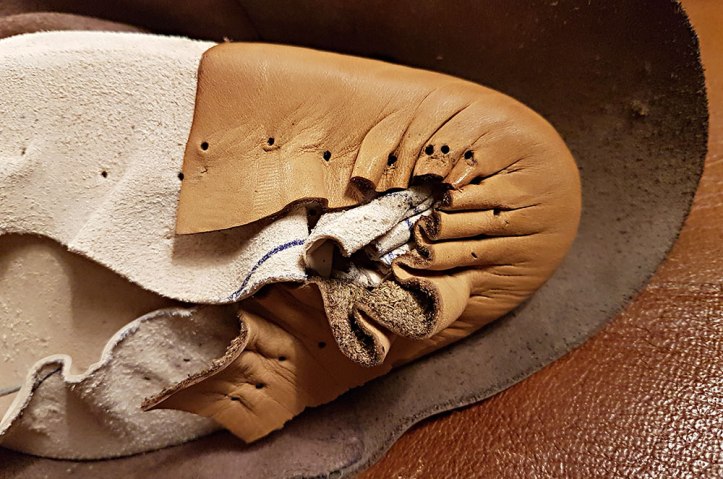
Proceeding with caution, I cut off the excess very close towards the edge, as to make it easier to welt.

After that, the toe puffs were moistened again and the cut up edges were hammered into shape. Hirschkleber was applied atop the shoulder leather, and the shoes were fully lasted. And here we are after the final lasting – Gripsholm is taking shape:

It’s a bit assymetrical, a bit wrinkly at some places, and a couple of details didn’t get my full attention. Even though I am disturbed by mistakes and flaws, I’m still fine with the results thus far. I consider Gripsholm somewhat of an experiment, being my very first derby shoe.
