Sir Winston Churchill obviously needs no introduction. This will be my interpretation of Churchill as a shoe.

I opted to make a shoe suitable for a statesman, yet – like Churchill – with some flair and showmanship. I’m going for a formal dress shoe, ornamented, and with a hint of military air.
I used a very nice chiseled last from Springline as a base last, and added leather to increase the width on both sides and instep volume. Then I designed a cap toe oxford like so, with broguing only on the toe cap:

Skipping ahead a bit in the process, I inserted a separate piece of lining with contact cement. To do this, I first fit the parts together without being on the last. The trick, I’ve found, is to gently fold the upper and the lining along their length, making them look somewhat like a meanforme. I cement them together like that, checking so that there’s enough lining to go around the entire opening. Then I pull them over the last and crudely last them with just a few nails.

The upper leather is Weinheimer boxcalf, which is a really beautiful leather in my opinion. It’s very firm and thus quite difficult to work with. Once the shoes are done and polished up, the leather will offer great depth and lustre in return. The German connection also felt apropos.
Once lasted, they looked like so. I consciously closed the lacing entirely without leaving any gap, hopefully resulting in a flush end result.

When welting, I continue to use the method of going from the outside and in. I find this gives me maximum control over where I place the hole through the upper, and there’s no problems finding the right spot at the insole. (I don’t pre-make any holes, but just open them up as I’m welting.)
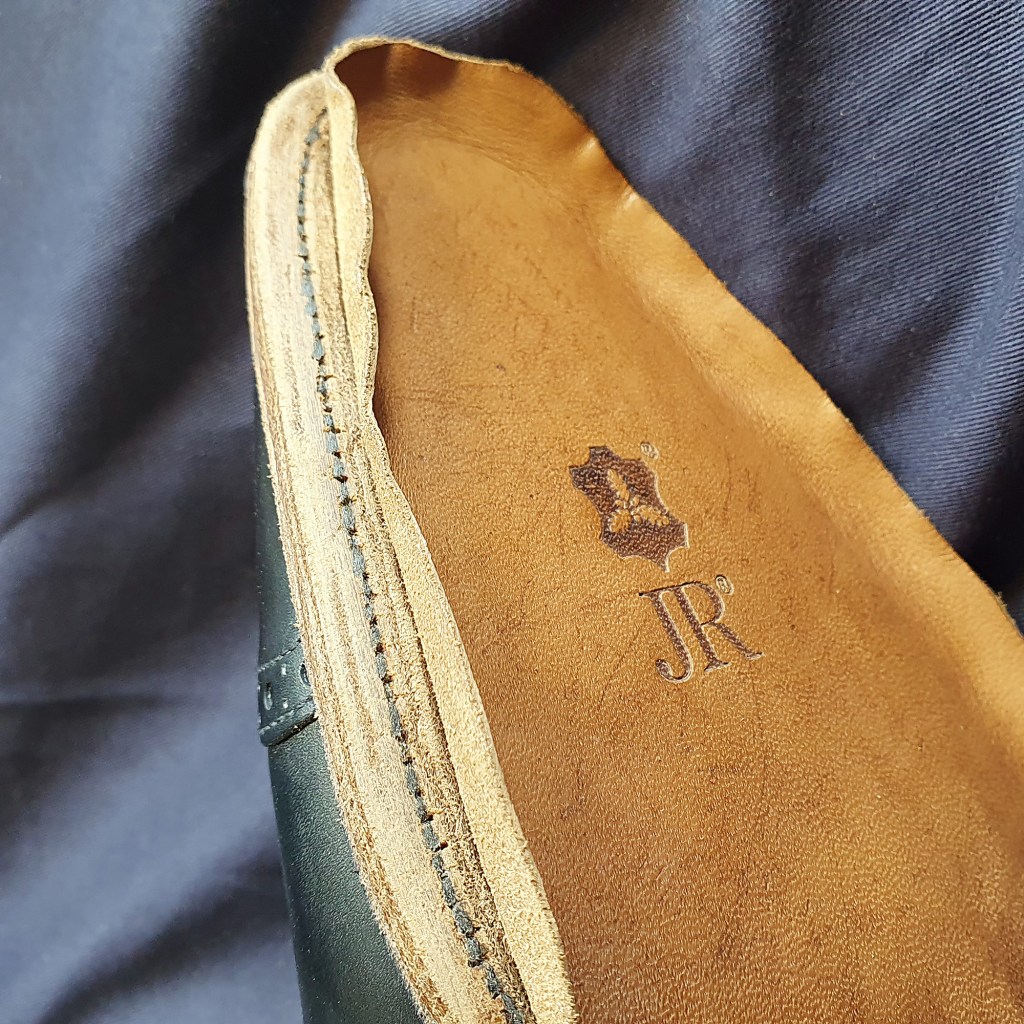
To make life a little easier, I moisten the leather on and around the holdfast slightly. The insoles are my standard option of choice: J&FJ Baker buffed insole shoulder in 7-9 iron weight. The thread used is Maine Thread waxed polycord in .045″ thickness (1.14 mm).

I make a little knot on the inside of the holdfast with each stitch. Then as I get to the toe, I insert an extra piece of polycord to offer additional reinforcement there, where the stitches come very close to eachother.
While lasting, I had glued the lining at the toe stiffener and heel counter, but didn’t glue it anywhere along the sides. Then I glued the lasted upper leather to the lining. This makes it very easy to welt, and to trim it off afterwards.

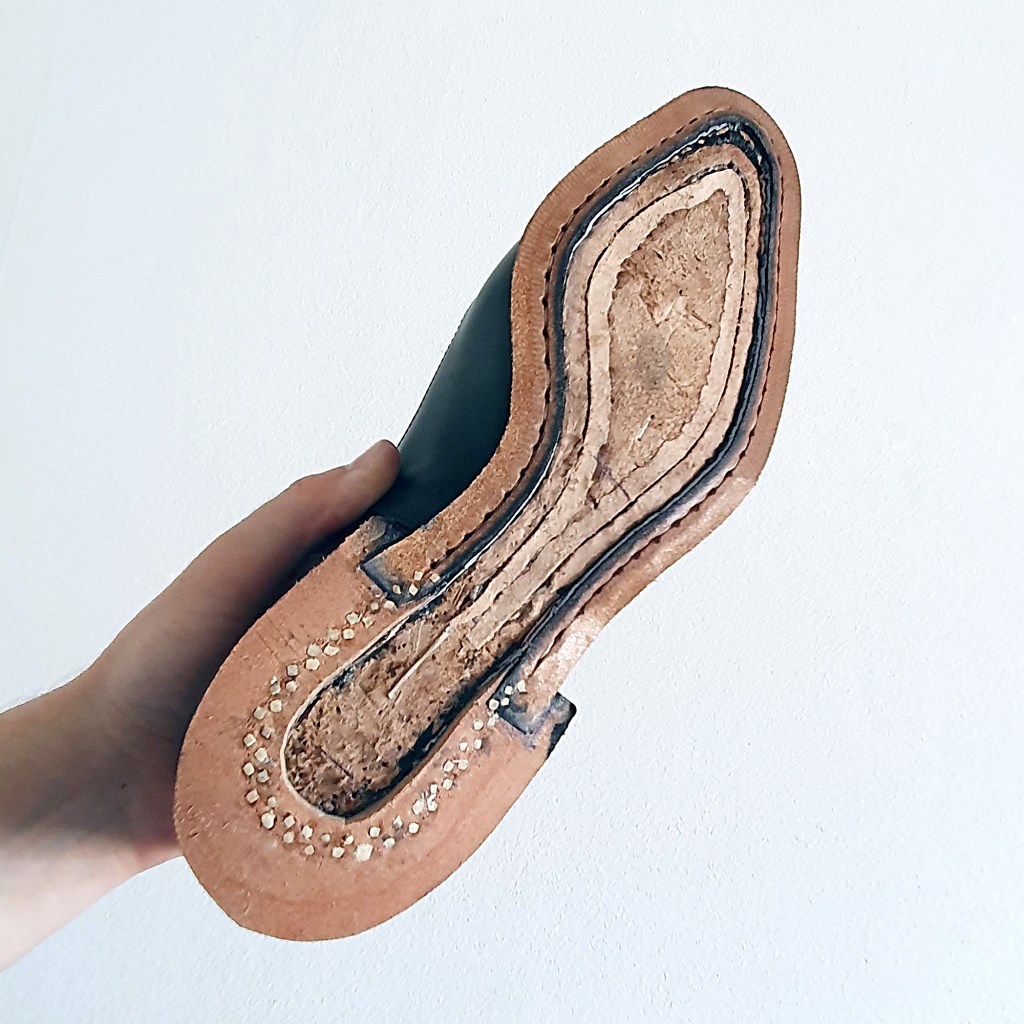
Like always, I saved the strip of insole leather from cutting out the holdfast, and re-inserted it with contact cement once the welting was completed. This offers a nice, level surface for filling the footbed.
I’ve found that the trick is to not use any special tool like a feathering knife to cut up the holdfast. I just use a thin snap-off blade, and cut it carefully, about centimeter at a time going all the way round. Even so, it still only takes a few minutes to do. I’ve never had any issues with accidentally cutting through the insole with the knife. (The thickness of this insole option sure helps with the confidence level.)
I took a bit of insole leather and cut it to form a shank cover. Then I pinned the shank cover while moist (but not dripping wet), and hammered it hard onto the shank. This makes the shank cover really wrap and form around the shank, as the shank gets imprinted in the inside of the shank cover. Once the cover is dry, I remove the nails and re-insert it with contact cement.

Preparing for an outsole with some flair and showmanship, I carved the shank cover like shown. This is the groundwork for a sharp fiddleback waist. In the image below, I’ve burnished the shank cover in order to compress it further, as well as find any unwanted irregularities. (Irregularities are revealed as the burnished parts become very glossy, leaving any crevaces unburnished and matte. When that happens, I just return with the knife to even it out, and repeat burnishing until it’s all even.)
The footbed was filled with one layer of tar felt. Below the tar felt, there’s also one slightly smaller layer of ca 1,6 mm leather that was skived to nill along all sides. The purpose of that was to elevate the center of the footbed a little bit, without adding any volume to the sides closest to the welt. This promotes a slightly curved, almost a little bulbous shape of the outsole. I felt it was suitable for Winston.
As is barely visible, I’ve also thinned down the welt around the waist, promoting a more elegant and slightly rounded waist.

Before putting the outsoles on, I sanded the shank cover to remove the glossiness that comes from burnishing, thus enabling it to bond much better with the outsole. (It doesn’t look quite as sharp when it’s not glossy, but it still is.)

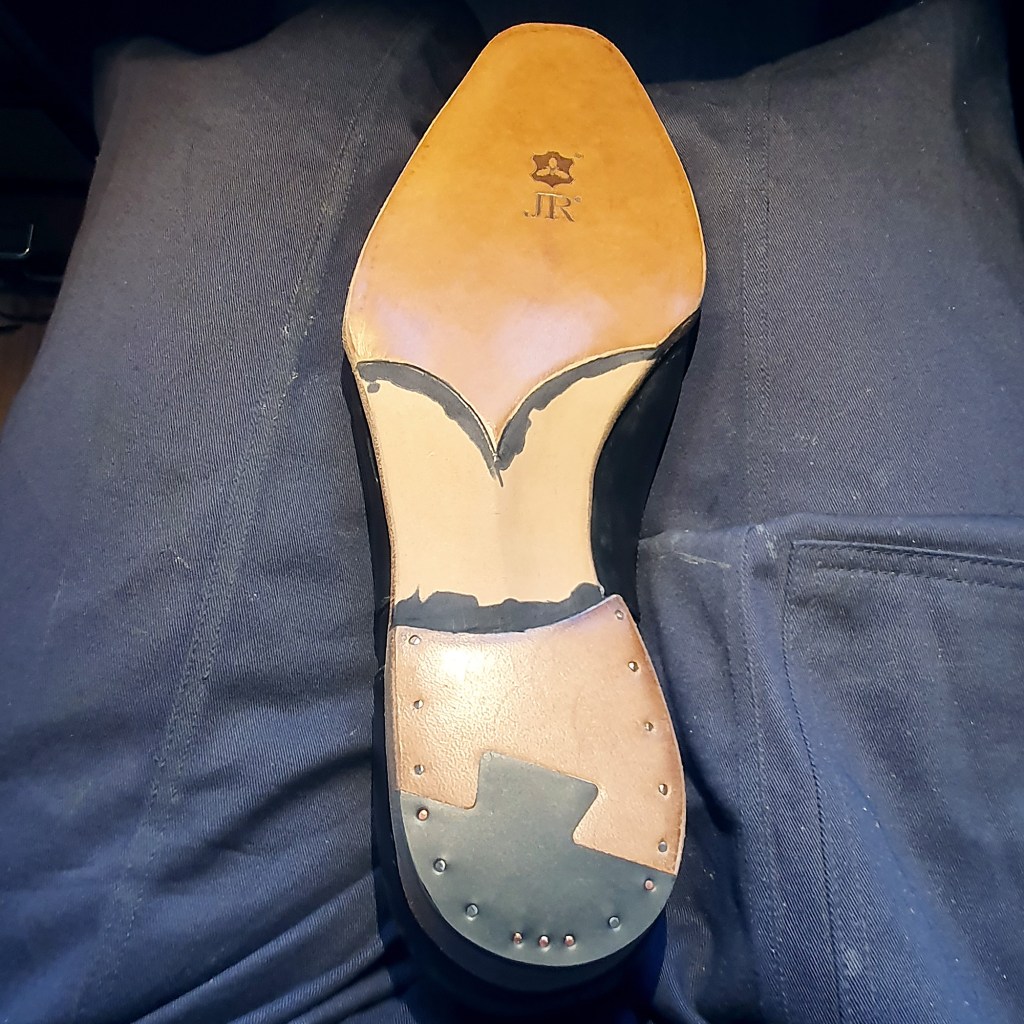
For this pair, I opened the supply vault and brought out a pair of vintage J. Rendenbach outsoles from the closed factory. I felt it was appropriate for a shoe celebrating Sir Winston. I skived the outsoles at the waist, going almost down to nill at the very edges. It was gradually skived, so the actual edge produced after trimming won’t be too thin. Thinning the waist down like this enables making a crisp fiddleback waist.

I used three ply Maine Thread waxed polycord in .035″ (.89 mm) to sew the outsole seam.

Here’s an inside look from the open flap:
After sewing and closing the flap up, I did some preliminary finishing work with this excellent seam detailer from Starko Tools. I first ran a heated fudge wheel over the seams, and then heated this seam detailer slightly and pressed it down in between each stich.

After some additional work with the same tool, the fudging started to look really crisp. I wanted to really do it thorough, seeking a distinct, showy and military look. To get the result below (which still isn’t completely finished), I used the seam detailer both from above, and slightly from the side in an angle. When using the detailer at an angle, it can be a bit tricky to not slip up and scrape the side of the outsole as a result. (I did slip up once or twice, but it was nothing that a little sanding couldn’t fix.)

Before sewing, I had used a bone folder to shape the outsoles into a fiddle when they were just put on. I forgot to take any pictures of this, but it’s pretty straigth forward. You just use the bone folder any way you like to shape the outsole, in this case, producing a sharp point along the middle of the waist.
It’s not really visible in the image below, but the tip of the fiddleback is actually rather sharp, much like the shank cover was. Here I’ve glassed and sanded only the waist part of the outsole, as preparation for some dye work. (The heels and sole edges are also glassed and sanded at this stage.)

Using a detail paint brush (perhaps 11 mm in brush length and 2-3 mm in brush girth at the thickest point), I began with carefully painting the curve as shown below. I used Fiebing’s Pro Dye in black for the job. I went on to paint the entire waist, heels, and sole edges. For the larger areas, where there was a comfortable error margin, I’d use a wool dauber.
Since a small paintbrush can’t hold anywhere near the amount of dye that a dauber can, it’s neccessary to re-dip the brush in dye pretty much all the time. Dye also has a tendency to ‘bleed out’ into the leather, and not stay only where it was applied. Using a small brush as mentioned, and going gradually closer towards the edge of the painted area (as to not get paint bleed over onto the wrong side of the sole), it’s usually no problem.
Then I continued with the rest of the finishing process. I’d burnish the fiddleback when it was painted, and wax it along with the heels and sole edges. Then I’d glass and sand the rest of the outsole and top lift, and treat them with cream and wax.
Stay tuned for the end result!
Continue to the summary of the finished shoes »
asd
