Rosenlund is to be a proper ladies shoe, in the form of a hand welted, medium heel height oxford. I made the pattern design on March 14th.

Before punching out the brogue holes, I eyeball the allowance needed for sewing and mark it with a scratch awl, and then use the line created as a guide for punching the holes. I punched them out with a new, budget brogue punch. High end brogue punches are usually quite expensive, so for the small price tag I really think this budget option delivered. (No affiliation, and I don’t know for how long it will last long term.)

When putting the pieces together, after sewing the first row, I use the scratch awl again to trace a line for the second row of stitching. I find that this really helps compared to winging it with the sewing machine. I don’t actually scratch the leather, only gently press it down with the awl tip, so if the guide line is slightly off it won’t look ugly.
I find this to be yet another in the long row of satisfying ‘shoemaking minigames’. I take aim on making a tight and smooth curve along the smaller holes, since they are the most protruding from the first stitch line.

Here’s a closeup from closing the heels of the upper. The upper leather is vintage Tanneries du Puy, sourced via Kolde Leder. (I bought this hide second hand from another maker, and have since bought more directly from Kolde. I really dig this shade of brown.)
Serafil 40s thread delivers as usual, and I’m getting better at handling the sewing machine. I’m also happy with the way the heel pattern turned out, positioning the seams almost dangerously close to eachother.

I sew the uppers “flat” until the point depicted below. (I promise, it’s still the same dark brown leather, only in slightly different lighting that oddly makes it appear black. There’s no editing abuse going on in any of my images – I simply blame the fact that leather somehow always ends up in different colors in each image taken.)

I skived some heel stiffeners from my go-to Tärnsjö leather. For this shoe, I didn’t pre-mold the heel stiffeners.

Instead of pre-molding, I put in the moistened heel stiffener between the upper and lining before lasting, with Hirschkleber paste on both sides. Then I lasted just the lining (in its entirety, toe and all), and let it sit for a couple of minutes. I then removed the nails at the seat and hammered the seat lining pleats before proceeding to last the upper leather at the heel only.

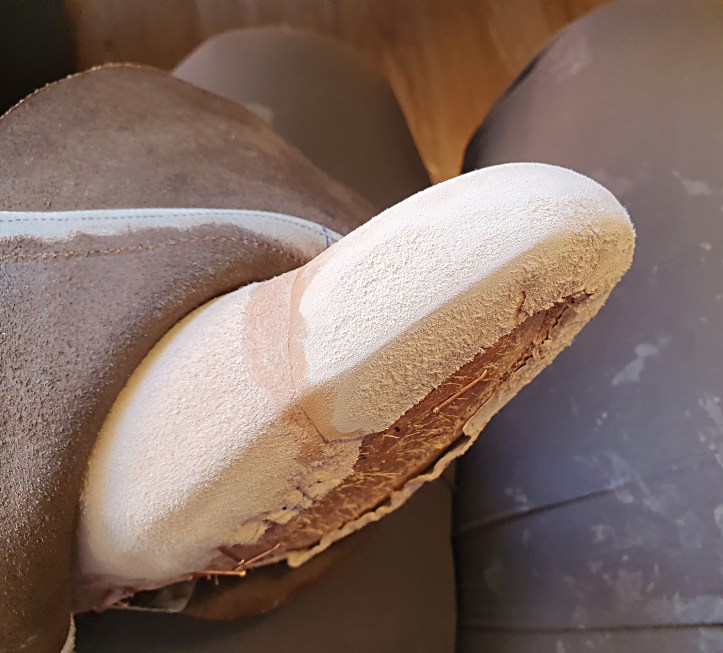
With the heel lasting completed (uppers and all), I lasted wet toe puffs separately on top of the lining and allowed them to dry. This is how they looked after trimming, before lasting the toe and rest of the upper.
I really prefer the look of seamless heels.
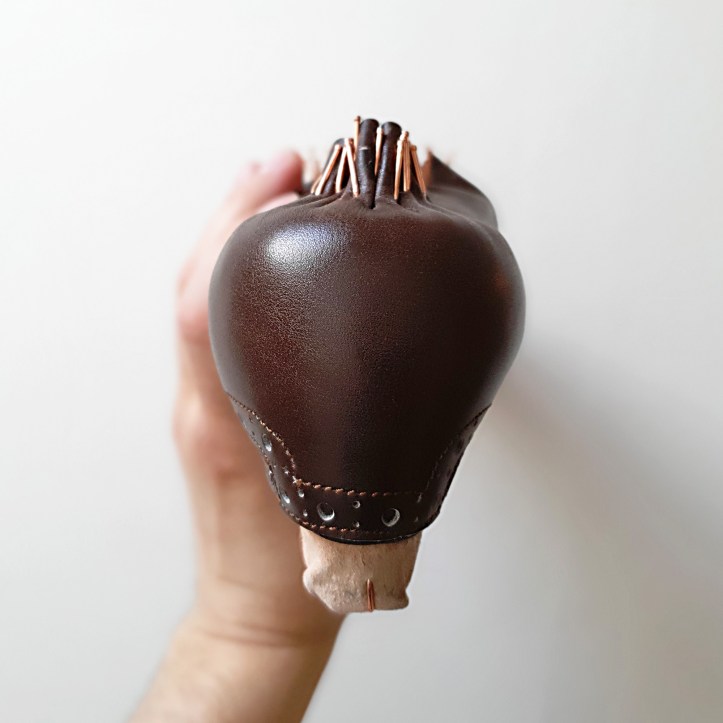
Below, the pair is pegged at the seat and then hand welted.
After I closed these uppers, I’ve been advised to use a sharpie or leather dye to touch up the brogue holes from the inside before actually putting the pieces together. This will be done for my next project. (I actually think it looks kind of cool with the highlighted broguing, although I will conceal it with shoe polish on this pair once these shoes are completed.)

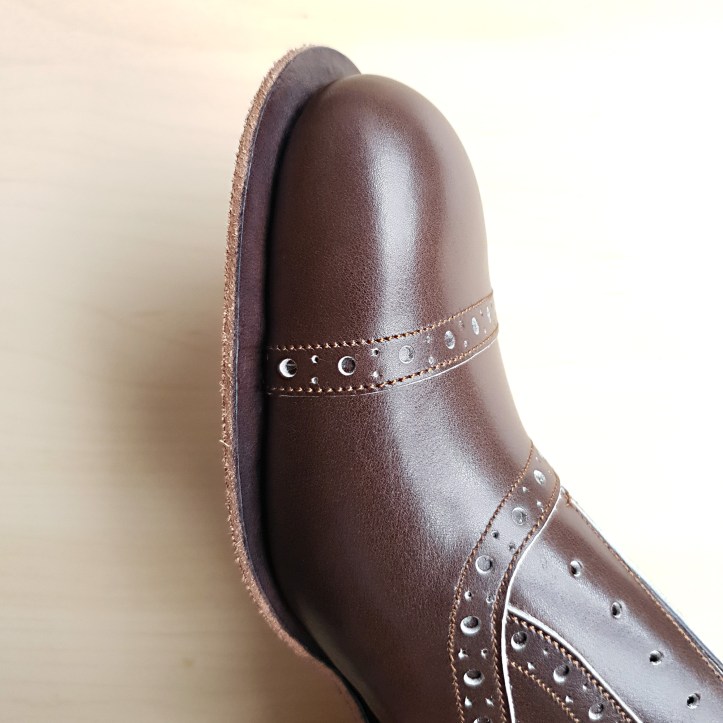
Viewed from the side, I’m happy with how the welt fits snugly to the shoe.
I put in some metal shanks, covered them with thick veg tanned leather, and filled the footbed with tar felt. I intentionally left the edge between the shank cover and the tar felt untrimmed, to promote creating a sharp line on the outsole during finishing.

The outsole seam was sewn at 9 spi.

I made the ground work of the fiddleback decoration when cementing on the outsoles, before sewing. After closing the hidden channel for the seam, I touched up the waist decoration again before the outsoles would dry completely.

I trimmed the heels and sole edges with a blade before starting the finishing.

The rough shape of the heels and sole edges is made with the knife. Then I sanded the heels – first with a sanding drill bit on a screwdriver, then with a 180 grit sandpaper, then I guess 320, and finishing with something like 400. In between these steps, I glassed the heels, and ended with sanding (not glassing). I only sand and glass in one direction.
Prior to finishing this shoe, I may have tried to make some kind of “shoemaking macho” point of going up to 600 and then 1000 grit in sand paper during finishing. That hasn’t done the trick, because it’s actually too high, and upgrading will do you no good unless the step before has actually been done thoroughly. Now I think I may be on to something, and if I am, 400 seems to be the highest grit needed.
Once glassed and sanded enough, I moistened the heels and burnished them before dying. Then I dyed them with Fiebing’s leather dye. Once that was dry I would burnish the heels again, and the second time using gum tragacanth. The image below depicts a heel right after dying, ie before being burnished a second time.

After this image was taken the heels were burnished with gum tragacanth, waxed and buffed with three consecutive layers of applied and then melted shoemaking wax in dark brown, and finally polished with Saphir Mirror Gloss and pate de luxe. I will return another day to write more about finishing. Results of how it turned out in this case will be posted here shortly. (Preview on Instagram.)
