Gustav Vasa was a ruthless dictator, and is widely considered to be the Swedish father of the land. How he spelled his first name himself varied, and how his name was spelled by others include: Gødztaff, Giöstaff, Göstaff, Gustaff, Gostavs and Gustavus.[1] Called by the patronymic surname “Eriksson” (simply because his father’s name was Erik), Gustav never used the last name ‘Vasa’ at all. This shoe is still made in his legacy, and I’m spelling it with a W because it looks cooler.
This shoe will be a grandiose shoe, worthy of a regal name. Furthermore, the design itself resembles Gustaf Vasas fashionable haircut.

It’s a gladiator shoe with lots of broguing, made with premium upper leather. It will be dark brown boxcalf contrasted by reverse calf suede. Alas, I failed to take any pictures during pattern making.
The insoles are carved out of world class Baker leather, in their thickest option. (9 iron buffed insole shoulder). This is sturdy enough to hold for an elephant, and yet very pleasant and easy to work with.

If I’m ever under gunfire wearing these shoes, I’ll comfortably karate-kick the bullets to a halt as I scurry to safety.

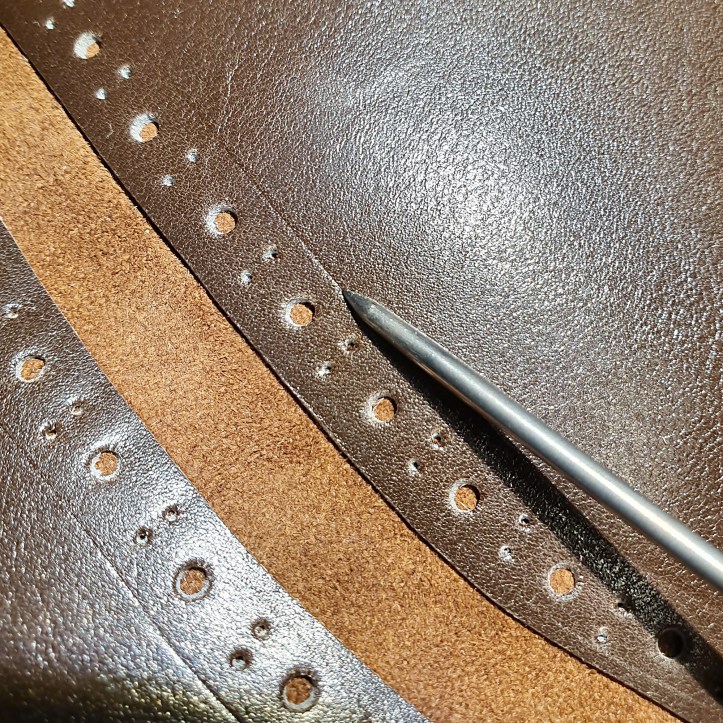
I got a hold of a tiny little brogue punch without a shaft. It wasn’t comfortable to use, but it worked.

While putting the upper pieces together, I marked the stitching lines with an awl. I used my eye measure for the task, and only double-checked afterwards that there was enough overlap allowance to sew it. I used a 12 mm overlap allowance, which was just enough.
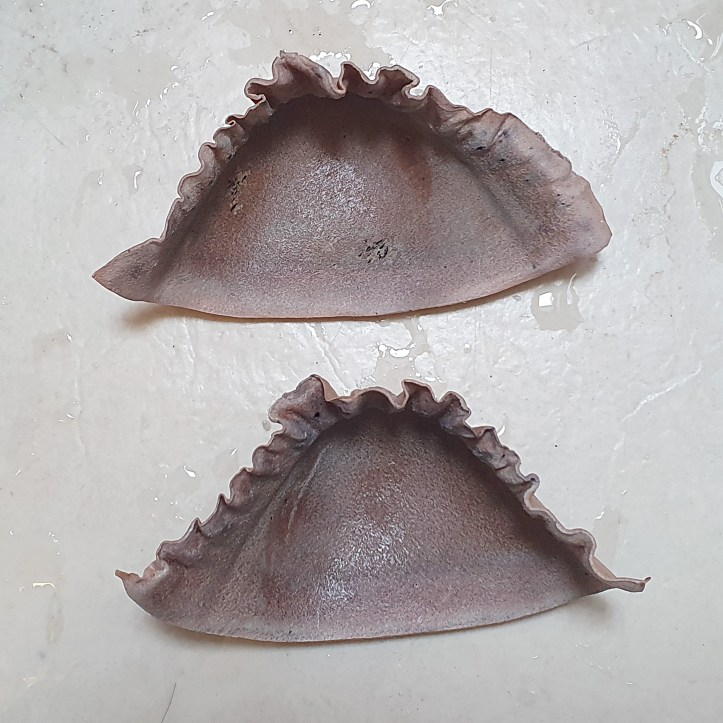
Once sewn up with Serafil 40s thread, it looked like this.
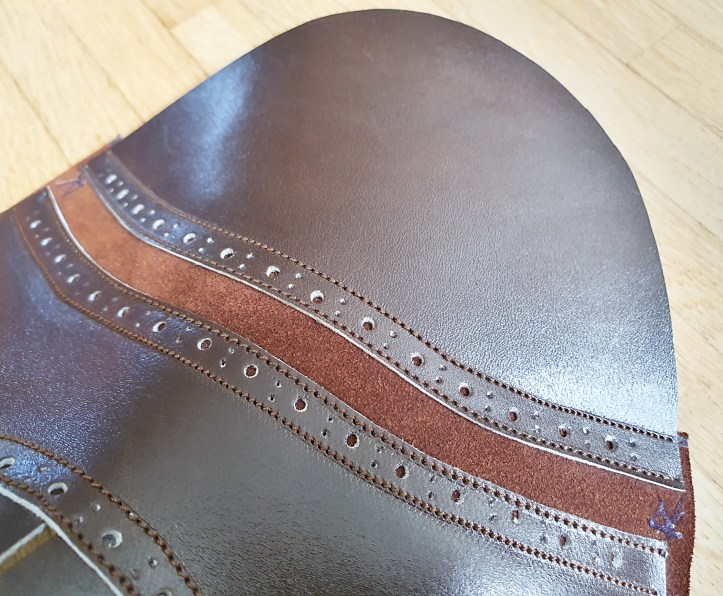
The superb french boxcalf from Kolde leder has a beautiful tone. Catching the light in different angles, it can look like anything from milk chocolate to black.
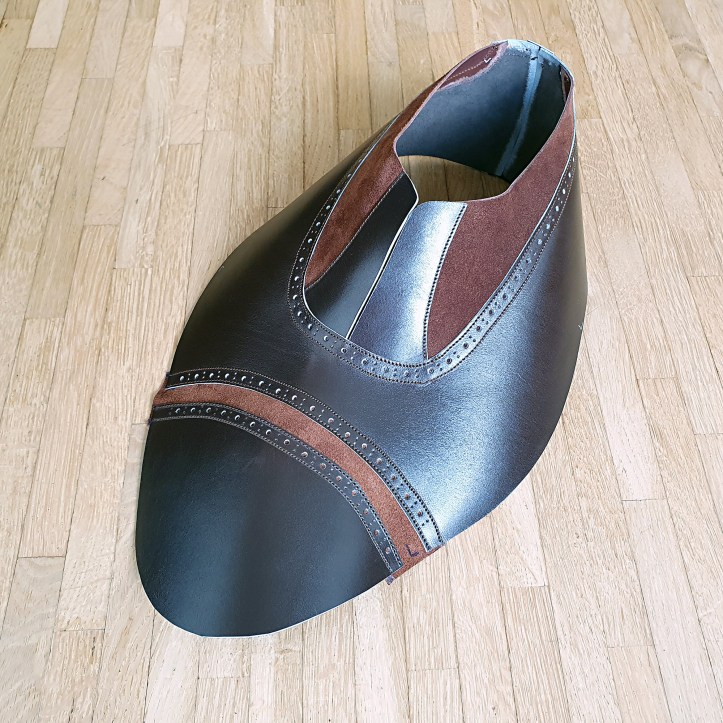
When it was time to last the shoes, disaster struck.
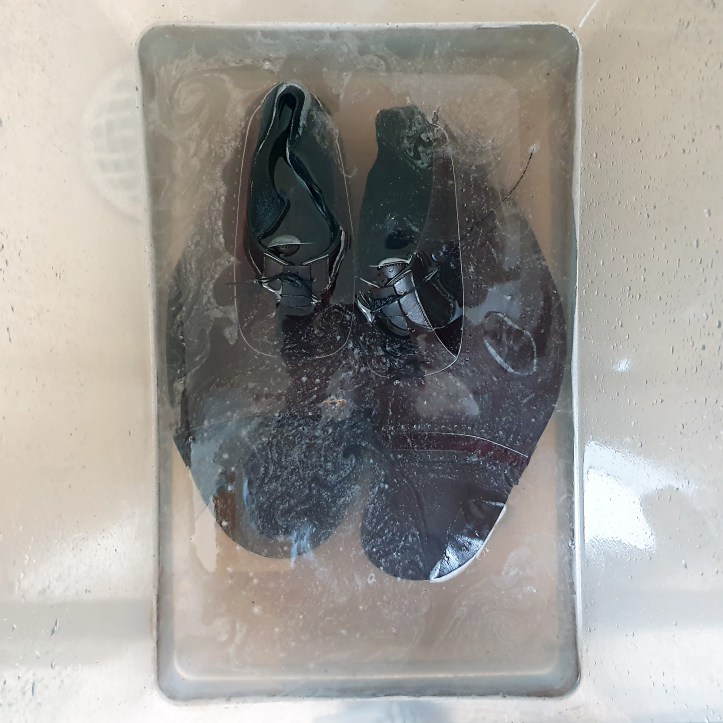
I tried to last the shoes when I was ill. My mind clouded by disease, I suffered a total brain cramp… I lasted both shoes (including stiffeners) with a super excessive margin at the heel. It just wouldn’t do, and I had to take desperate measures. I removed all nails, and sent the shoes to have a bath.

As soon as I could remove the lasts and insoles, I drenched the uppers entirely, to loosen the Hirschkleber paste which had dried. Somehow, I guess it only feels fitting that Wasa was sunk…
I removed the toe caps and the heel stiffeners and let the uppers dry slowly from their soaked state, before having another go at lasting.
The second attempt worked much better, and so the shoes were lasted properly.

The insoles were a bit discolored by the bathing ordeal, but they won’t be visible from the outside… Back when carving the holdfast of the insoles, I saved the leather strips that were cut away to make the inside holdfast channels, and put them back into place after welting. This makes for a much more level surface inside the shoe, which helps when filling the footbed.

I put in plastic shanks, and pinned some Baker insole leather moist on top of them.

Then I trimmed the shank covers and inserted one layer of tar felt. (I’ve previously had to use several layers of tar felt to get to the elevated level of the welt, but this time, a single layer was enough.)

Once some J. Rendenbach outsoles were cemented on, I stitched the outsole seam at 9 spi.

With the heels stacked, I attached the top lifts with only two nails to keep them in place while trimming. Then I started rough trimming them by pressing the side of the knife against the upper leather (without harming the uppers), and cutting from above and down.

Going around the heel like so creates an extremely rough shape. I find it weirdly satisfying to cut through several layers of heel stacks – the more layers the merrier. (It also leaves beautiful scraps.) This time, I’ve opted for a bunch of thin layers instead of a few thick ones.

I refine the heel shape slightly by switching grip as shown below. In this grip, I also put the side of the knife towards the shoe upper, without harming the upper. This is all done rather quickly, as to not let the cement set with the big gap between heel stacks and top lift. (This gap will be fixed.)

I basically go around the shoe and carve away the sharp ‘tips’ created by previous rough trimming.

As soon as I can get a good look at where the nails should go around the top lift, I put them in. This removes the gap from before, and needs to be done quickly before the cement sets. Once the top lift is nailed into place, I continue trimming the heels with the knife. I learned from Carreducker’s Finishing – Tips & tricks that “the shape of the heel is determined by the knife, not by the rasp”.

And so, the actual construction of the shoe is complete, and “only” the finishing process remains…
