Disclaimer: This post contains a very old attempt at shoemaking, during the very beginning of my journey. I really didn’t know what I was doing at this time, and the post is left online for archive purposes only. Please do not “learn” anything from it, as the post is certainly riddled with mistakes. It’s just a documentation on some of my thoughts as a beginner in this venture. For a more updated view of my shoemaking, please see my latest posts instead.
Once the lasted shoes had dried throroughly, I cut of excess around the heels, leaving enough leather for wooden pegs and enough space for a shank.
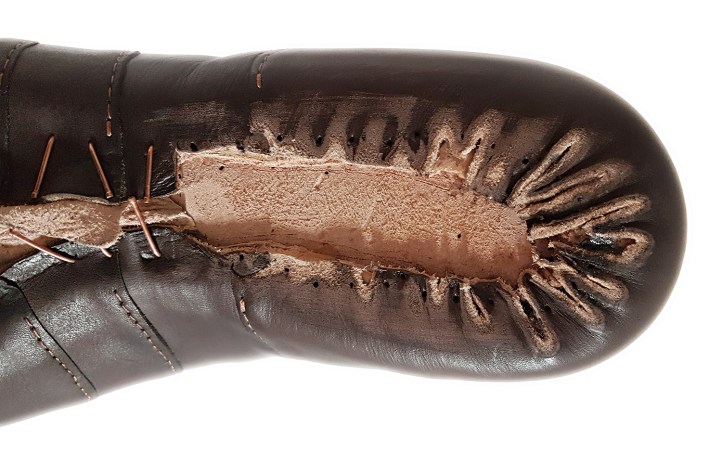
If I had a good welting awl at my disposal, I might have gone for separate pieces of rand and welt, to try my hand at working with a regular straight welt. As it were, I didn’t, and resorted to my comfort zone. I made my usual combination pieces of rand and welt, with the same 5 oz veg tanned shoulder that I used for stiffeners.
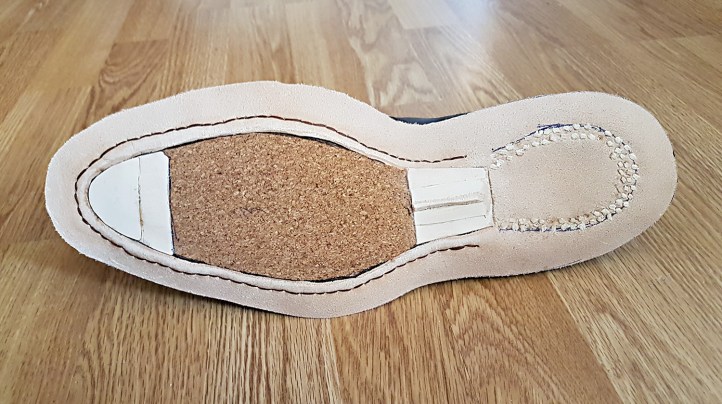
Skipping ahead a bit here, I pegged the combo pieces at the heel with wooden pegs, and welted the rest. (This took a long time). Then I slid in a shank in each shoe, filled up the footbed with three layers of 2 mm sheet cork, and added extra vegetable tanned leather at the toe and around the shank to achieve an even surface.
At the shank, I then added two additional skived layers of 4 oz veg tanned leather, to help me with the waist. (The final layer merely a pointy strip, as vaguely seen below.) At this point, I hadn’t decided on whether to make a fiddleback or a regular bevelled waist, but figured that some extra help from the inside (but not too much) would be valuable in any case.
I applied a rich layer of Kövulfix contact cement, to the shoes as well as the nap side of the outsoles (after the outsoles had been moistened through and their surface dried enough to take the cement). A disposable toothbrush aided me in the application. I did this outside in the garden, as not to die from the fumes of the cement before I could get to the finishing process.
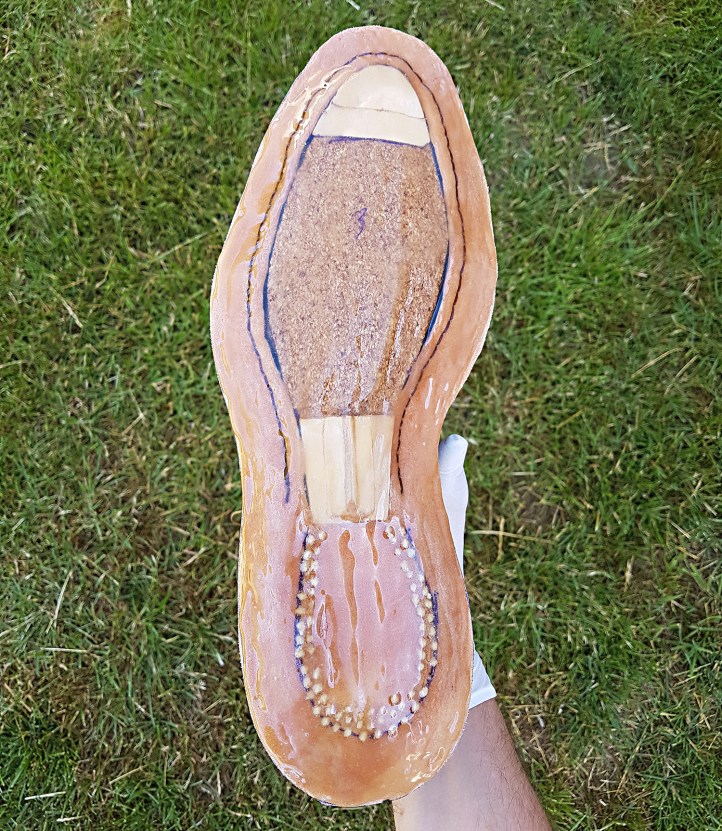
After the cement had been left to cure for around 45 minutes, I put the pieces together. To press the outsole snugly against the shoe, following the curvature of the shoe without leaving a gap between the outsole and welt, I used a bone folder and a piece of veg tanned scrap leather. As soon as I had put the outsole in contact with the shoe, I first pressed it down all around with my hands. Then I quickly tucked the bone folder from the welt side and pressed it hard against the welt, protecting the outsole with the scrap leather as I supported it with my fingers on the other side. I would have taken a picture, but did this as quick as I could as not to let the outsole fix in the wrong position. After having worked my way around the shoe, I hammered the outsole all over except for at the waist, and went back to secure the edges once more with the bone folder, in the same manner. Then I used the bone folder to press hard along the waist, to emphasize the bevel.
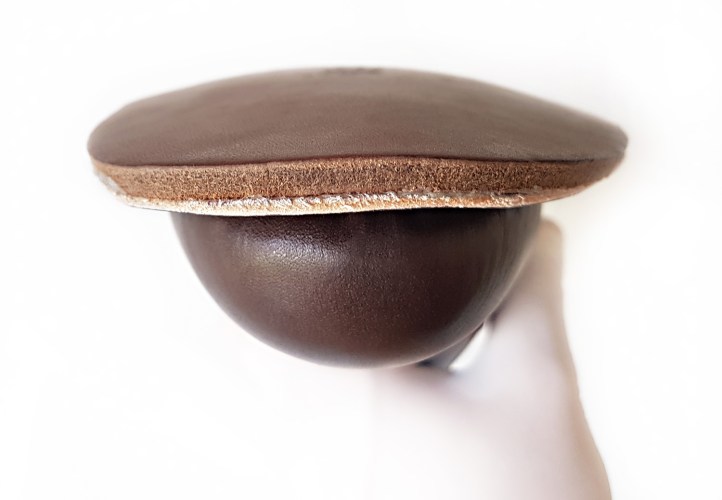
Here’s the curvature of the outsole as seen from the toe of the shoe:
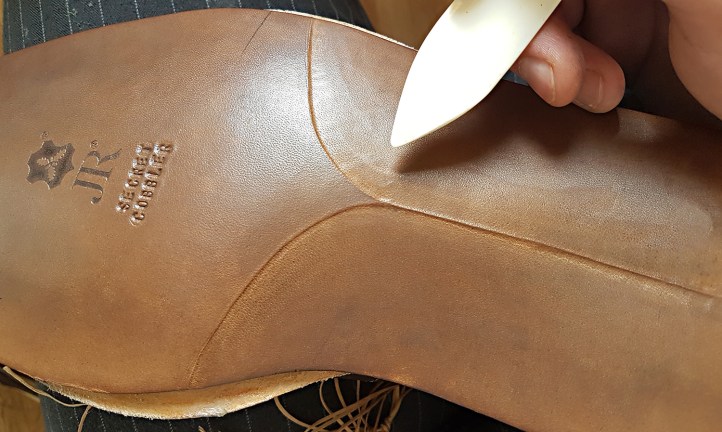
When I had finished pressing on the outsoles, they were left to sit for perhaps 30 minutes before I returned to stamp in my logo in the outsole. I also decided to try and make a kind of fiddleback with the bone folder at this point. I figured I had to act now or forever hold my peace, while the outsoles were still moist and workable. (Even though they can of course be re-moistened.)
Using the bone folder, I started by ‘drawing’ where I wanted the shapes of the fiddleback in very thin lines – so lightly that I could ‘erase’ the lines with my thumb. Once I had found where I wanted it, I started working my way with the tool to compress the leather along those lines.
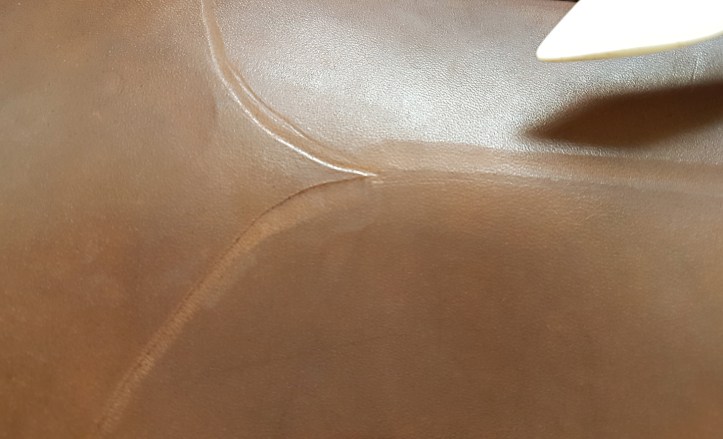
Slowly but surely, it started taking form. I went for rather accentuated lines, both at the top and at the line through the waist (whatever those parts are really called).
At this point (below) I decided to be content. If anything I may have overdone the line and underworked the rest, but I thought shaping it like this would look kind of cool. It’s not a classic fiddleback, but what the heck – it’s only for decoration and I liked it like this.
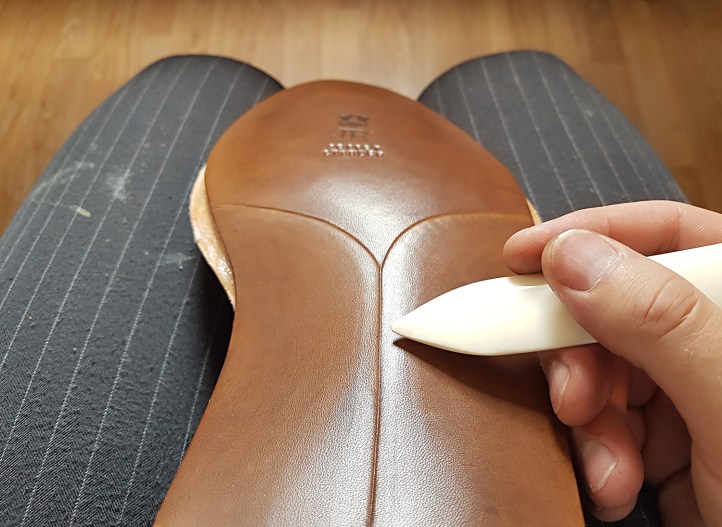
To get an equivalent result on the other shoe, I took some measurements, held the shoes up together for comparison, corrected the measured positions on the next shoe using eye measure, and then did the same thing with the other shoe. I think it turned out alright.
Then I let the outsoles rest some more, and returned to give the waists a slight burnish, with one of them wooden burnishing/slicker tools. I also ran an angled fudge wheel along the point sides of the waist.
Using broken glass would make for a more traditional fiddle waist. I’ve tried this before and haven’t really gotten it down, plus I’m fresh out of glass to brake without aggravating the spouse…
I returned the next day, re-moistened the outsole, and cut open a flap for the outsole stitch. I ground down a channel for the thread to rest in, made the holes, and stitched up the outsoles with chocolate brown 1 mm waxed polyester thread.

I realize it wasn’t super wise to make the fiddle decorations before this step. After I had cemented the flap shut, I used a bone folder to reaccentuate the edges where the flap had been opened, and burnished the waist lightly again.
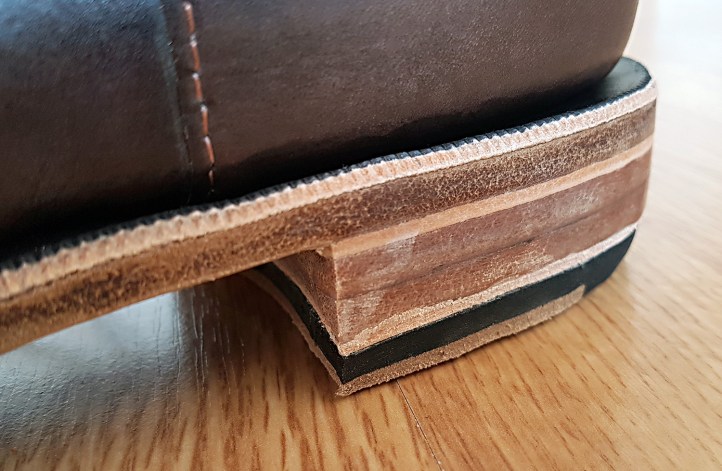
When the outsoles were dry, I started building the heels. From outsole to top-lift, I stacked the heels with one 5 oz veg tanned shoulder in a horse-shoe shaped second rand, then 2 full layers of 12-13 oz veg tanned calf butt, and then another 5 oz veg tanned shoulder layer. I added them one by one, nap side facing the outsole. I trimmed and roughed up the grain surface of each layer once it had settled, before putting on the next one. In the image below, the heels are stacked (aside from the top lift) and the edges are rough sanded.

I decided not to peg the heels, and instead put a couple of nails in. Here the top lifts are attached and trimmed, leaving the final steps of the finishing process before the shoes will be free to walk the earth:
Continue reading the Summary of the finished shoes »

Have a look at this guy on German eBay:
sattlerei_daniel
He has plenty of awls for welting and square awls for outsole stitching.
Very affordable as well.
LikeLike