Disclaimer: This post contains a very old attempt at shoemaking, during the very beginning of my journey. I really didn’t know what I was doing at this time, and the post is left online for archive purposes only. Please do not “learn” anything from it, as the post is certainly riddled with mistakes. It’s just a documentation on some of my thoughts as a beginner in this venture. For a more updated view of my shoemaking, please see my latest posts instead.
Summer’s entry has made it difficult to find enough time for shoemaking, but at least activity has not been at a complete standstill in my secret workshop. While posts on this blog have been scarce, my Instagram has been more or less frequently updated @secretcobbler.
Previously, I’ve made one pair of shoes meant for feet other than my own (Waxholm, for one of my brothers). The pair currently in production is also meant for another brother with the same mother – but with the creation of Gefle, this is the first time the recipient is also aware of production during the process. (The recipient will henceforth be referred to as ‘the client’ beause it sounds cooler – even though there will be no transaction of money, gold, bitcoin, minor estates or other things involved).
Gefle will be a cap toe adelaide oxford in hand painted vegetable tanned calf. It is named after the home-town of the recipient, and after the diabloical patina to come (seeing as how the city name has diabolical connotations in the Swedish language). I guess there’s also some kind of castle or manorial estate in the city – who cares.
Seeing as how these shoes are not for me, and the feet of the client are quite special, I needed to work out a way to secure the fit. Since I don’t know the first thing about measuring feet like a boss bespoke maker, I figured the best way (for me) would be to:
- Choose a last based on the clients usual size in RTW models, by manufacturers including but not limited to Carmina, Yanko and Meermin. (These are brands that the client own and walk around in.)
- Make a guess based on what I know about the clients feet, and adjust the lasts accordingly.
- Make a test-shoe for a first fitting.
- Adjust the lasts further after the first fitting, then make the shoes and hope for the best.
So, this is what I did. As every project always does, It all began with the lasts…

In my guesstimate, I obtained a last size UK 11 from German ebay. The client has a very high instep, so I boosted that up with three layers of 2 mm latigo tanned calf shoulder. The leather was skived around all edges to connect smoothly to the shape of the last, soaked in warm water, and cemented onto the lasts with dual layers of cement between each strip of leather. (The images only show the top layer, concealing two hidden layers beneath.) I also put two layers of the same leather to reinforce the space surrounding the pinky toes at the ball.
When the initial last adjustments were dried up nicely, it was time to make the design. I did this my usual way, using the tape method.

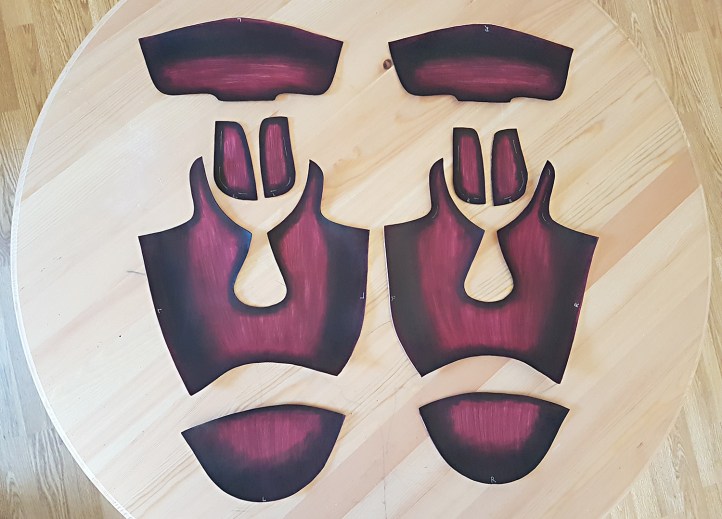
When the cardboard patterns were made, I traced around the pattern shapes on some 1st grade vegetable tanned crust calf sides. Judging from the limited experience that I do have working with leather, this leather was absolutely spectatular in quality – I haven’t seen a more beautiful full-grain leather to date… I cut all the pieces out from the absolute top notch part of the hide (the upper back). The vamp in the image below is facing the spine of the hide.


After the pieces were cut out, skived and burned around the nap edges, I decided to dye them before assembly. (I know most makers apply dye after the actual making of the shoes, which I might try next time, but this is how I did it.) I used Fiebing’s alcohol based leather dye in burgundy, mixing in some black dye of the same brand as I went. Instead of a dauber, I used a regular paint brush to be able to create some intentionally emphasized brush strokes.
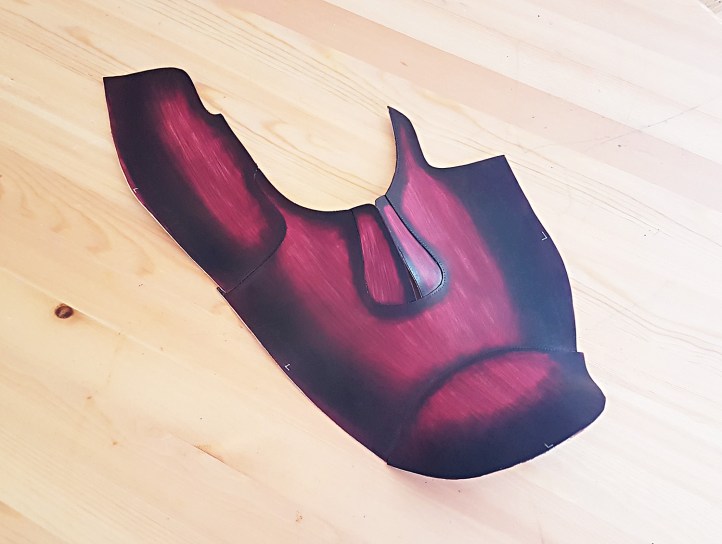
The pieces were assembled as far as possible in two dimensions, with Renia Gummilösung. Using this adhesive was a tip I got from a kind individual at the amazing Shoemaking Forum on facebook, and it worked perfectly. (I’ve previously experimented with lots of adhesives, including another brand of rubber solution among many others, but with no success. This one did the trick!)
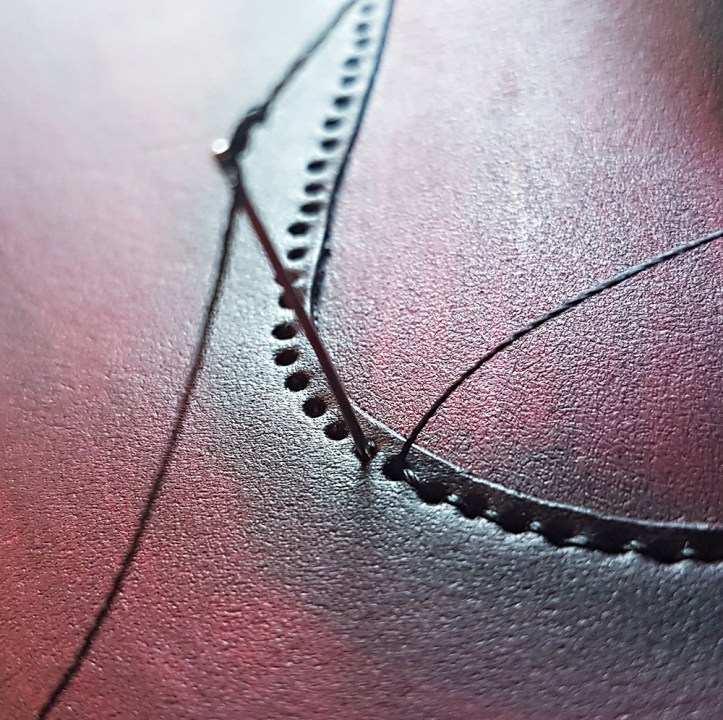
The holes were punched out with hammer and awl over a plastic cutting board. Then, thanks to another tip I got through the shoemaking forum, I used two needles to sew. I think I got it right. (Also note the grain of the leather – that thread is about 0,3 mm in diameter. Isn’t it lovely?)
I attached the baby calf lining and trimmed it off.
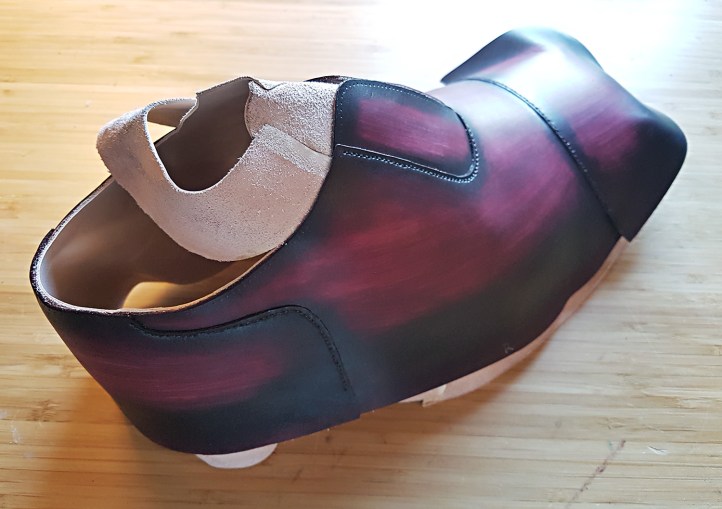
Before getting to this point, I had also made a test-shoe for a client fitting. This test shoe was made in ca 3 hours, and consisted of insoles, baby calf lining, stiffeners and a 2 mm “outsole”. The only purpose was to test the fit of the lasts.
After my notes on the test shoes at the first fitting, I decided to boost the instep even more, and to grind down the lasts at the arch and around the heel. I’ve come to understand that grinding down wood from lasts is generally frowned upon and adviced against, though I don’t exactly know why. This is an experiment with an outcome yet to be revealed, but without a vast library of more suitable lasts at my disposal, I saw no other way to proceed.
With the lining trimmed, I closed the rest of the uppers with two needles, burnished and dyed the edges where uppers meet lining (using no top beads for this pair), attached the tongues (that were made and painted in the same style as the uppers), put in some black YKK eyelets, protected the facing with a strip of 2 oz shoulder leather, and inscribed the lining with the name of the shoes and the client.

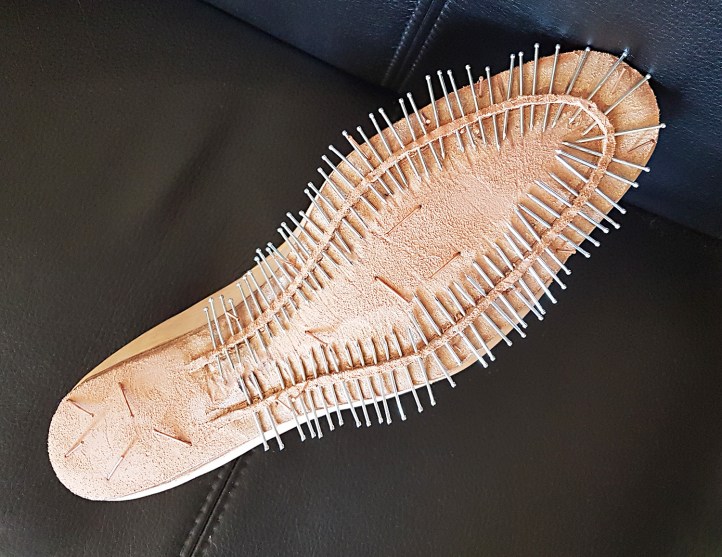
Insoles were cut out from well moist 12-13 oz calf butt, nailed to the lasts and trimmed, and holdfasts were carved out with a blade. In lack of better tools, I made the holes with a regular straight awl, pushing it from the outside and inwards. Then I popped a nail into each hole, to ensure the hole would remain as the leather dried. I decided to make the waists quite snug, and to allow a rather generous margin between holdfast and edge.
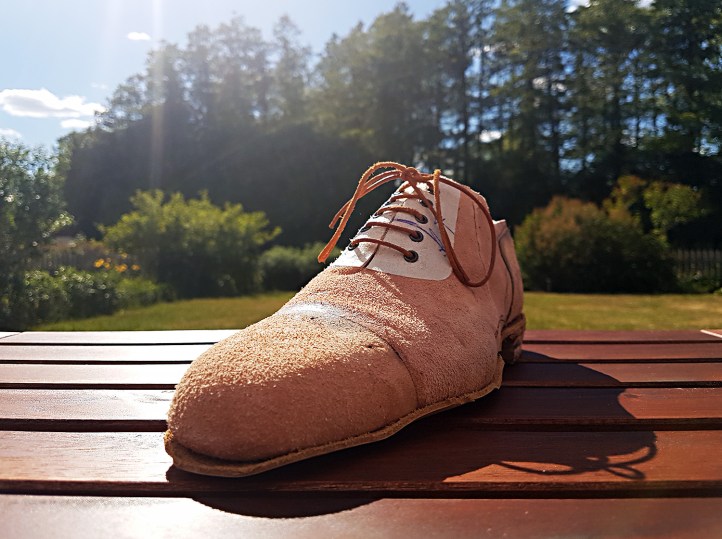
The veg tanned lining was moistened, lasted with lots of talc underneath, and left to dry. Then the 5 oz stiffeners at the toe and heel were moistened and lasted with Hirschkleber underneath. This is one of my favorite type of shots from the inside of a shoe:

After the stiffeners had dried up they were trimmed, and the shoes were ready to last for the final time. I did this like so:
- Moistened the veg tanned uppers with warm water, on grain and nap.
- Pasted slightly watered down Hirschkleber on top of a toe stiffener.
- Put in blackbird lasting nails at the ball of the foot.
- Lasted the uppers of the toe completely.
- The new nails at the ball were then removed, along with all the old nails that previously went through the lining.
- The heel stiffener was pasted up with Hirschkleber in the same manner as the toe.
- The ball was lasted again.
- The heel was lasted completely.
- The rest of the shoe was lasted, starting with the areas at the ball and arch.
I don’t know if this is considered the correct way to go about lasting, but I felt it was an improvement. Lasting was tricky what with the super-high instep and ground down arch, but it did seem to work well.

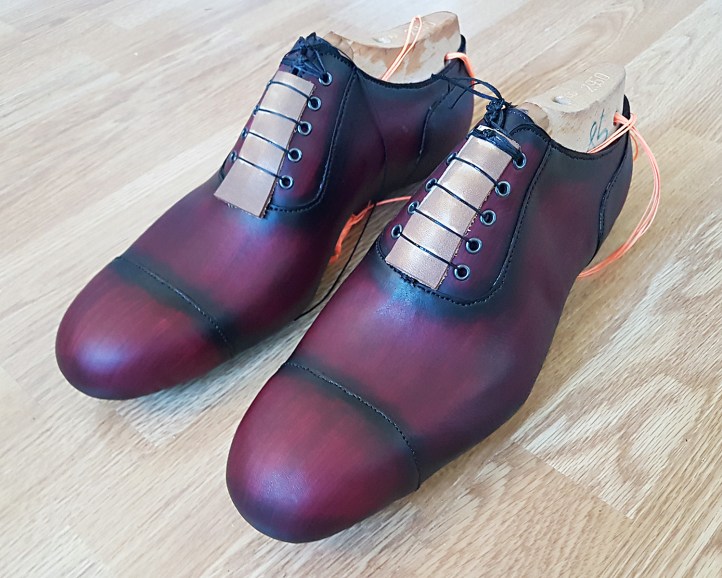
After the final lasting, the shoes were again moistened with warm water tro dry up tightly against the lasts. (Moistening the veg tanned leather really brings down the color dark, but the shoes will lighten up again once dry.)
Continue reading in Part 2 »

Hello,
Very nice project, as usual !! Making a “test shoe” before clicking the real leather is a good idea… You can also use cork to make the outsole and the heel lifts…
Just one remark : you left a very wide margin between the holdfast and the hedges… In my (little) experience, such a margin can produce some ugly gap between the welt and the upper after welting, especially at the toe area…
I hope you won’t have any such problem… if it happens, the best way to fix it is with glue and pegs…
Best regards
Antoine
LikeLike
Thank you very much, Antoine! Yeah, I was so eager to start making the shoe – I should have made the test shoe first for ideal patterns… (Luckily, I didn’t have to make too radical adjustments after the test shoe, though I elevated the instep 2mm higher.)
I did the wider holdfast margin consciously as an experiment. When I did my last two shoes (the only ones I’ve done English welted before) I had a smaller margin, and wanted to try having it a bit wider. The shoes are welted now and it looks fine (although there is a small gap at the toe area). I think I will make the margin ever so slightly smaller next time, and keep it the same width around the whole shoe. (This was also an experiment, to allow an even wider margin at the toes.)
Kind regards
R
LikeLike