Disclaimer: This post contains a very old attempt at shoemaking, during the very beginning of my journey. I really didn’t know what I was doing at this time, and the post is left online for archive purposes only. Please do not “learn” anything from it, as the post is certainly riddled with mistakes. It’s just a documentation on some of my thoughts as a beginner in this venture. For a more updated view of my shoemaking, please see my latest posts instead.
After the final lasting, I proceeded like I’ve done on my previous pairs. That is to say, I trimmed excess leather from the heel (leaving ca 15 mm around the heel) and pegged a combination rand/welt piece onto the shoe.

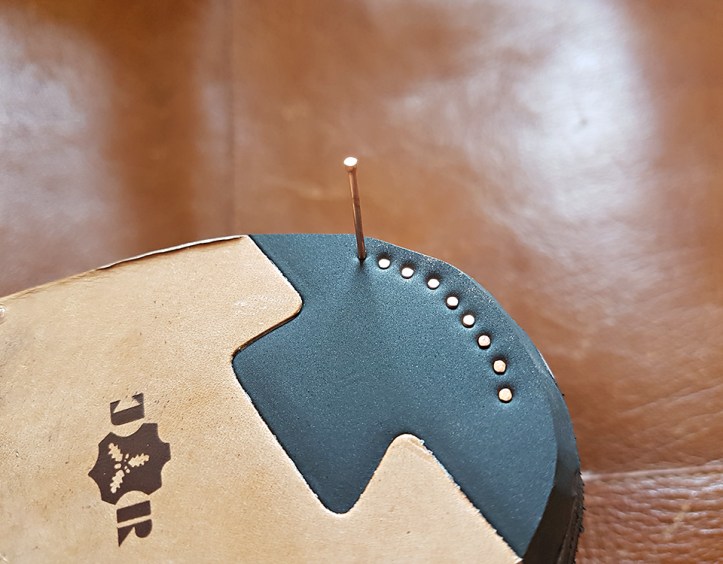
Then I removed lasting nails and cut off excess upper and lining leather as I worked my way around the shoe while welting. I varied using metal bristles (seen above) that were generously donated by Antoine of Paris (thanks again!), and the same Prym curved needles I’ve used before. I found that the curved needles (as seen below) were better for the toes, whereas the bristles were more pleasant to use for more straight passages. I’m probably not doing it right, but it did seem to work.

Welting the first shoe of this pair, I didn’t manage to get the fit of the combined rand/welt just right, and had to cut up the welt as displayed below. (It is, however, barely noticeable in the end result.) I think this was a result of moistening and stretching the welt part a bit too much while welting. (For the second shoe of the pair, I hardly moistened the welt at all and was careful not to stretch it too much. The second piece fit splendidly without having to cut it up, and it was made with the same pattern flipped over.)
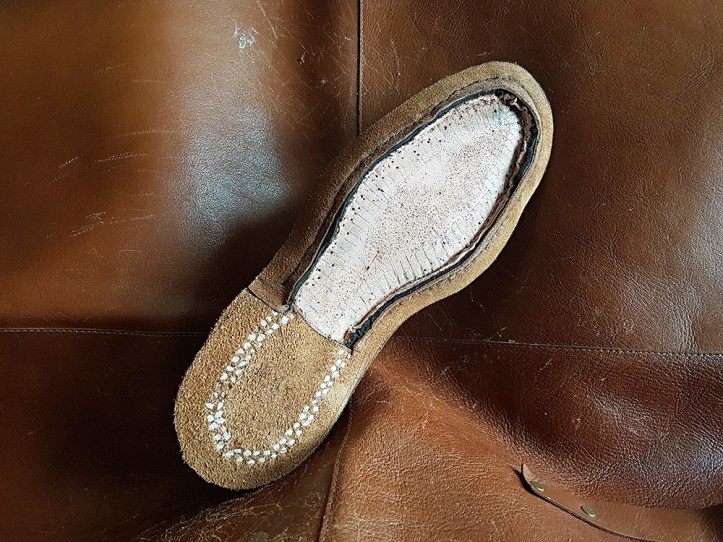
I slid a shank in, corked the footbeds with three layers of 2 mm sheet cork, and covered the shank as well as toe parts with pieces of 4 oz vegetable tanned leather to get a nice shape. Again, Antoine has generously donated wooden shanks (a product I have otherwise been unable to find from an online retailer), but when it was time to put the shanks in it seemed as if the wooden shanks didn’t fit quite as well as the other options I had at my disposal. I ended up using plastic shanks for this pair. I would prefer to use wood and will certainly give them another go for my next pair! (Note the seamless edge between rand and welt on the left shoe.)

With outsole pieces prepared from 13 oz calf butt, I applied Kövulfix contact cement to the shoe and nap side of the outsoles, and let the cement cure for about 35 minutes.

I hammered the outsoles into place and shape and let them dry. Then I returned another day to re-moisten them and cut a flap open, preparing for a closed channel stitch.

I made the holes, cut up a grove, and stitched the outsoles with 1 mm midnight blue waxed polyester thread.

With the channel closed, this is what the toes looked like after being very roughly trimmed.

I made heel lifts from the same leather as the outsoles, and 2 oz shoulder leather to find the right height. The outsoles were dyed turquoise for good measure.

I cemented on the top lifts, trimmed them into shape and nailed them into place.
The finishing process I use is described in my post about how I do outsoles. This time, as an experiment, I added an application of Fiebing’s Resolene between dying and applying gum thragacanth.
