Choosing leather for shoes
People who are not shoemakers, tend to focus entirely on the upper leather. This is somewhat understandable, in that the upper leather is basically ‘the only thing you see’ if you don’t know what else there even is to look for. However, choosing leather for a pair of shoes requires far more than just choosing a leather to use for uppers. At the bare minimum, you will need at least 5 different types of leather in order to whip up a shoe.
Vegetable tanned vs. chrome tanned
Vegetable tanned leather is the mother of leathers, having existed for some 7000 years. It’s tanned through a traditional process, free from harmful chemicals, and with a genuine smell. It ages beautifully over time, takes dye with ease, and is very durable. You can moisten, shape and stamp vegetable tanned leather in ways that you simply cannot do with chrome tanned leather. On the downside, its ability to soak up water like a sponge is not always beneficial, and it isn’t very resistant to heat.
In the other side of the ring, we have chrome tanned leather, invented by Friedrich Knapp and Hylten Cavalin in 1858. The absolute vast majority of shoes are nowadays made with uppers that are chrome tanned. This goes for world class hand welted bespoke shoes, as well as for your average 30$ leather shoe at the “save shop”. (While the general tanning type of “chrome tanned” may be there, the quality level of the leather is not. The quality of the leather parts of a shoe can – and does indeed – differ astronomically in both quality and price.)
Chrome tanned leather – in the highest quality options – offers great durability and resistance to the elements, making it very suitable for footwear. Chrome tanned leather is easier to work with in many aspects, more resistant to both water and heat, and for good and bad it doesn’t really ‘age’ like veg tanned leather.
Please beware: there are endless options of really bad chrome tanned leathers out there – even more so than with veg tanned leather. (Of course, veg tanned leather also varies in quality, but really not as much as chrome tanned leather.) Do make sure you’re confident with what you’re buying, before making a purchase.
That being said, the question remains. Which way to go: vegetable tanned or chrome tanned? The answer tends to be a mixture of both. Most high end shoes are made with chrome tanned uppers, and with veg tanned leather for everything else. (It is also an option to use 100% veg tanned leather for a pair of shoes, uppers and all – but this is to be considered an exception to the rule. I’ve made a few like that, and it can be great – but it’s not standard practice.)
Regardless of the upper leather, some parts of the shoe must be vegetable tanned as explained later below.
Cut
Even if you get the most expensive, top dollar hide, all parts of that same premium hide will not be created equal. As can be read in Analysis of leather and materials used in making it (1931), this image pretty much sums it up:
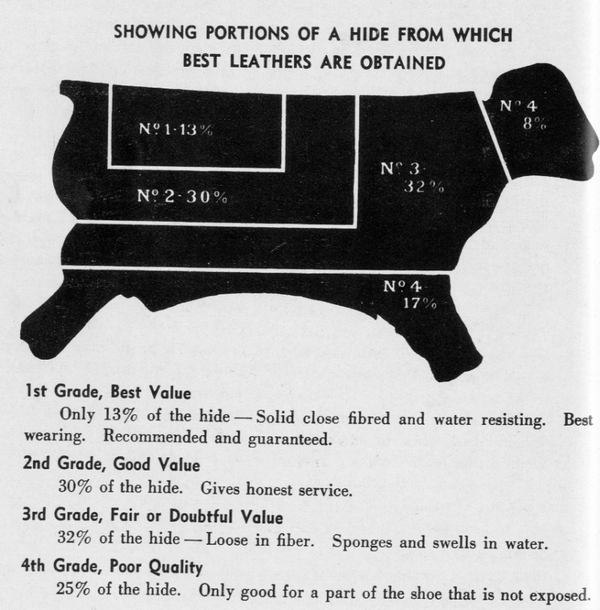
I favor the 1st and 2d grade areas in the image above. Sometimes I may just sneak a little into a 3d grade area for more hidden parts of the shoe (like quarters), but usually not too much. I never use any 4th grade areas, and neither should anyone.
Stretch
The natural stretch direction of the leather must be taken into consideration when cutting out the pieces. Closer to the spine, the leather stretches alongside ‘with’ the spine (in both ways, from head to butt), and is firm in the other direction. Closer to the belly, the deal is the opposite: here the leather stretches both ways from spine to belly, and is slightly more firm in the other direction (from butt to front). I place the patterns so that the stretch direction of each individual upper piece goes in under the last of the shoe.
Upper leather
Upper leather should ideally be between 3 and 5 oz in thickness, which is equivalent to ca 1.2 – 2.0 mm. (1 oz = 0,4 mm). For a first shoe project, I’d favor around 3-4 oz chrome tanned calf for uppers.
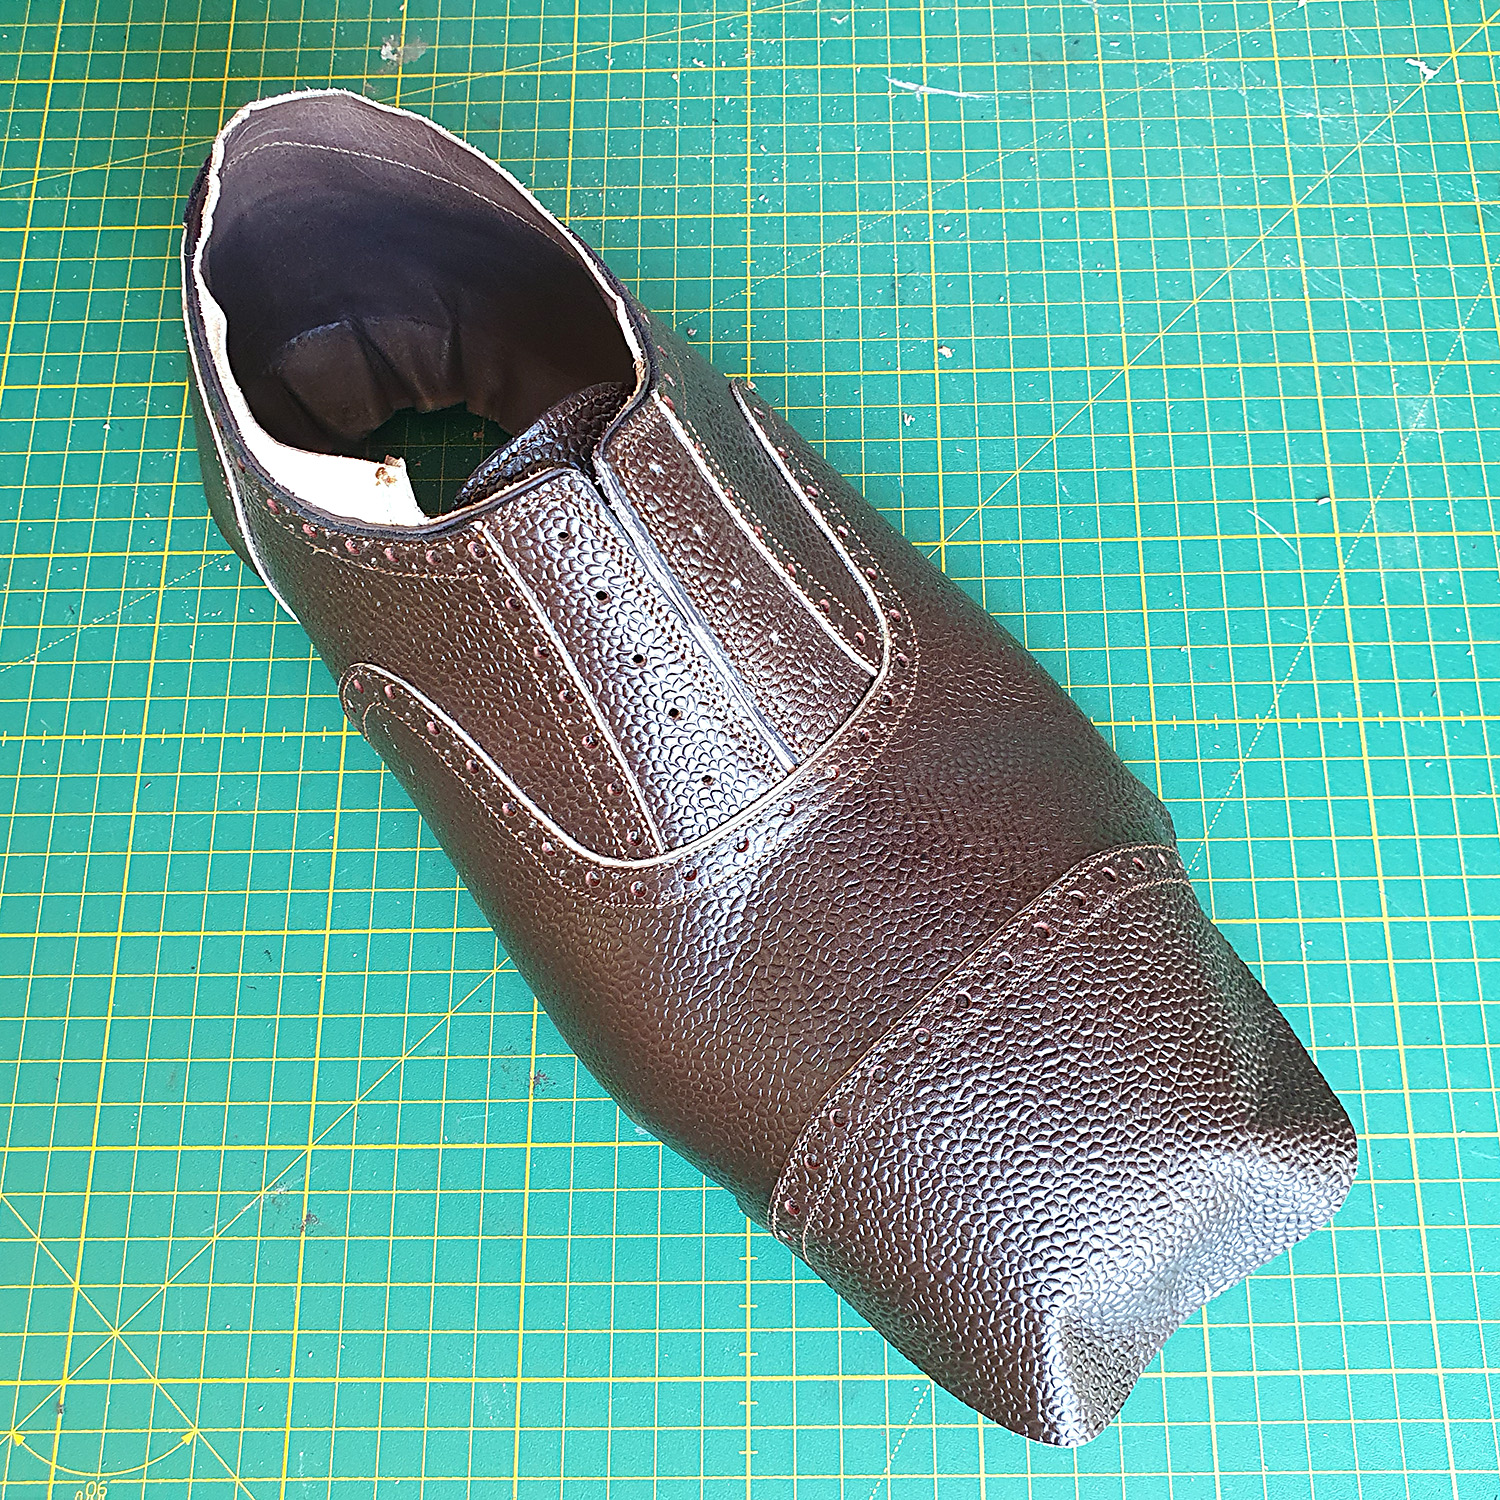
Depicted here is an upper in Tannerie d’Annoay scotch grain from Kolde leder – an excellent choice.
The best calf leather for shoes that is known to man is available at Kolde Leder and A&A Crack & Sons, among others. It’s also very expensive for a private persons pocket. These retailers between them stock international top quality product like Horween shell cordovan, Tannerie d’Annonay, Tanneries Du Puy, and Weinheimer/Freudenberg box calf, etc. GVT Fast stocks some nice and more affordable boxcalf and museum calf by Ilcea tannery. They also have some great and wallet friendly ‘intermediate’ options like a fine reverse grain suede and scotch grain calf.
For the hobbyist getting started, far more affordable alternatives are offered at buyleatheronline. As long as cost is a big issue, I would advise against getting the most expensive and qualitative leather for your first couple of pairs. Many professionals give opposite advice, and advocate going straight for the end goal and using the highest quality of materials from the get go. That is certainly a more efficient way to learn how to work with ‘the real deal’ (which is also a bit more difficult) – but it’s also more expensive. In summary: if you aspire to be the next world champion: by all means, you should start out using the real top quality materials. If you’re happy to begin as a regular hobbyist and sort of “see where it goes”, I think you should start with the slightly more affordable options. (A couple of shoes in, however, I would definitely recommend upgrading your leather choices.)
Please also note, with all due respect, that your first pair, or perhaps couple of pairs, are bound to turn out looking like crap if you compare them to world class hand welted shoes. You may – and should – still be proud of them. This is to be expected, and is part of the anticipated learning curve. Get used to the idea that your first shoes will suck.
Lining
Lining is ideally made from vegetable tanned calf IMO, between 2 and 3 oz in thickness (ca 0.8 to 1.2 mm). I like to use 0,8 mm vegetable tanned baby calf. Chrome tanned leather can also be used as lining, but I prefer vegetable tanned for various reasons.
Beading
Inserting beading between uppers and lining is optional. I often like to use a thin, 1 oz chrome or veg tanned leather as beading.
Toe puff & heel counter (stiffeners)
Toe puffs and heel counter stiffeners should be veg tanned. The toe puffs should ideally be slightly thinner than the heel counters. My preference is ca 2 – 2,2 mm for toe puffs, and ca 3 – 3,5 mm in thickness for heel counters. I’ve mainly used 5-8 oz veg tan Tärnsjö garveri. Italian 5 oz pure veg tanned also does the trick.
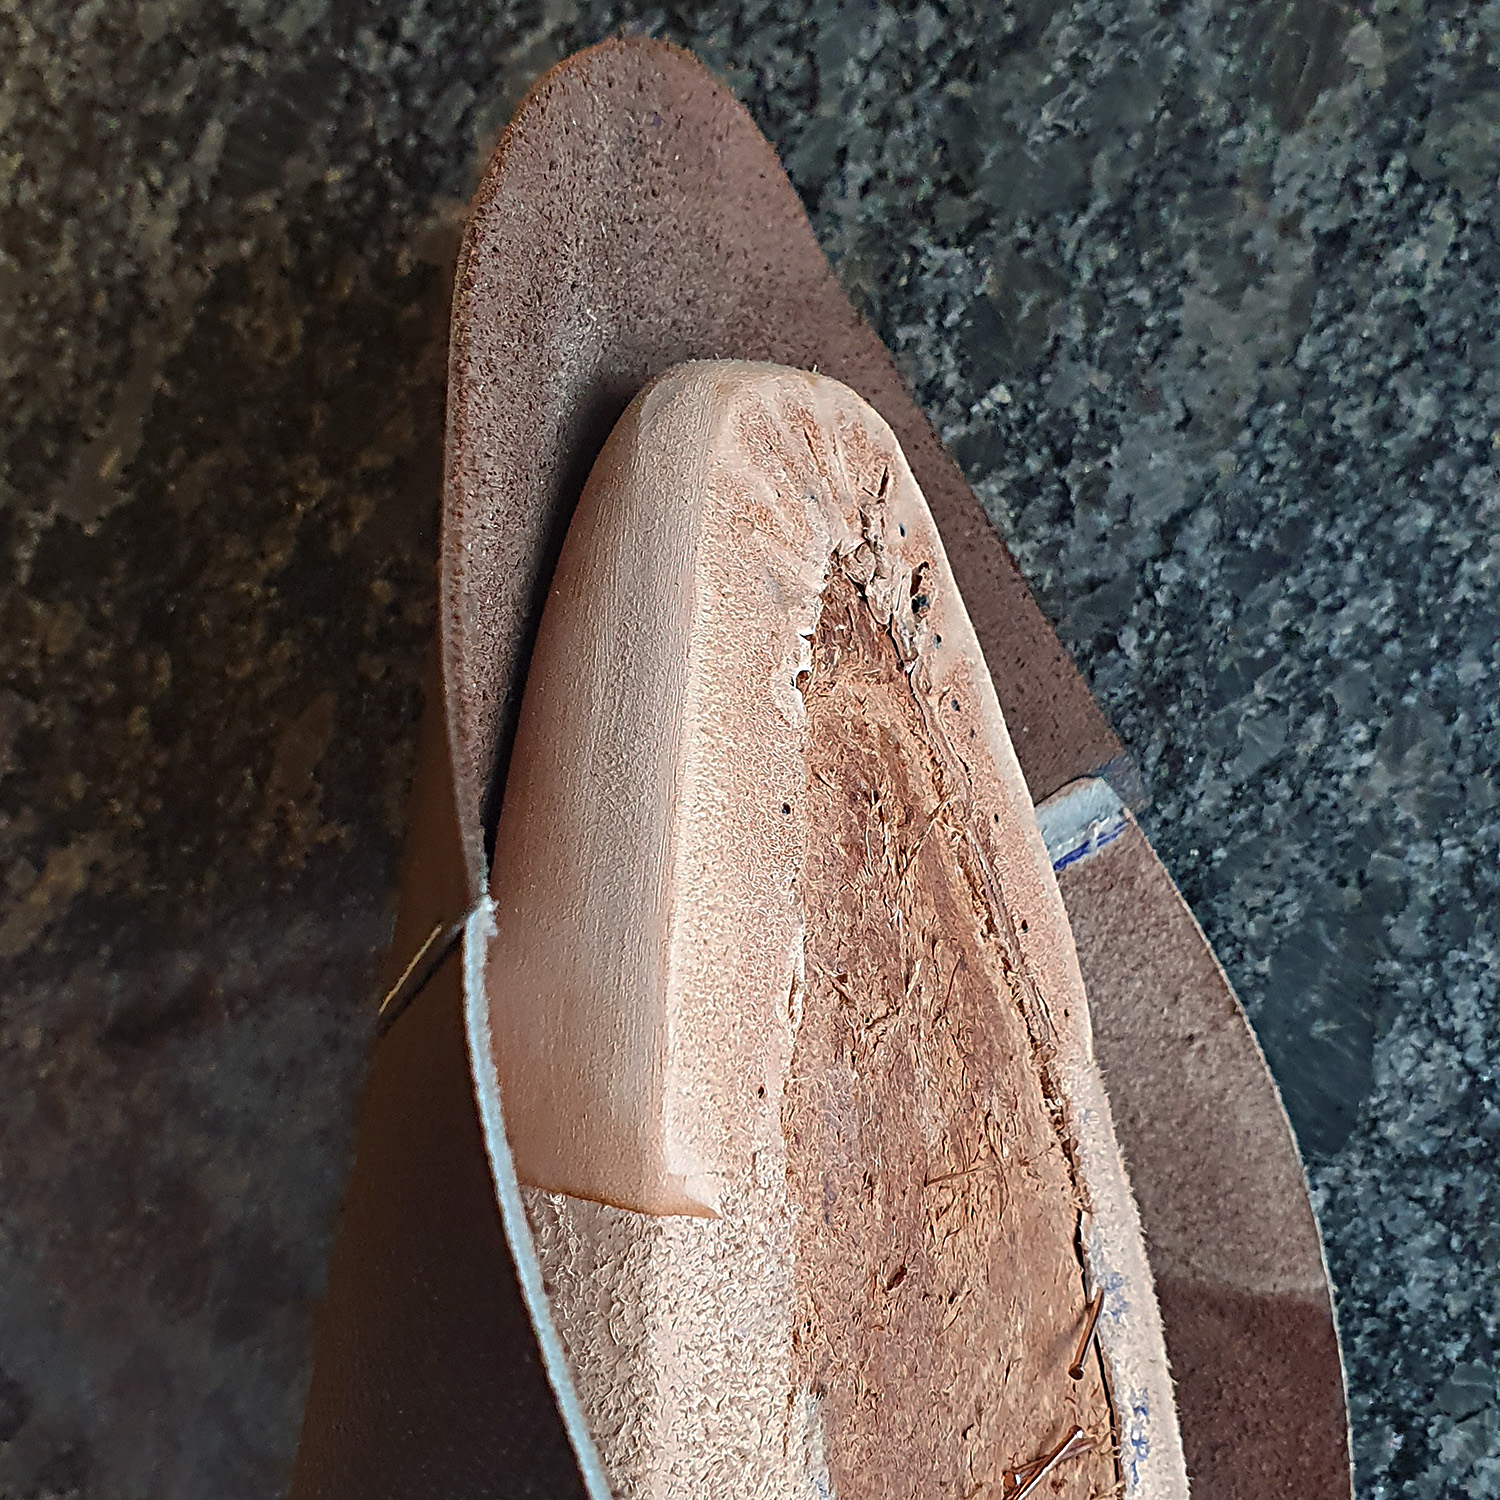
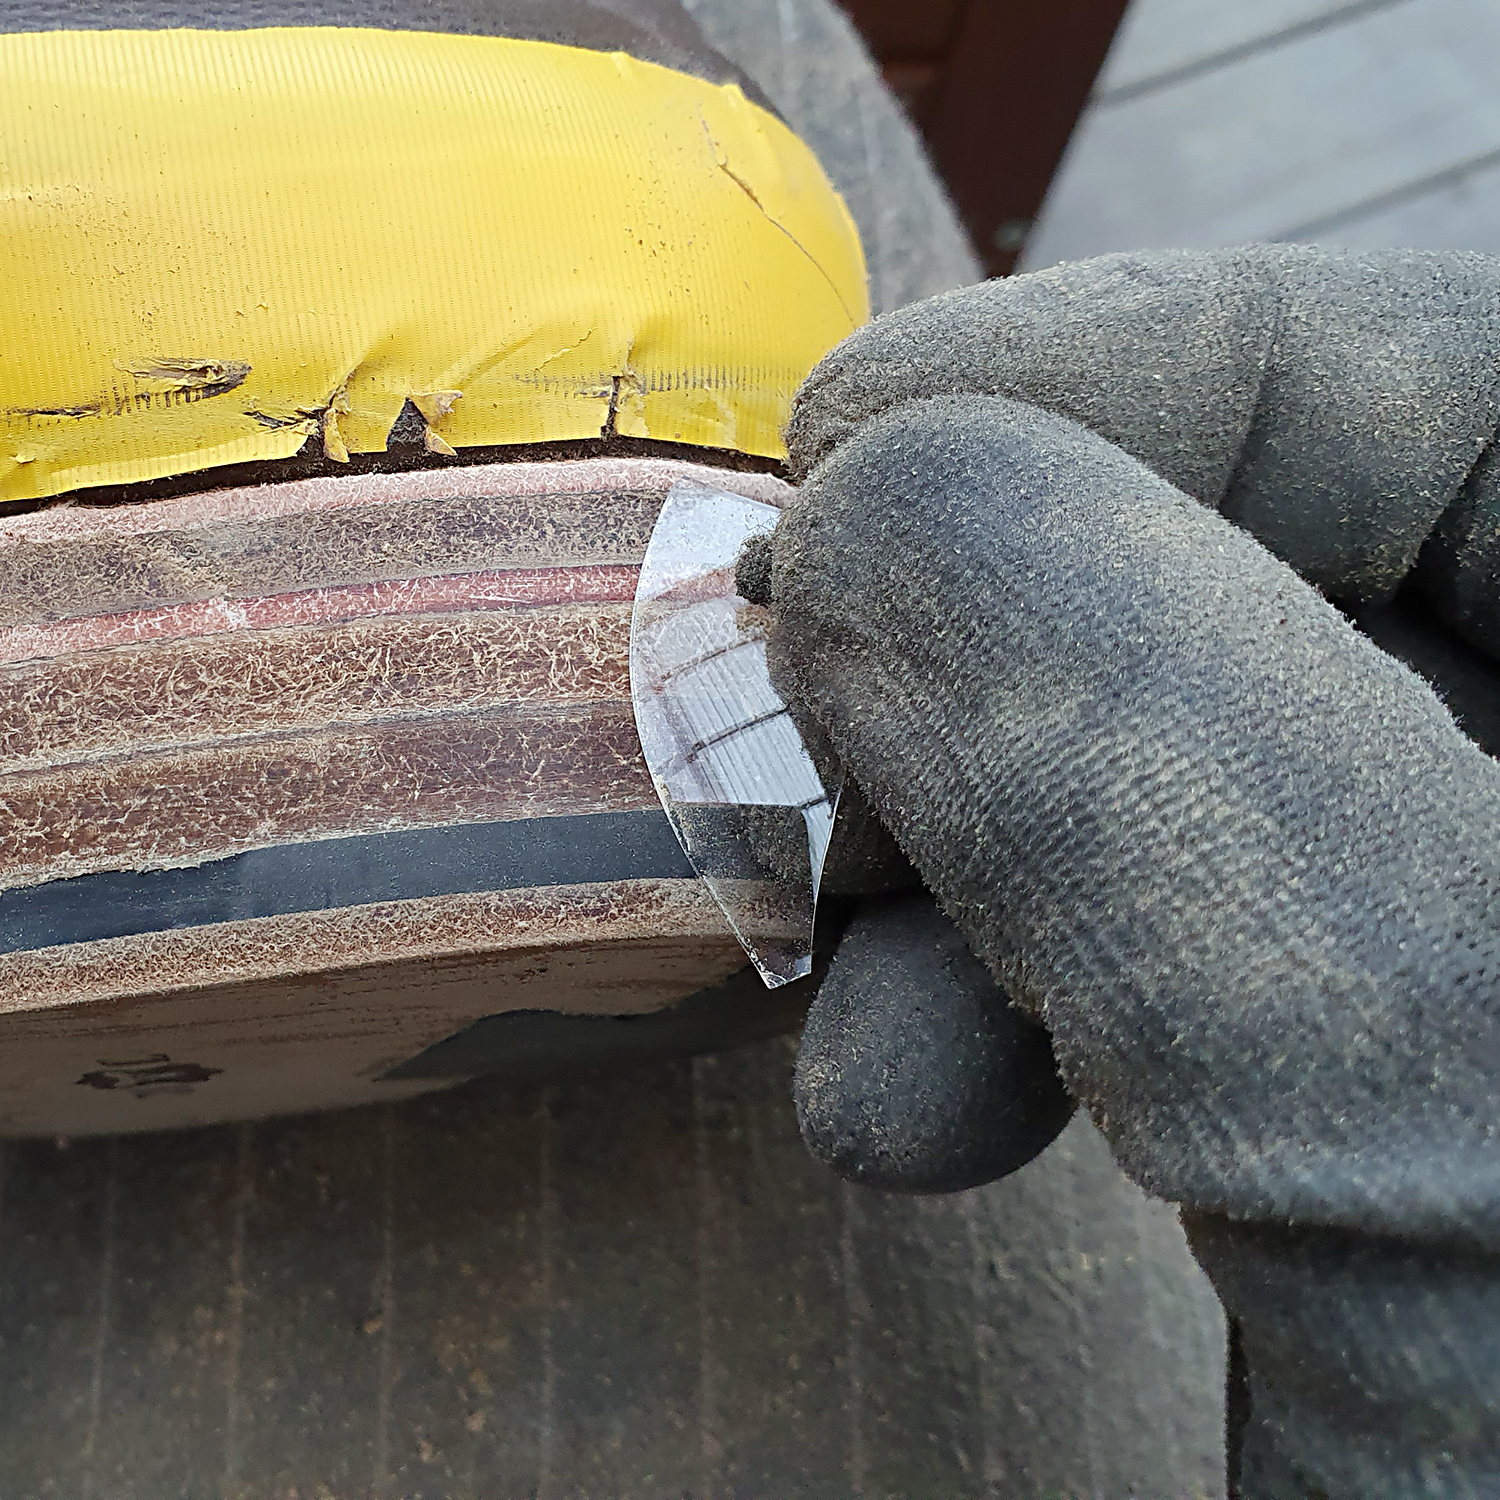
Depicted below is a 5 oz pure veg tanned toe puff, first lasted on top of the lining with Hirschkleber and then trimmed and sanded once dry, to keep a crisp feather edge.
Rand
Using a pegged rand at the heel is optional: one could also sew the upper and lining together there, which many do. If a rand is used, use a veg tan according to preference. I like to use ca 7-8 oz veg tan from Tärnsjö Tannery.
Welt
I like natural colored welting leather from Leather & Grindery. You can also make your own from veg tanned leather in your thickness of choice, preferrably the same thickness as the rand.
Insoles
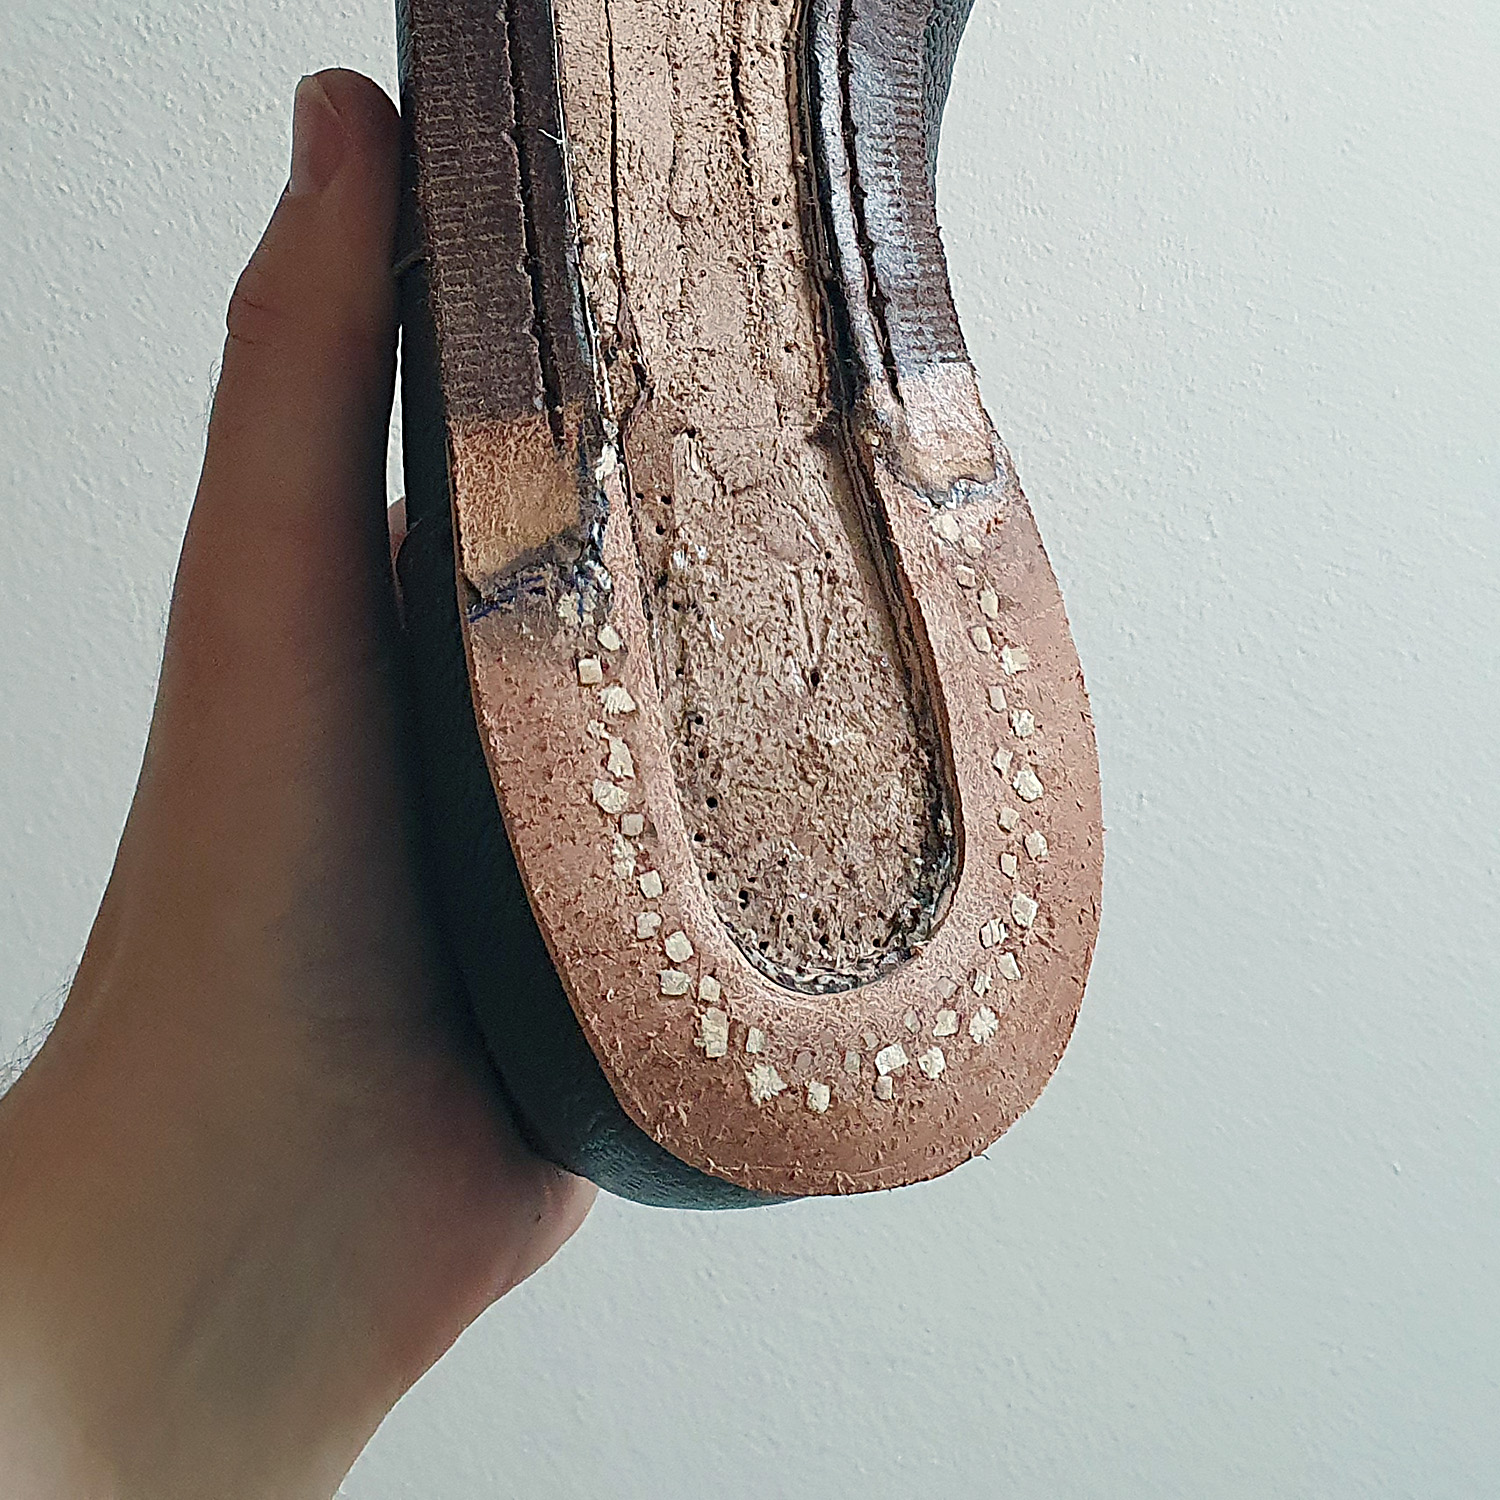
The insole is the core of the shoe. Thick, vegetable tanned calf should do the trick, between 11 and 14 oz depending on the desired result. I’ve used a multitude of options, including 12-13 oz veg tan from Tärnsjö Garveri, 11 oz Italian dorsal and 12-13 oz veg tanned butt (durable, but also very difficult to work with due to its hard temper). My favorite thus far (and coincidentally the most expensive) is 7-9 iron buffed insole shoulder from J&FJ Baker, shown below. If you can get a hold of such a leather (or similar), I highly recommend it.

Outsoles
Thick ol’ hard tempered veg tan, around 12 oz. For leather sole shoes, I most often use 9 iron (equivalent to 12 oz) J. Rendenbach outsoles. It’s of course possible to go both up or down in thickness, depending on preference.

Heel lifts
Any veg tanned leather will do, with a thickness depending on how thick lifts you want. The easiest way to start is to use outsole leather. The thicker the lifts, the easier to make – the thinner, the more prestigious. Depicted below is 5 mm heel lifts (easy, but not very prestigious).
First project suggestions
For someone starting out on a shoemaking journey, trying to keep the costs down low and the amount of different leather types to a minimum, I would probably advise to get the following leathers – taking price very much into account.
Upper: 3-4 oz boxcalf, or 3-4 oz scotch grain, or 3-4 oz dollar printed calf.
Lining (and optional beading): 2 oz baby calf
Stiffeners, rand and welt: 6 oz / 2,5 mm veg tan
Insoles: insole leather, or in an emergency, 11 oz dorsal
Outsole + heel lifts: 13 oz veg tanned butt (or the same option in 9-10 oz for a thinner sole).
The list above is by no means the highest quality options, but it would certainly make do to start. The leathers mentioned should be enough for at least 2 pairs of shoes depending on how much of the upper hide you use. Some additional hardware is required, like top lifts and shanks, and of course stuff like glue and nails, etc. See my page List of materials for the other stuff needed.
Upgrade options
Some upgrade recommendations, for the slightly bigger wallet and ambition.
Upper: Ilcea box calf or better yet, French box calf (Tannerie du Puy)
Lining: 2 oz baby calf still works great, IMO
Beading: Something like 1 oz veg tanned calf, or another leather of your choice (preferrably thinner than the lining)
Stiffeners, rand: 6 oz / 2,5 mm veg tan or similar
Welt: Welting leather
Insoles: Insole leather, or the cheaper (but bigger order) option buffed insole shoulder.
Outsoles: Tannerie Garat or J&FJ Baker. (Maybe this could also do, though I haven’t tried it.)
Top lifts: Something like this.
