Disclaimer: This post contains a very old attempt at shoemaking, during the very beginning of my journey. I really didn’t know what I was doing at this time, and the post is left online for archive purposes only. Please do not “learn” anything from it, as the post is certainly riddled with mistakes. It’s just a documentation on some of my thoughts as a beginner in this venture. For a more updated view of my shoemaking, please see my latest posts instead.
And thus it came to pass that Sigtuna was born.
This page is a summary of the finished shoes – in Part 1 and Part 2, I display in detail how they were made.

Construction: handmade with hand-held tools, English welted
Last: Vintage mystery lasts from german ebay, adjusted
Uppers: 3-4 oz chrome tanned calf sides
Lining: 2 oz vegetable tanned baby calf (1st grade)
Top beads: 1 oz chrome tanned baby calf, black
Insoles: 12-13 oz vegetable tanned calf butt
Insoles (sock liner): 4 oz vegetable tanned calf side
Outsoles: 12-13 oz vegetable tanned calf butt
Toe/heel stiffeners: 5 oz latigo tanned calf shoulder
Rand/welt combo piece: 5 oz latigo tanned calf shoulder
Shank: Plastic
Heel lifts: 12-13 oz vegetable tanned calf butt + 5 oz latigo tanned calf shoulder
Top lifts: vegetable tanned (1/4 rubber) J. Rendenbach

Sigtuna is a black cap toe oxford, with informal details like lots of broguing (albeit very small) and visible gun metal eyelets. Spread out over 8 weeks, the pair took ca 75 hours to make from idea to feet, and got a presidential shoe shine with Saphir products. (Even so, the toe caps could still use a couple of additional wax layers.) Considering the design and construction method, this is a vast improvement from my previous work.
The outsoles were experimentally dyed turquoise with Fiebing’s alcohol based leather dye, coated with Fiebing’s Resolene, then coated with gum thragacanth and finally polished with Saphir pate de lux in neutral. I dyed the top lifts black for contrast.
The reflection in the turquoise outsoles is intended to be reminiscent of cumulus clouds.
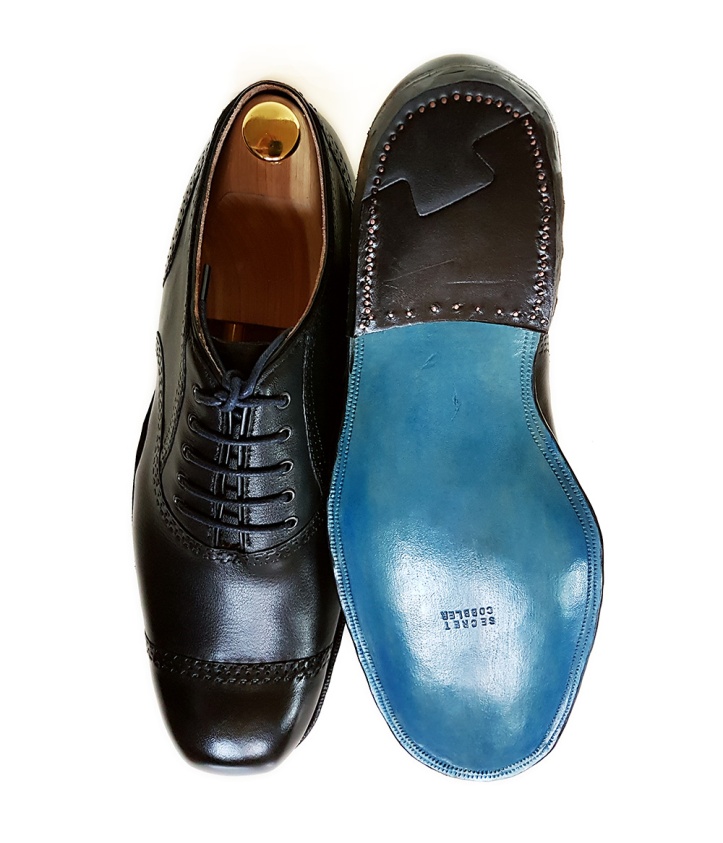
In an attempt to make the shoes microscopically more interesting and match the outsoles, I went with a waxed polyester thread in midnight blue for the outsole stitch, and dark navy laces.
I still have some work to do when it comes to getting nicely finished heel lifts and welt with hand tools. I’m thinking I’ll try to use another type of leather for rand/welt for my next pair. Lasting feels like it gets easier and better with every shoe though, and I really like the curvature of the heels (disregarding the somewhat gnarly welt).

As it is for all shoes, there’s no better lighting than that produced by the sun… Here’s Sigtuna enjoying some shine in my backyard.

And as comparison, here’s the pattern design made on march 25th:


Hello
Very nice work !! You are really improving your skills as a shoemaker !!
I am happy to see that the needles have been of some use… Maybe the wooden shanks were too shorts (they are made to fit for size 7,5-8)
I understand that you cut the groove in the outsole after having made all the holes for the stitching. I usually cut the groove before starting the stitching but I sometimes have troubles to make every hole falling exactly into the groove. I will try your technic next time !
Finishing the heel and the welt is really challenging !! It’s all.about rasping, glassing and sanding…
You can find some tips on the finishing process on the carreducker blog: http://carreducker.blogspot.fr/2012/07/finishing-tips-and-tricks.html?m=1
It has really helped me (even if my heels are far from perfect). Also, another thing you could try for the finishing is shellac gum. wjen dry it gives a very nice wooden look !
Best regards
Antoine
Ps: please let me know if you can’t find any item you need, I will be glad to see if it’s available in France…
LikeLike
Hello again Antoine, and thank you very much! Then I understand about the shanks (I think) – my size is around UK 10F :).
Indeed I make the outsole groove after the stitching holes – I hope it works out well for you if you try it!
I will devote more time to rasping, glassing and sanding for my next pair, and study the carreducker link when it’s time for finishing! I haven’t come across shellac gum before – is it similar to gum tragacanth?
Also, thanks for scouting offer! Right now I think I am set, but I will keep it in mind! 🙂
LikeLike
Hello again,
Next Time I make an order, I will surely buy larger wooden shanks and send you some !!
Shellac gum is made from a resin secreted by some asian bug… It is used for wood finish… You can try it on the heel and the edges to obtain some kind of natural finish, it is really nice.
Best regards
Antoine
LikeLike
Sorry for the late reply, and thank you! I will look further into Shellac gum! 🙂
Kind regards /R
LikeLike